Showing posts with label baking. Show all posts

Thursday, February 9, 2012

Claudia Roden's orange and almond cake

When you're as food-obsessed as I am, it makes sense to surround yourself with people on your wavelength, so it comes as no surprise that some of my closest friends also happen to be excellent cooks/bakers/snackers. My adventures in cooking with my pal Gideon have been widely chronicled on this site. Patricia, who sadly lives in France nowadays, is the queen of hosting potlucks, and Mathilde, who lives in New York but hails from Paris, is the master of the quiche and makes a mean crêpe, to boot. Just to mention France one more time, Bonnie and I founded a dinner club together with our friends in Toulouse last year, and I think it's safe to say that her dinners were the most heavily anticipated--she made a mapo dofu last Chinese New Year that blew my mind (and, to a certain extent, my tongue--those Sichuan peppercorns can be fiery!) Despite all these heavyweight contenders, I think it's actually my friend Willy who can go head to head with me in terms of food fixation. He and I cook together all the time, and when I need a culinary companion for a far-flung peregrination to Queens or deep south Brooklyn, he's usually game to make the trek with me.

Willy also happens to be an excellent baker. He's prepared my birthday cakes sever
al times--this past year, it was a white layer cake filled with homemade raspberry jam and draped with homemade marzipan. His no-knead bread, which he makes routinely, puts mine to shame, and I've also tasted potato bread, rye bread, and Anadama bread that he's made. A few months ago, I was over at Willy's for lunch, and for dessert he served a beguiling orange and almond cake the likes of which I had never tasted: it had a ton of texture from the ground almonds, a powerful perfume from the oranges, and an underlying bitterness to complement its sweetness. What most attracted me about this cake, though, was the unusual way in which it was made: Willy told me that to make the batter, he boiled two whole oranges for hours, then ground them up, peels and all, to incorporate into the cake mix. That slight bitterness I tasted was coming from the orange pith. I loved the idea of this recipe, and I had to try it.

Several weeks later, I found the occasion to make it: I was attending a Rosh Hashanah dinner at my cousins' house in New Jersey, and I volunteere
d to bring a dessert. I picked up the ingredients I knew I would need, and then called Willy to confirm the method of preparation. As I simmered the oranges in boiling water, an intense, almost incense-like fragrance filled my apartment. I couldn't wait to taste this cake. When the oranges were ready, I puréed them in the food processor, then set them in the fridge to cool as I worked through the rest of the recipe: grinding the almonds, separating the eggs. Then I put the whole thing together, poured it into a pan, and slid it into the oven to bake.

All that work had made me hungry, so I peered into the fridge to see what I could make myself for lunch. And that's when I saw it: that bright, vivid, luscious-smelling orange purée, still cooling in my fridge. Very distinctly not baking in my cake. My heart fell. Who needs a plain old almond cake? I thought. It's been done!

When my boring, stupid almond cake emerged from the oven about 45 minutes later, I tried to salvage the situation. I mixed some of the orange
purée with some water and sugar, in an attempt to make a glaze. I poked some holes in the still-warm cake and brushed on the glaze, hoping that it would imbue the cake with its citrusy freshness. And in the end, of course, the cake was fine--but it barely tasted of orange. It lacked that exotic quality that the cake I'd tasted at Willy's had in spades.

Luckily, I was able, through my haze of anger, to have the foresight to stick the rest of the unused orange purée in a container in the freezer, to be deployed at some other time. I finally got my chance this past weekend, when my brother hosted a cassoulet party at our parents' house. Bravely, I volunteered, yet again, to bring dessert. I went through all the same steps, but of course, this time I remembered to include that precious orange purée in my confection. I also adjusted the cooking time and temperature a little bit, remembering that while Willy's cake had a more crumbly texture, I was looking for a softer one in mine. And I'm happy to report that the end result was just as glorious I had hoped for all those many months ago when I first made the cake: moist, fragrant and vivid in color from the orange peel and egg yolks, this cake truly has the power to transport you to the Middle East.


Middle Eastern Orange and Almond Cake

Adapted slightly from this recipe
Makes one cake

Ingredients:

- 2 oranges
- 6 eggs, separated
- 1 1/2 c. ground almonds
- 1 c. sugar
- 1 tsp. baking powder
- 1/2 tsp. vanilla extract
- 1/2 tsp. almond extract
- 1/2 tsp. ground cinnamon
- 1/2 tsp. salt

Preparation:

1. Preheat the oven to 375°. Prepare a medium spring form pan: butter the bottom and sprinkle with additional almond meal.
2.
Wash oranges thoroughly, place them in a pot, cover with water and boil for 2 hours. Remove from water, cut open and remove seeds, then purée in a food processor until completely smooth. Set aside.
3. Combine ground almonds, orange purée, egg yolks, sugar, baking powder, vanilla, almond extract, cinnamon, and salt in a large bowl, mixing well.
4. Whip egg whites to somewhere between soft and stiff peaks. Fold gently, in two batches, into the yolk mixture. Pour into prepared pan and bake for 45 minutes or until top is well browned but center still appears moist.

Tuesday, February 7, 2012

How to make almond flour

Got a recipe that calls for almond flour but all you've got in the pantry are whole, skin-on almonds? No problem. Or maybe all you have are blanched almonds? Even easier. If you've got a food processor, you've got almond flour. Well, almost.

For those in the skin-on camp, what you've got to do, is, well, blanch the almonds. Far from being a specialized process that can only occur in some mechanized factory, blanching and skinning almonds is a breeze. First, fill a pot with enough water to cover your almonds. Cover it and heat it to boiling. Drop in your almonds and set a timer for 45 seconds:


Drain the almonds and dump them out onto a towel:


When they're cool enough to handle, all you have to do is rub off the skins with your fingers. If you've ever shelled fresh beans like favas, the process is almost exactly the same: you sort of grip the almonds between your thumb and forefinger and push. It'll slide right out of its skin:


And now you've got a whole mess of pristine blanched almonds (or, if you started out with those, they'd look something like this):


When they've cooled completely, place them in the bowl of the food processor, fitted with the normal blade. Pulse until the almonds become flour. Don't overprocess, as this will result in (pale, inferior) almond butter!


So now that you've got almond flour, how will you use it? I used mine in this. Stay tuned for that post, up next!

Friday, November 5, 2010

Part III: Apple Cinnamon Coffee Cake

After a bit of a pause (a school vacation, which I spent working on a farm in Ariège, a region in southwest France nestled in the Pyrenees), I'm back in Toulouse and ready to bring my 3-part series on Apple Desserts to a close (for the time being, at least--I've got a bucket of homemade applesauce in the fridge upstairs that's just begging to be transformed into this applesauce cake).

You might notice that many of the recipes I share on this site are adapted from Smitten Kitchen, and this dessert is no exception (that applesauce cake up there, too, comes from SK). Smitten Kitchen is probably my favorite food blog: the site's author, Deb, always seems to select (or create) the recipes for things I just happen to be craving; her adaptations always makes sense, and her recipes always turn out. I especially like to refer to her when I'm baking, since baking is not my forte but is certainly hers (I mean, the woman's Recipe Index has an entire section devoted to sweets!).

So of course when I was looking for good apple dessert recipes, I went over to Smitten Kitchen first. And this apple cake, that's Deb's mom's recipe, fit the bill exactly. It's moist and sweet, and actually reminds me a great deal of an apple cake that my grandmother makes (I suppose when it comes to apple desserts, it's best to keep it all in the family!). What I love about this recipe is its clever pairing of orange with apple: it calls for a little orange juice to be mixed in with the wet ingredients, and I upped the orange ante by using fresh-squeezed juice, as well as substituting orange blossom water for the vanilla. Insert clever pun on "it's like apples to oranges" here.

I know I said the exact same thing about my pumpkin apple bread, but this cake makes just as good a breakfast as a dessert, and I eat it in exactly the same way: with a bit of plain yogurt, to cut the sweetness and richness. As the cake sits (and it won't last long, trust me!), it gets even more moist and luscious. Who wouldn't want to be greeted by this vision first thing in the morning?


Apple Cinnamon Coffee Cake
Makes 1 cake
Adapted from Smitten Kitchen

Ingredients:

8 baking (firm, not too sweet) apples, peeled, cored and cut into medium-sized chunks
1 tbsp. cinnamon
5 tbsp. sugar
2 3/4 c. all-purpose flour
1 tbsp. baking powder
1 tsp. salt
1 c. vegetable oil
1 3/4 c. sugar
1/4 c. orange juice
2 tsp. vanilla extract, or use 1 tsp. almond extract or orange blossom water
4 eggs

Preparation:

1. Preheat oven to 350°. Grease a tube pan or a large rectangular glass baking dish. Toss apple chunks with cinnamon and sugar; set aside.
2. Combine flour, baking powder and salt in a large mixing bowl. In a separate bowl, whisk together oil, orange juice, sugar and vanilla. Add eggs to wet ingredients, one at a time, mixing well to combine.
3. Add the wet ingredients to the dry ones and stir until just combined. Pour half of the batter into the prepared pan. Top with half the apples, distributing evenly. Pour the other half of the batter over the apples; top with remaining apples. Place pan in the oven and bake for about 1 1/2 hours, or until a toothpick comes out clean.

Wednesday, October 20, 2010

Part II: Pumpkin Apple Bread

As we talked about a few days ago, my household and I are currently working our way through two large crates of apples. And as I've mentioned on the blog before, I like squash. A lot. So sometime last week, as I was plotting my next strategic attack against the glut of apples, I decided to employ a natural fall companion to the round red fruits: my old buddy, the squash. I had some potiron left over from the squash pasta I had made, so I cut it into a few pieces and threw it into a steamer basket set over some hot water. Ten minutes later, it was soft and scoopable, and peeled away from its thick green skin without putting up a fight. I mashed it up in a bowl until it was smooth, and, together with some flour, baking powder, sugar, oil, eggs, and of course those apples, made this:


It's a pumpkin apple bread, and if you take the 20 minutes needed to produce it (10, if you use canned pumpkin), it just might become your new favorite breakfast. Although this looks like a cake, it's really not that sweet; however, it is supremely moist thanks to all the apple bits nestled within, the perfect bed for some cool, tangy plain yogurt, sprinkled with brown sugar, which is how I took to eating this during the two mornings it was around for. In the mood for something a little sweeter, a little richer? Then stay tuned: I've got a recipe for a classic apple coffee cake coming up in Part III.


Pumpkin Apple Bread
Makes 1 loaf
Adapted from Libby's Pumpkin

Ingredients:

1 1/2 c. all-purpose flour
1 tsp. ground cinnamon
1 1/2 tsp. baking powder
1/2 tsp. salt
1/2 c. granulated sugar
1/2 c. dark brown sugar
1 1/2 c. puréed pumpkin, or use canned pumpkin
2 eggs
1/2 c. vegetable oil
2 large apples, cut into medium-sized chunks

Preparation:

1. Preheat oven to 350°. Grease a medium-sized glass baking dish, or use a round bundt pan.
2. If using fresh pumpkin, take a small portion and cut it into large chunks, removing any seeds. Place in a steamer basket and steam, covered, until very tender, about 10 minutes. Remove. Peel skin away and discard; mash pumpkin in a bowl until smooth.
3. Combine flour, cinnamon, baking powder and salt in a large bowl.
4. Whisk together the sugar, pumpkin purée, eggs, and vegetable oil. Add wet ingredients to dry and stir until just combined. Add apple chunks and stir to incorporate. Pour into prepared baking dish and shake the dish to distribute the batter evenly.
5. Bake for 45 to 55 minutes, or until a toothpick inserted into the center comes out clean. Let cool on a rack before slicing.

Saturday, October 16, 2010

A bushel of apples

A day or two before I arrived at my new home in Toulouse, my roommates purchased a huge supply of potatoes (white- and red-skinned), onions, shallots, and two kinds of apples. Apparently there had been a vendor going door-to-door through the neighborhood, selling bulk produce at low prices. I didn't know this type of thing still happened, but I think it's great. Needless to say, we've been eating our fair share of the haul, and we've still barely made a dent in it:


I, personally, have been focusing my culinary attentions on the apples, because they're a ready-made excuse to bake. As I've discussed many times on the blog, I really prefer to cooking to baking, but that said, there's definitely something soothing about the latter. Since I'm in a new place and don't really have a set schedule yet, baking is both a) something to do with an otherwise free afternoon and b) a centering exercise in the face of so much change. I'm also loving baking for a 4-person household, because it means that my creations actually get eaten in a timely fashion. At home, when I lived with just one other roommate, most of my desserts inevitably ended up in the freezer after a few days.

So far I've made three apple desserts and I'm still going strong. So get ready, folks, for a 3-part series on Apple Desserts. I figure I should start out by talking about the most quintessentially French pastry I've made: tarte Tatin. I think tarte Tatin is well-known in the U.S., but I'd wager that American cooks hesitate to make it, and I believe I know why: it's the caramel. Yes, tarte Tatin involves making a caramel, but it's not the fussy sugar-and-water kind that's unpredictable, prone to scorching and sticking to your favorite pot; rather, it's a butter-and-sugar mixture that doesn't burn but turns a rich, dark amber color and fills your entire kitchen with an unbelievably enticing aroma.

There are two ways to make this simple dessert. The traditional, and easier, way to make it is a one-pot affair: you cook the sliced apples together with the caramel in an ovenproof skillet; when the caramel gets dark and the apples slightly soft, you cover the whole thing with a layer of pastry and pop it in the oven. That's it! Unfortunately for me, there wasn't an ovenproof skillet to be found in my new abode (a kitchen without a slick, seasoned cast iron skillet is something of an abomination in my opinion, but I digress). Fortunately, though, the backup method of making tarte Tatin is also a piece of cake (so to speak), and you also get more control over the color (and therefore the flavor) of the caramel you'll make. All you do is cook the butter and sugar together in a saucepan, stirring frequently, until it reaches the shade you desire. I let my caramel get pretty dark, because I like the bitter notes that come out in a dark caramel; they help offset its sugary sweetness. Once that happens, you pour the caramel out into the dish you'll bake the tart in:


Then, while the caramel is still soft, arrange the cut apples over it, fitting them in tightly. You can quarter the apples, but I like to leave them in halves, because I think the result is prettier. I put the round sides down, so that they'll be face up when the tart gets inverted after baking:


At this point you'll want to pop the dish into the oven and bake it until the apples soften. They won't cook that much longer once the pastry lid goes on, so make sure they're about 75% cooked. Then place the round of pastry on top (if you didn't trim it beforehand, like me, you can just fold the excess back):


Then the tart goes back in the oven, and bakes until the pastry is nice and brown:


At this point the tart will have to cool in the pan for 10 to 30 minutes, so that the caramel sets somewhat. Otherwise, it would all just run out all over the plate you'll turn invert it onto. It won't be easy to wait, but it will be worth it in the end, when you present your friends with this thing of beauty:


The classic French way of serving this dessert is with a dollop of créme fraiche, and it's easy to understand why: the sour tang of the cream cuts through the sweetness of the apples, and it's also cool against the warmth of the just-out-of-the-oven tart. If for some reason you can't find créme fraiche, you can fold some whipped cream into some sour cream. Et voilà! An easy, delicious and oh-so-French dessert:


Apple Tarte Tatin
Adapted from epicurious.com
Serves 8

Ingredients:

1 package (usually 17 1/4 oz.) frozen puff pastry, preferably all-butter, thawed
1/4 c. (1/2 stick) unsalted butter, softened
1/2 c. sugar
6 or 7 firm, tart apples, such as Granny Smith, peeled and halved or quartered, and cored

Preparation (skillet method):

1. Preheat the oven to 400°.
2. Roll out puff pastry and trim to size of the skillet you'll be using. Prick pastry all over with a fork. Set aside, preferably in the fridge or freezer to keep cold.
3. Spread butter over the bottom of a 10" or 12" seasoned cast iron skillet, then sprinkle sugar all over the butter. Add the apples, fitting them into the pan tightly, round sides facing down. Cook mixture, undisturbed, over medium-high heat for about 20 minutes, until juices are a dark golden color.
4. Place the skillet in the oven and bake for about 20 minutes, until apples are about 75% cooked. Remove skillet from oven and lay the pastry round over the apples. Place skillet back in the oven and bake for about 20 more minutes, until pastry is browned. Remove tart from the oven and allow to cool for 10 to 30 minutes.
5. Invert pastry onto a serving plate. Apples should come free easily; if any of them stick, just put unstick them and fit them onto the tart. Cut into 8 wedges and serve with créme fraiche (or alternatively, some sour cream lightened with whipped cream).


Preparation (alternative method): If you don't have an oven-safe skillet, you can make the dessert like this.

1. Preheat the oven to 400°.
2. Roll out puff pastry and trim to size of the baking dish you'll be using. Prick pastry all over with a fork. Set aside, preferably in the fridge or freezer to keep cold.
3. In a medium suacepan, cook the butter and sugar together over medium-high heat, stirring frequently, until caramel reaches a dark golden color, about 10 to 12 minutes. Pour caramel into a 10" or 12" round baking dish.
4. While caramel is still warm, arrange the apples over it, fitting them into the dish tightly, round sides facing down. Place the dish in the oven and bake for about 40 minutes, or until apples are about 75% cooked.
5. Remove dish from oven and lay pastry round over the top. Place tart back in the oven and bake until pastry is browned, about 20 more minutes. Remove tart from the oven and allow to cool for 10 to 30 minutes.
6. Invert pastry onto a serving plate. Apples should come free easily; if any of them stick, just unstick them and fit them onto the tart. Cut into 8 wedges and serve with créme fraiche (or alternatively, some sour cream lightened with whipped cream).

Sunday, June 20, 2010

A happy accident

Like most fundamental things in life, good cooking has a lot of mythology surrounding it. The origins of iconic dishes such as Caesar salad, Buffalo wings, and oysters Rockefeller, to cite just a few American examples, are often hotly debated, with at least three or four stories of ownership and invention existing for each one--not to mention the endless variations on each recipe that restaurants across the country proudly declare to be the "original."

A related form of cooking mythology is the "happy accident" variety. You know what I'm talking about: those recipes that are supposed to have developed through some chef's error that, magically, turned out to be even more delicious than intended. Toll House cookies probably best exemplify this category. The accepted story goes like this: in the 1930s, Ruth Graves Wakefield was the owner of the Toll House Inn in Whitman, Massachusetts. One night, running low on the unsweetened bakers' chocolate that she used to make the inn's popular chocolate cookies, Whitman decided to break a semisweet chocolate bar into chunks and mix them into her plain cookie dough in the hopes that the chocolate would melt in the oven and create a chocolate cookie. But of course, the chunks stayed intact, resulting in an equally, if not more addicting cookie that has gone on to become the most popular American dessert since apple pie.

Now, I tend to mistrust stories like this. Why? Because I think that most accomplished cooks and bakers, like the ones featured in these recipe myths of origin, tend to be knowledgeable enough to be able to predict how their ingredients will react. Chefs aren't just running around kitchens throwing things into bowls and hoping that they'll taste good in the end (well, not usually, at least). Particularly in the Toll House cookie example, the story just seems far fetched: any experienced baker would know that the chocolate chunks in the cookie wouldn't melt, and so on and so forth for the many other "oops I made a mistake but wow does that taste good" tales that exist.

Or so I thought. Until that very thing happened to me. Allow me to set the scene: it was Thursday, June 17, 2010, and I was hard at work in the kitchen creating a rhubarb, apple, and blackberry tart. I had never made one before, but I knew, more or less, where to begin. I started by making an all-butter pastry crust in my brand-new, shiny Cuisinart, mixing the dough only the barest amount, using the smallest bit of water possible to make it set, and allowing it to rest comfortably in the refrigerator for half an hour before even thinking about attempting to roll it out. I was feeling confident as I set to work on the filling, which consisted of sliced apples, sliced rhubarb, whole blackberries, lemon zest, cinnamon, and sugar.

But not enough sugar. Much to my dismay, after smelling the warm, enticing aromas of browning butter and softening fruit during the hour or so that the tart spent baking, I pulled a beautiful, delicious-looking pastry from the oven and stuck an eager fingertip into the bubbling juices--only to pucker up in disgust at the sour taste. I didn't use enough sugar! And I'm due at a barbecue in a half hour! I racked my brain for possible solutions, and there seemed to be only one: I grabbed a box of raw brown sugar from my pantry and sprinkled a generous handful of the coarse crystals over the fruit, then stuck it back in the oven, under the preheated broiler. In about a minute, when the sugar had turned into a tawny, crackly glaze--exactly like the one you find atop crème brûlée--I declared the tart done. There was nothing else I could do.

Later on, at the aforementioned barbecue, I duly cut my tart into even slices, but with a heavy heart: I had little hope for it now. My friends gathered around to try it, and I sat back to gauge their reactions. And much to my delight, far from running to the nearest trash can or patch of grass to indelicately spit out the bitter crumbs, my pals were oohing and aahing with delight, reaching back for seconds and thirds. I tried a piece. It was phenomenal: the crunchy sweetness of the caramelized sugar topping followed by soft, yielding fruit; the whole thing anchored by a light, crumbly, and buttery crust. It was a mistake, and yet it was so good. I guess happy accidents really do exist.


Bruléed Apple, Rhubarb and Blackberry Galette

Serves 8

Ingredients:

1 stick (8 tbsp.) very cold unsalted butter, cut into small cubes
1 1/2 c. all-purpose flour
1/2 tsp. salt
3 to 4 tbsp. ice water

1 large apple, peeled and cut into thin slices
3 large stalks rhubarb, peeled and cut into thin slices
1/2 pint blackberries
1 1/4 c. sugar
1/2 tsp. ground cinnamon
Zest of one lemon
2 tbsp. all-purpose flour
1 tbsp. unsalted butter
About 4 tbsp. raw brown sugar, or granulated sugar

Preparation:

1. Make the dough: in the bowl of a food processor, combine the flour and the butter. Pulse several times to distribute the butter. Pulse several more times, adding as little ice water as possible, until the dough comes together in a smooth ball. Do not overmix, as this will result in tough dough. (Alternatively, you can mix the dough by hand, but a food processor will produce a lighter, flakier crust.)
2. Wrap the ball of dough in plastic wrap and flatten it slightly into a disk. Place in the refrigerator and chill for 30 minutes to one hour.
3. Meanwhile, make the filling: combine the apple, rhubarb, blackberries, sugar, cinnamon, and lemon zest in a large bowl and toss to combine. Let it sit while you wait for the dough.
4. Preheat the oven to 350°.
5. Remove the dough from the refrigerator and let it sit at room temperature for about 5 minutes. Then, working on a large, flat, well-floured surface, use a rolling pin to roll the dough out into a large oval of about 1/4" thickness. Carefully transfer the dough to a large cookie sheet.
6. Evenly sprinkle the 2 tablespoons of flour over the fruit filling and toss to combine. Carefully spread the filling over the center of the tart dough, leaving the outer 1 1/2 inches of dough bare. Carefully fold the dough edges over the filling, creating an ovular tart. Break up the 1 tablespoon of butter into small pieces and dot them over the fruit filling.
7. Place the tart in the oven and bake for 1 1/4 hours to 1 1/2 hours. When done, the tart dough will be golden brown, and the fruit filling will have cooked down and set.
8. Remove the tart from the oven and turn the oven to the broiler setting. Sprinkle the additional 4 tablespoons of sugar evenly over the fruit and place it under the broiler for about 2 minutes, or until the sugar has melted. Be careful not to burn the sugar.
9. Let the tart cool to room temperature before slicing into 8 portions. Serve (preferably with vanilla ice cream).

Thursday, May 27, 2010

Potluck, please

I don't know about you all, but I love potlucks. I love hosting them; I love attending them; I even like just talking about them. As much I enjoy eating in restaurants every once in a while, dining out has never really been my thing. That's because my favorite kind of food is the simple, comforting, homey kind; the kind, say, that my friends might make for me. Plus, I've always been a sucker for dim sum/Indian buffet/smörgåsbord-type situations, where you get to try lots of different dishes all at once. So, as you can see, potlucks basically represent the sweet, sweet center of my personal Venn diagram of dining.

I've been fortunate in life, I suppose, because I happen to have found a set of friends who share my passion for potlucks. My pal Patricia, who sadly lives in France nowadays, used to host them in her Brooklyn apartment with some regularity, and a coworker of mine has themed potlucks at her house about once a month. Most recently, though, it was my friend Hallie who invited people over to her new place in Williamsburg for a housewarming potluck.

When deciding what to bring to a potluck, there are a few factors to take into consideration. The obvious one is size: you want to make something that will feed a large group. Another is broadness of appeal: a potluck is not the time to try out that recipe for wasabi-sriracha snails you've been eying. Finally, you'll want to think about portability: if you, like me, are riding your bike or even taking the train to your destination, you don't want to prepare something ultra-delicate that will suffer from transportation.

When choosing my potluck dish this time around, I was inspired, as I so often am, by leftovers. I had a box of phyllo dough that had, funnily enough, been hanging around in my freezer since the last potluck I attended, when I made an Austrian potato strudel. In my fridge, I found some slightly sad-looking shiitake mushrooms that needed to be cooked immediately. Lastly, I had purchased a huge bunch of beautiful fat leeks at the farmer's market, and I wanted to spare them the shiitakes' fate and make sure to use them while they were still in their prime. It was obvious to me, once I considered my options, how all these items would go together: in a rich, savory tart.

I sauteed the leeks and shiitakes together, adding some button mushrooms to fill the mixture out, let that cool, and then folded it into some ricotta cheese, adding grated Parmesan and fresh thyme to tie it all together. Once the filling was done, I set to work on my phyllo, laying out the sheets on a large, clean workstation and covering them with a damp towel. After brushing each sheet with a mixture of melted butter and olive oil, I layered them in a shallow glass baking dish, then spread the filling on top. I added several more sheets of phyllo dough, slid the tart into the oven, and in about 40 minutes had a crispy, golden, delectable-smelling pastry cooling on my countertop. I got to tuck into it a few hours later at the potluck, and it was delicious: the earthy, slightly chewy mushrooms breaking up the soft bland richness of the ricotta, the caramelized leeks adding sweetness and just a little bit of bite. If you try it out for your next potluck, don't expect to bring home any leftovers.


Savory Leek, Mushroom and Ricotta Tart
Serves 10

Ingredients:

1 box prepared phyllo dough, thawed
1/2 cup + 3 tbsp. olive oil, divided
3 tbsp. + 1 tbsp. unsalted butter, divided
1 cup shiitake mushrooms, cleaned, stems discarded, and cut into bite-size pieces
1 cup button mushrooms, cleaned and cut into bite-size pieces
4 - 5 leeks, sliced into half-moons and rinsed of all grit
1 small (15 oz.) container ricotta cheese
1 egg
Grated Parmesan
Chopped fresh thyme
Salt
Pepper

Preparation:

1. Preheat the oven to 375
°.
2. In a small pot, melt 3 tbsp. butter, then mix in 1/2 c. olive oil. Set aside to cool.
3. In a large, wide, heavy-bottomed skillet, heat remaining olive oil and butter over a medium flame. Add leeks and mushrooms and cook, stirring occasionally, until leeks are wilted and mushrooms have released their liquid and browned, about 8 minutes. Season with salt and pepper and set aside to cool.
4. Combine mushrooms and leeks with ricotta, egg, Parmesan and thyme to taste. Season with salt and pepper. Set aside.
5. Lay phyllo sheets out on a large, clean workstation and cover with a damp towel. Working with one sheet at a time, brush phyllo generously with oil/butter mixture, then quickly lay it in a 7"x11" glass baking dish. Repeat with 7 more sheets of phyllo.
6. Spread ricotta filling on top of phyllo, distributing evenly.
7. Add a final layer of 8 phyllo sheets on top of the filling, making sure to seal the tart well.
8. Place tart in oven and bake until phyllo is golden brown and crisp, about 40 minutes. Let cool completely, then cut into 10 pieces. Serve at room temperature.

Thursday, January 21, 2010

Birthday fun (with pork)

January 9th marked the 24th year in a row of my existence on this earth, and, also, marked the second year in a row that I chose to celebrate the occasion by feeding a huge, slow-roasted hunk of pork to my friends. For my potluck dinner/birthday party this year, I stuck with pork shoulder because it's a) ridiculously cheap, b) ridiculously easy to make, and c) feeds a ridiculously large number of people. Plus, it's a delicious cut of meat that fills your apartment (and stairwell, and foyer) with a heady, tantalizing, rich aroma during the six to seven hours it spends basting in its own porky juices in your oven. I don't keep many traditions, but I like the fact that one of the few that I observe involves consuming a large section of a pig once yearly.

So I had the pork shoulder, and I prepared it much the same way as the pernil that I made last year, marinating it overnight in a potent blend of chopped garlic and onion, chili powder, olive oil and vinegar. The next day, I slow-roasted it at 300° for, well, the entire day. But after that, all bets were off. I was serving pork shoulder again, but I wanted to mix up my preparation. I decided to convert the pernil into southern-style barbecued pulled pork. I mean, how can you go wrong with that? (Answer: you cannot.) So after six or seven hours when the pork shoulder emerged from my oven glistening with crispy fatty crackling and virtually melting off the bone, I pulled off great big hunks of meat, and, with almost no effort needed at all, shredded them up into long, soft strands. I piled these into a big heavy pot, then folded in a sweet, smokey, homemade BBQ sauce as well as (shhh) a healthy ladle of pork fat drippings that I had rescued from the bottom of the roasting tray. I then turned on the heat again, though this time on top of the stove, letting the pork cook into the sauce over a low heat for about an hour. The pork came out just as I had hoped: moist, tender, and full of sweet and slightly spicy flavor:


And let's not forget the cornbread. After all, what's a southern barbecue without cornbread?


If every year finds me surrounded by good friends and copious amounts of pork, the future looks like a bright one to me!

Southern-Style Barbecued Pulled Pork
Serves 12 - 15 (with leftovers)

Ingredients:

1 pork shoulder, 8 to 10 pounds
4 cloves garlic, peeled
1 large onion, quartered
2 tbsp. fresh oregano leaves or 1 tablespoon dried oregano
1 tbsp. sweet paprika
1 tsp. ancho or other mild chili powder
1 tbsp. salt
2 tsp. freshly ground black pepper
Olive oil as needed
1 tbsp. wine or cider vinegar
1 recipe Sweet and Smokey BBQ Sauce (see below)
Reserved pork drippings, as needed

1. Score meat’s skin with a sharp knife, making a cross-hatch pattern. Pulse garlic, onion, oregano, paprika, chili, salt and pepper together in a food processor, adding oil in a drizzle and scraping down sides as necessary, until mixture is pasty. (Alternatively, mash ingredients in a mortar and pestle.) Blend in the vinegar.
2. Rub mixture into pork, getting it into every nook and cranny. Cover with plastic wrap and place in fridge. Let marinate for 12-24 hours.
3. Heat oven to 300 degrees. Remove plastic wrap from pork and place in a roasting pan, filling the bottom with about a half inch of water. Roast pork for as long as you can, or six to seven hours (you cannot really overcook it), covering the skin with foil if it starts to burn. Remove foil before cooking time is over to allow skin to crisp well.
4. Let meat rest for 10 to 15 minutes, then pull off pork cracklings (serve these with lime, hot sauce or both. You won't be disappointed). Using your hands, tear all pork meat off bone in big chunks. When all meat is removed from the bone, shred it into a large, heavy pot, using either your hands or two forks--either way, this is a messy job.
5. Fold in the majority of the homemade BBQ sauce, as well as a good ladleful of pork juice and drippings reserved from the bottom of the roasting pan. Cook, covered, over low heat, or until pork is completely soft and tender and has absorbed a good deal of the sauce, about 1 hour. Taste and add more BBQ sauce, drippings, or seasoning as needed.


Sweet and Smokey BBQ Sauce
Makes about 3 cups

Ingredients:

2 cups ketchup
7 tbsp. apple cider vinegar
2 tbsp. water
Juice of 1 lemon
2 tbsp. Worcestershire sauce
12 dashes Tabasco sauce
1 tbsp. Dijon mustard
1 tsp. chili powder
1 tsp. sweet or smoked paprika
3/4 c. dark brown sugar or more, to taste
3 cloves garlic
2 chipotles en adobo plus 2 tbsp. adobo sauce
1 tsp. salt
Ground pepper to taste

1. Combine all ingredients in a heavy saucepan and bring to a simmer. Cook for 45 minutes or until sauce has thickened, stirring often to prevent burning and adding more water as necessary.
2. Puree until smooth with a stick blender. Taste for seasoning, adding more brown sugar or salt as necessary.


Skillet Cornbread
Adapted from epicurious.com
Makes 1 loaf

Ingredients:

1 c. all-purpose flour
1 tbsp. baking powder
1/2 tsp. salt
1 c. yellow cornmeal
1/4 c. sugar
1 c. milk
1 large egg
1 sticks (1/2 c.) unsalted butter

1. Preheat oven to 375°. Place several small pats of butter into a large cast iron skillet and place skillet in the oven. (If you do not have a cast iron skillet, butter a large, shallow glass baking dish and set it aside.)
2. Melt remaining butter in a small saucepan over medium-low heat.
3. In a large bowl whisk together flour, baking powder, salt, cornmeal and sugar.
4. In another bowl, whisk together melted butter, egg, and milk. Pour the wet ingredients into the dry and stir until just combined. Batter will be thin.
5. Remove skillet from oven and pour in the batter. Place in middle of oven and bake until golden brown and cooked through, about 35 minutes. Remove skillet from oven and cool on a wire rack.

Tuesday, May 12, 2009

A birthday dinner

On April 15th, my mom turned 60. She threw a big party, and old friends from all over the country flew in to see her. She was heaped with presents, receiving everything from jewelry to decorative plates and vases to cookware--all lovely gifts, to be sure, but for my present I wanted to offer her something homemade. Remember when you were a little kid and you would painstakingly create birthday cards for your parents out of construction paper, glue, and obscene amounts of glitter? They took hours of fierce dedication to complete, and were true measures of your devotion. In a slightly more mature variation on this tried-and-true gift-giving tradition, this year my present to my mother was a three course meal cooked from scratch.

In my humble opinion, a home-cooked meal is one of the finest gifts you can receive. The giver has to plan out the menu in accordance with the recipient's likes and dislikes; they have to shop for the ingredients; and, finally, they must cook and serve the meal. A lot of thought goes into this process, and who in this world doesn't appreciate it when someone else thinks of them? And don't think that the gift-giver doesn't get something out of the deal, too. For someone, like me, who loves to cook, preparing a meal for someone else is great fun. I can't just shoot from the hip, as it were, riffing on the contents of my refrigerator and throwing together something that satisfies my tastes alone. I have to put myself in someone else's shoes, I must imagine what kind of meal someone else likes to sit down to, and that often means using a recipe or technique that I don't often employ on my own. It's good practice, and it's a good time.

There were a number of factors to take into account when planning the menu for my mom's birthday dinner. First and foremost, she is a very healthy eater; she likes to eat whole grains and hearty, nutritious items such as beans, squash, and sweet potatoes. She eats and enjoys red meat, but only infrequently; usually, she prefers lighter proteins such as fish and poultry. Finally--and most importantly--my mother is a chocoholic in the truest sense of the word. It's she who taught me to appreciate the virtues of a dark, bitter piece of chocolate--an item she eats on a daily basis. There was no question that, whatever the meal, the grand finale would have to exalt chocolate.

And so, without further ado, here is what I made. To start, we ate Warm Squash Salad with Candied Pepitas, a recipe I adapted from one I found on epicurious.com. In this salad, still-warm pieces of roasted butternut squash are piled on top of bitter arugula and topped with shaved parmesan and sweet spiced pumpkin seeds:


For the main dish, I made Stuffed Squid Braised in Aromatic Tomato Sauce. Again, I adapted this recipe from epicurious. This dish is somewhat laborious but really fun to make. First, you finely chop the squid tentacles and saute them in olive oil. Once cooled, they provide the base for the stuffing, which also includes fresh bread crumbs, chopped herbs, grated parmesan and lemon zest. The filling gets spooned into the hollow squid bodies, which are the perfect vessels for stuffing. They're then browned in olive oil and finally allowed to braise in a bright, simple tomato sauce until the filling has expanded and they're perfectly tender. I served them over orzo:


The insides of these guys looked really cool flecked with green from the herbs and purple from the tentacles. Here's a cross-section:


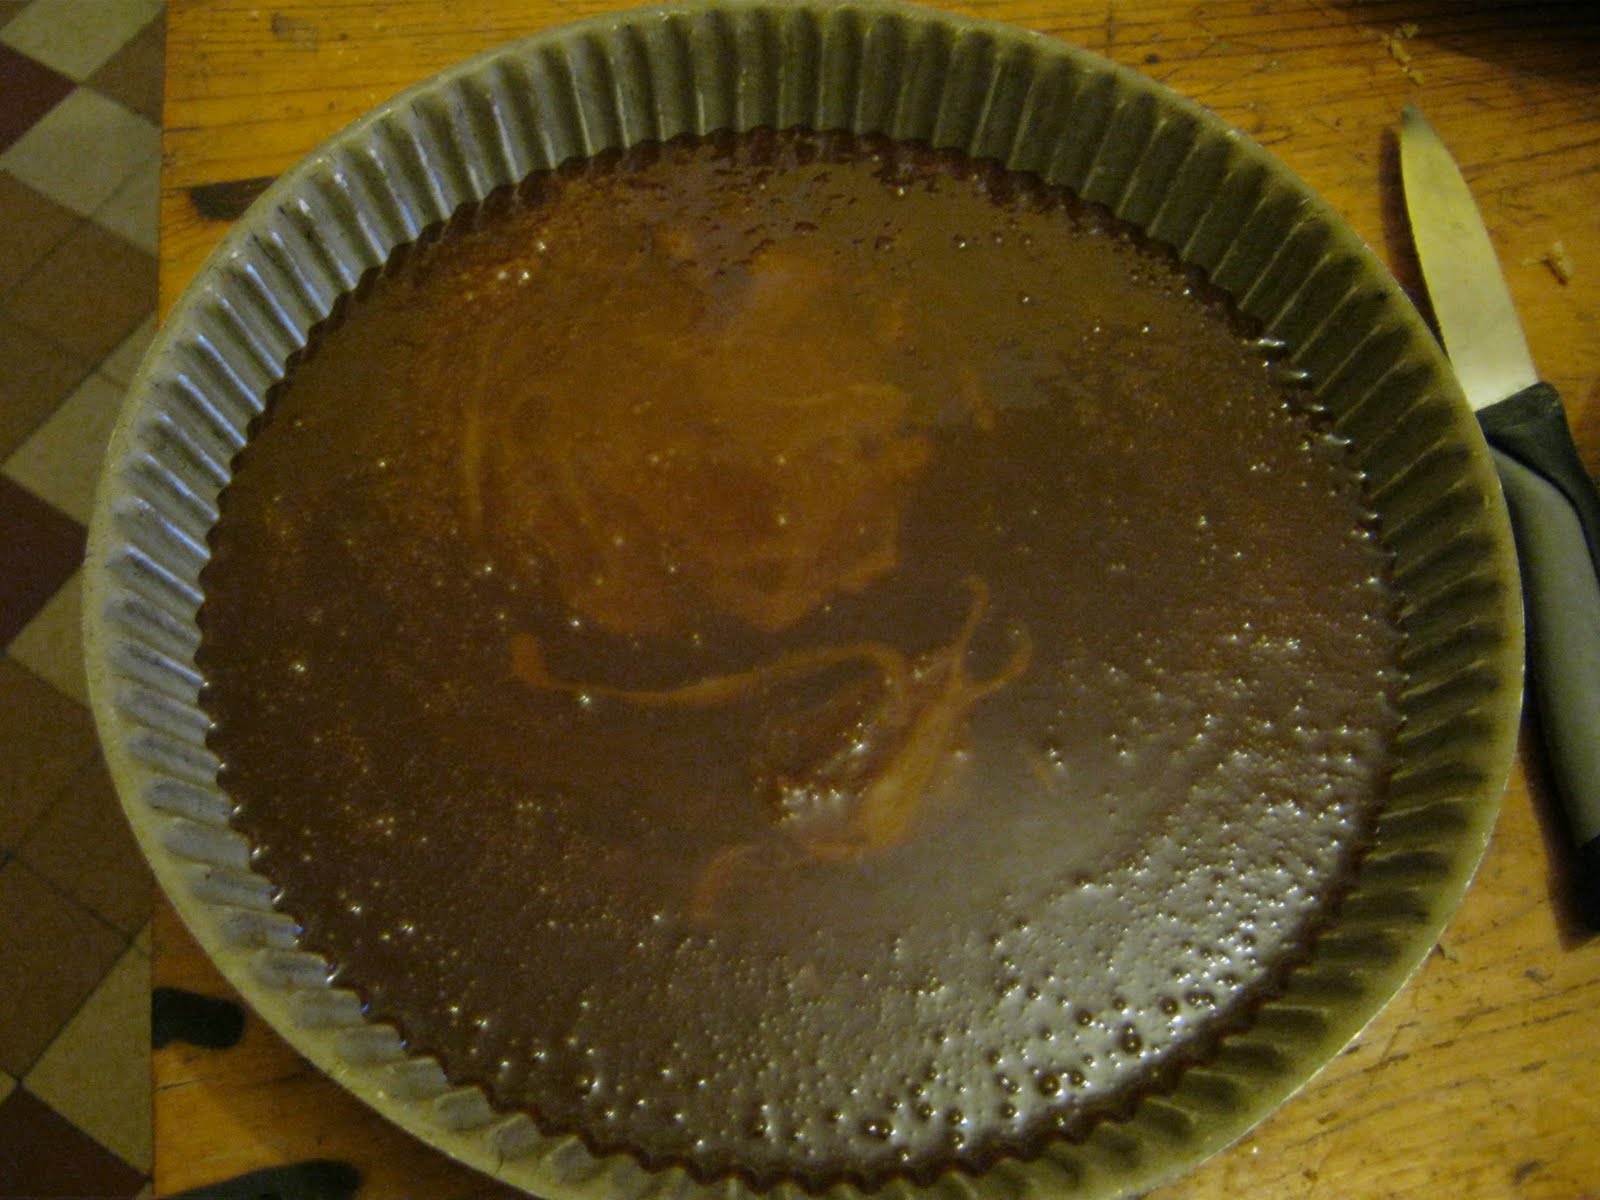
I might be calling the squid the main course, but for my mother the main event was dessert. I made her a deep, rich, crisp-on-the-outside-gooey-on-the-inside chocolate torte--regally named the Queen of Sheba--from a wonderful cookbook called Bittersweet written by a wonderful author named Alice Medrich. The torte consists, basically, of chocolate, butter, eggs and sugar; a scant two tablespoons of flour provide some solidity to this souffle-like confection:


I served the slices with a little bit of barely-sweetened whipped cream:


Happy birthday, Mom!


Warm Squash Salad with Candied Pepitas
Adapted from epicurious.com
Serves 4

Ingredients:

1 tbsp. unsalted butter
1 tbsp. sugar
1/2 tsp. ground cumin
1/4 tsp. cinnamon
1/4 tsp. paprika
1/4 tsp. cayenne
1 tsp. salt
1/2 cup raw green (hulled) pumpkin seeds (pepitas)
1 tbsp. cranberry juice cocktail
2 tsp. Sherry vinegar
1 tbsp. minced shallot
4 tbsp. extra-virgin olive oil
1 1/2 lbs. butternut squash, peeled, seeded, and cut into 1/2" thick slices
1 small piece Parmesan cheese
1 bunch arugula, trimmed, washed, and dried

Preparation:

1. Roast the squash: preheat the oven to 450°. Toss squash with 1 tablespoon olive oil and salt and pepper to taste in a shallow baking pan and arrange slices in 1 layer. Roast in the middle of the oven until just tender, about 20 minutes. Remove from oven, then cover with tin foil to keep warm.
2. Make the candied pepitas: melt butter in a heavy saucepan over moderate heat. Stir in the sugar, cumin, cinnamon, paprika, cayenne, and 1/2 teaspoon salt, then cook, without stirring, until caramelized. Add the pumpkin seeds and cook, stirring occasionally, until seeds are puffed and golden. Transfer to a plate to cool. When seeds have hardened, break up any clumps with your fingers.
3. Make the dressing: whisk together the cranberry juice, vinegar, and shallot and let stand 5 minutes. Whisk in 3 tablespoons oil, remaining 1/2 teaspoon salt, and pepper to taste.
4. Assemble the salad: shave 12 strips from the cheese with a vegetable peeler. Place a large handful of arugula on each of 4 salad plates, then top with a few pieces of squash. Divide dressing evenly among 4 plates. Top each salad with 3 cheese shavings and a generous sprinkling of pumpkin seeds.


Stuffed Squid Braised in Aromatic Tomato Sauce
Adapted from epicurious.com
Serves 4

Ingredients:

2 lbs. cleaned squid with tentacles, rinsed
6 tablespoons extra-virgin olive oil
2 (14- to 15-oz) cans diced tomatoes, puréed in a blender or food processor until smooth
5 fresh basil leaves
1/2 tsp. salt
1/2 tsp. black pepper
1 cup finely grated aged Pecorino or Parmesan cheese
1 cup finely ground fresh bread crumbs (from an Italian loaf)
1/2 cup chopped fresh flat-leaf parsley
4 garlic cloves, minced
Zest of one lemon
2 large eggs, lightly beaten

Preparation:

1. In a food processor, finely chop tentacles. Heat 3 tbsp. oil in a wide 5- to 6-quart heavy pot over moderately high heat and sauté tentacles, stirring, until just cooked through, about 1 minute. Transfer with a slotted spoon to a bowl and cool.
2. Stir tomatoes into oil in pot along with basil, salt, and 1/4 tsp. pepper and simmer, uncovered, stirring occasionally, 10 minutes. While sauce simmers, stir together Pecorino, bread crumbs, parsley, garlic, lemon zest, eggs, sautéed tentacles, and remaining 1/4 teaspoon pepper. Gently stuff each squid body with a slightly rounded tablespoon of filling and pat squid to distribute filling evenly. Weave a wooden pick horizontally across wide opening of each squid to seal. (During cooking, stuffing will expand and squid will shrink, forming a rounded, well-stuffed squid. Do not overstuff!)
3. Heat remaining 3 tbsp. oil in a 12-inch heavy skillet over moderately high heat and sauté squid, turning over once, until browned and any liquid given off is evaporated, about 6 minutes total. Add squid to tomato sauce and simmer, covered, until squid is tender, 25 to 30 minutes. Discard picks and serve squid, about 4 per person, with sauce over cooked orzo. Garnish with chopped parsley.


"Queen of Sheba" Chocolate Torte
Adapted from Bittersweet by Alice Medrich
Makes one 9" cake

Ingredients:

6 oz. bittersweet chocolate, coarsely chopped
10 tbsp. (1 1/4 sticks) unsalted butter, cut into pieces
3 tbsp. brandy or whiskey
1/2 tsp. vanilla extract
1/4 tsp. salt
1/2 cup unblanched (skin on) whole almonds
2 tbsp. all-purpose flour
4 large eggs, at room temperature, separated
3/4 cup sugar
1/4 tsp. cream of tartar
Very lightly sweetened whipped cream

Preparation:

1. Position rack in the lower third of the oven. Preheat to 375°. Prepare a 9" round springform pan by placing a round of wax paper on the bottom.
2. Place the chocolate and butter in a medium heatproof bowl set over a pan of simmering water. Stir occasionally until melted and smooth. Remove from heat and stir in brandy, vanilla and salt. Set aside.
3. Meanwhile, pulse the flour and the almonds in a food processor until finely ground. Set aside.
4. In a large bowl, whisk the egg yolks with 1/2 cup sugar until thick and well blended. Stir in the chocolate mixture a little at a time.
5. In a clean dry bowl, with an electric mixer, beat the egg whites and cream of tartar at medium speed until soft peaks form when the beaters are lifted. Add the remaining 1/4 cup of sugar and beat at high speed until the peaks are stiff and glossy but not dry. Scoop one quarter of the egg whites and all of the nut mixture on top of the chocolate batter and carefully fold them in using a large rubber spatula. Fold in the remaining egg whites. Pour the batter into the prepared pan, spreading it level if necessary.
6. Bake for 25 to 30 minutes, or until a toothpick inserted in the edge comes out dry but a toothpick inserted in the center comes out moist and gooey. Set the pan on a rack to cool.
7. To serve, slide a slim knife around the inside of the pan to loosen cake. Remove the pan sides and invert the cake onto a plate, remove the wax paper, and invert again onto a platter or cake stand. Cut cake into wedges and serve each slice with a little whipped cream on top.

Wednesday, March 18, 2009

Blog's first birthday

It's true: For the Love of Food turned one year old yesterday. Since March 17, 2008, I've graduated from college, moved into my first apartment, completed one internship at a food magazine and started another--and through it all, I've kept cooking and writing in this space. I think that's pretty great. I haven't always written as often or as well as I would have liked, but what's important is that I've stuck around--and you've stuck around, reader, whoever you might be. Thanks for that; please keep coming back for another year.

I figure that since it's a birthday here on Blogspot I might as well share a cake with you. I haven't made one recently, but, digging into my photo archives, I found an image of a chocolate layer cake frosted with peanut butter ganache that I made for my friend Malcolm's birthday party back in January. If you like peanut M&M's, Reese's peanut butter cups and the like, then this cake is definitely for you. Both of its components deliver on the promise of intense flavor: the cake, made from a recipe from an old Hershey's pamphlet that my mom has had lying around forever, has been my standard birthday cake for, oh, twelve years or so. It's called Black Magic Cake, and there's definitely something magical about it: incredibly moist, fluffy but rich at the same time, this cake packs a powerful hit of cocoa--and a subtle hint of coffee--in every bite. For the peanut butter frosting, which I had never made before, I turned to the doyenne of simple, elegant baking: Ina Garten, the Barefoot Contessa herself. She didn't let me down. Her recipe takes sugar, peanut butter, butter, vanilla, salt and heavy cream, and turns them into a thick, oozing, coat-your-spoon (and lips, and fingertips) ganache that nevertheless manages to heighten--not obscure--the flavor of the chocolate in the cake. Consider this combination for the next birthday in your life--whether you're celebrating a website or, you know, a real person.


Black Magic Cake
Adapted from hersheys.com
Makes two 9" cake layers

Ingredients:

1 3/4 cups unsifted flour
2 cups sugar
3/4 cup cocoa
2 tsp. baking soda
1 tsp. baking powder
1 tsp. salt
2 eggs
1 cup strong coffee
1 cup buttermilk or sour milk (1 tbsp. white vinegar or lemon juice plus milk to equal 1 cup)
1/2 cup vegetable oil
1 tsp. vanilla

Directions:

1. Preheat the oven to 350°. Grease and flour two 9-inch round baking pans, tapping out excess flour.
2. Stir together sugar, flour, cocoa, baking soda, baking powder and salt in large bowl. Add eggs, buttermilk, coffee, oil and vanilla; beat on medium speed of mixer for 2 minutes (batter will be thin). Pour batter evenly into prepared pans.
3. Bake for 30 - 35 minutes or until toothpick inserted into center comes out clean. Let cool for 15 minutes; remove from pans to wire racks and cool completely. Frost as desired.


Peanut Butter Ganache
Adapted from the Barefoot Contessa
Makes about 4 cups

Ingredients:

1 cup confectioners' sugar
1 cup creamy peanut butter
5 tbsp. unsalted butter, at room temperature
3/4 tsp. pure vanilla extract
1/4 tsp. kosher salt
1/3 cup heavy cream

Directions:

Place the confectioners' sugar, peanut butter, butter, vanilla, and salt in the bowl of an electric mixer fitted with a paddle attachment. Mix on medium-low speed until creamy, scraping down the bowl with a rubber spatula as you work. Add the cream and beat on high speed until the mixture is light and smooth.

Saturday, December 13, 2008

A brief sojourn to the country

Last weekend I finally escaped New York City and headed upstate to my friend Gideon's country house. As I detailed in this post, Gideon and I like to cook together and we tend to create some really delicious things. The past weekend was no exception. We arrived late at night and got right to work the next morning, making oatmeal griddle cakes for breakfast. The recipe, which we found in the classic Joy of Cooking, is dead simple; you basically just add the usual pancake ingredients (flour, leavening, eggs) to cooked oatmeal, mix, and fry. A great use for leftover oatmeal, they made a filling, hearty breakfast that fortified us for our hike in the frigid woods:


For dinner that night we roasted a chicken and some potatoes in exactly the same manner as I demonstrated in my recent post on roasted chicken. This one came out just as nicely:


On the side we enjoyed a refreshing salad of green leaf lettuce, sectioned grapefruits, sliced red onions and avocados dressed with olive oil and rice wine vinegar. The lightness of the salad was a perfect counterpoint the warm, rich and salty chicken and potatoes:


As good as that whole plate of food was, I think my favorite part of our meal was the little cooks' treat that we made at the beginning as we cleaned the chicken: chopped liver. Gideon happened to have some homemade chicken and matzoh ball soup that he had made with his grandmother, so as any good Jews would do we skimmed the top of its schmaltz (that's chicken fat, used for cooking, for you Goyim out there) and slow-cooked the one liver that came with the chicken, along with some chopped onions, in a small pan. We then seasoned it well with salt and pepper and whirred it up with some fresh parsley in a little electric chopper. Here it is spread on some olive bread and garnished with raw red onion:


The chicken was a large one and took a while to roast in the oven. As it did, Gideon and I decided that we wanted to bake something, so we made challah bread. For a yeast bread, it's very simple to make and doesn't take too much time. Here's what it looked like after we braided it and let it rise for a second time:


And here it is after being coated with an egg wash and baked:


And here it is after being converted to French toast the next morning:


Think we were done eating by that point? Well, not quite. Late on Sunday afternoon we threw together this chicken salad with parsley, tomatoes, red onion, olives, olive oil and vinegar and made to-go sandwiches to bring in the car:


Needless to say, after polishing those off I was quite full.

Oatmeal Griddle Cakes
Serves 2-3
Adapted from Joy of Cooking

1. Sift 1 cup of all-purpose flour. Re-sift with 1 1/2 tsp. baking powder and 1/2 tsp. salt.
2. Stir together 1 1/2 c. cooked oatmeal, 1/2 c. milk, and 2 tbsp. melted butter. Add one egg, beaten, and stir to combine.
3. Stir in the dry ingredients until just combined. Fry the cakes on a heated buttered griddle or cast-iron pan, about 3-4 minutes per side. Serve with butter and maple syrup.

Challah Bread
Makes 1 loaf
Adapted from Joy of Cooking

1. In a small bowl, mix 1 packet of active dry yeast with 1/4 c. warm water and 1 1/2 tbsp. sugar. It should froth up; if it does not, discard and try again with different yeast.
2. Measure out 3/4 c. warm water and add a pinch of saffron to it.
3. Sift 3 c. flour with 1 1/2 tsp. salt into a large bowl. Create a well in the center and add 2 eggs, lightly beaten, 2 tbsp. vegetable oil, the saffron water, and the yeast mixture. Using a wooden spoon, stir until combined. The dough will be very sticky.
4. Turn the dough out onto a floured surface and knead, with floured hands, until it becomes smooth and elastic, about 10 minutes. Place the dough in a large bowl that has been oiled and turn it over so that both sides are coated. Cover and let rise in a warm place until doubled in volume, about 1 hour.
5. Punch the dough down and knead it again, briefly, on the floured surface. Create three long, ropey strands of dough and place them on a greased and floured baking sheet. Braid the strands together and tuck the ends underneath. Allow the loaf to rise again, about 1/2 to 1 hour.
6. Preheat the oven to 400°. Make an egg wash of one egg yolk beaten with a little water. Brush it all over the loaf and bake it in the 400° oven for 15 minutes, then turn the heat down to 350° and bake for another 15 minutes. The loaf is done when it is well browned and sounds hollow when tapped on the bottom. Allow it to cool before you slice it.

Saturday, August 16, 2008

Grandma knows best

In my last post I shared a photo of a slice of my grandmother's blueberry cake, and I thought I'd go into a little more detail about that recipe. In one of my older posts I wrote about "the old standby"--one of those recipes that you return to again and again, both perfecting it through practice and also putting your own personal stamp on it. And an important and reliable standby is definitely the family recipe. Carefully passed down like an heirloom, it's tried and true and stands the test of time. In my food-centered Jewish family, we have a number of such recipes. One of them is my great-grandmother's mandel brot, which is basically a Jewish biscotti studded with nuts (mandel brot means "almond bread"). The story goes that my great-grandmother never used recipes, and as she got older family anxiety that the recipe might pass away with her increased. So one day when she was baking her famous cookies she was closely observed and the recipe was finally recorded. Since then it's been baked dozens of times, mostly by my grandmother (whose blueberry cake recipe follows) and by my mom.

My grandma Georgia is a great cook and baker. We visit her house in Pittsburgh for Thanksgiving every year, and in addition to the turkey, brisket, sweet and sour meatballs and potato kugel that she turns out (largely on her own), she also serves up pumpkin pie with the most tender and flaky crust (her secret? Crisco), airy vanilla cake topped with sweet cherries, and chunky, slightly salty oatmeal-and-chocolate-chip cookies. Blueberries, obviously, aren't in season in November, but during the summer when they abound my grandma makes this delectable cake. It's such a great recipe: sweet and laden with fruit, it still manages to be light, thanks to the step which calls for the egg whites to be beaten separately. The best way to eat it? Unadorned, and with a cup of coffee or tea. But if you want to gild the lily--as we all do sometimes--top it with some vanilla bean ice cream.


*Note: if you--like me--prefer your desserts a little less sweet, you can reduce the sugar in this recipe by up to 3/4 cup. Another change I make is to use two sticks of room temperature butter in place of the shortening. Finally, I add the zest of one lemon to the wet ingredients for more complexity of flavor. Enjoy!

Friday, August 1, 2008

And lo, there was bread, and it was good

Back in May I reported that one of my culinary goals for the summer was to learn how to bake good bread. I nourished a sourdough starter weekly, but for the most part it just sat in my fridge unused (with the notable exception of its inclusion in these sourdough pancakes). But the good thing about goals is that we usually get around to them, even if it takes a while. And so over the weekend I finally made a loaf of sourdough, and I couldn't be more pleased with how it turned out.

The reason I finally got around to baking bread was that I bought a bread stone, which I had been meaning to do for a long time. I had originally intended to just buy one or two saltillo tiles, commonly used for flooring, because Alton Brown of the Food Network show Good Eats said that that was the thing to do. But I don't live near any big home goods stores, and when I checked with my local hardware stores they didn't carry the tiles. So I just bit the bullet and purchased a bread stone at Williams Sonoma--for $35. I think that price is a little exorbitant, but luckily I had a long-unused gift card from my brother lying around (thanks, Eric!) I can't stress how much of a difference baking with the stone makes. I am not a skilled baker, and this bread turned out phenomenally well. That's because the stone preheats in the oven and gets scorching hot, drawing out all the moisture in the bread and producing a crackly crust that comes close to approximating the texture of bakery loaves.

So I'll walk you through the process. It's a long one--you have to have a deep reserve of patience to be a baker because you can't speed things along. What you do first is mix your starter with water, a little sweetener, and the flour to form a dough. You knead it--an infinitely satisfying process--then let it rest a while. Then, you knead it again, adding the salt. That's it; you have your dough. All it has to do now is rise. This step actually proved to be a minor problem for me. You see, although my starter is by all accounts active and alive, it wasn't sufficiently raising the dough. When I noticed this, I quickly took action, mixing up 1/2 tsp. of instant yeast with some water and flour to form a paste, and then kneading it into the dough. Problem solved--the dough quickly started to behave as it should. Purists might frown upon this step, but I think it was necessary. The dough rises at room temperature for 4-6 hours, and is then punched down and allowed to rise in the fridge for a second period of 8-12 hours (as I said, patience is key!) Here's what my dough looked like when it came out of the fridge the morning after its second rise:


After the cold dough comes to room temperature, about 2-3 hours, you shape the loaves. I only made half a recipe, which yielded one large loaf. What you do is flatten the dough into a large rectangle, fold each long side into the middle, then fold that completely in half to create tension in the dough, which will cause a nice springiness as the bread bakes in the oven. Then you let the loaf rest, yet again, for 1 hour. At this point you should place your bread stone on your oven's middle rack and start preheating the oven to 500°. You should also place a heavy pan full of water in the bottom of the oven to generate steam. Here's my loaf after 1 hour of proofing, almost ready for the oven:


Next I slashed the bread lengthwise, and then it was time to bake. I quickly slid the loaf from a cornmeal-dusted baking sheet directly onto the stone, splashed the floor and walls of the oven with water for more steam, and closed the door. Within the first five minutes of baking, I splashed water twice more (you can use a spray bottle, too). After that, I lowered the oven temperature to 450° and left the oven door closed for 20 minutes. Then I opened it up and rotated the bread, closed it, and baked the bread for 15 more minutes. The bread is done when the loaf sounds hollow when tapped on the bottom. I removed the bread to a cooling rack and waited (more!) until the bread was completely cool before cutting into it--you must do this, or else you'll mess up the bread's texture by releasing all the steam still in the bread. And here's my gloriously crusty brown loaf (can you tell I'm a little bit proud?):


And here's a peek inside at the bread's crumb. As a novice baker, I was very pleased with the bread's texture: it was chewy but not too heavy, with a wonderfully crisp crust. But I think that ideally the crumb should have larger air bubbles; maybe my technique will improve with time:


I loved the taste of the bread, too. What the sourdough starter adds is an intense, highly developed sour tang; I've made regular yeast breads a few times before and they just don't have the depth of flavor. Even though I had to boost my starter with a little yeast to get it to rise, it was really instrumental in creating a finished product that tasted (dare I say it?) almost as good as something you buy at a bakery. The best way to enjoy this bread? Spread thickly with good butter, and even sprinkled with a tiny bit of salt, if you dare. The creamy richness of the butter offsets the sourness of the bread in a most satisfying way:


.
French Country Sourdough White Bread
Adapted from The Modern Vegetarian Kitchen by Peter Berley
Yields 1 two-pound loaf

* Note: This recipe will take 2 days from start to finish. It's most convenient to do steps 1-6 on the first day, and steps 6-16 on the second.

Ingredients:
3/4 cup white sourdough starter
1 1/2 cups lukewarm (70-80°) non-chlorinated water
1 1/2 tsp. sweetener (honey, sugar or molasses)
1/2 tsp. instant yeast
3 cups unbleached white flour
1/2 cup whole wheat flour
2 tsp. salt
Cornmeal

1. In a large mixing bowl, combine the starter, water, sweetener, and yeast. Stir until starter is dissolved.
2. Add the flours and mix to form a ragged mass of dough. Cover the bowl and allow dough to rest for 5 minutes.
3. Scoop the dough out onto a clean, lightly floured surface. Wash out the bowl and thoroughly wash and dry your hands. Knead dough for 10 minutes. Invert the bowl over the dough and let it rest for 15 minutes.
4. Uncover the dough, add the salt, and knead for 5-10 minutes, until the dough is smooth and elastic. Avoid adding extra flour as you knead.
5. Lightly grease the inside of the bowl. Add the dough and turn it over several times until it is well-coated. Cover the bowl tightly with plastic wrap and set aside at room temperature until dough has nearly tripled in volume, 4-6 hours.
6. Gently press on the dough to deflate it. Cover the bowl tightly with plastic wrap and refrigerate for 8-12 hours.
7. Remove the dough from the refrigerator. Remove the plastic wrap and sprinkle with a little flour. The dough will be very cold and stiff. Cover the bowl with a clean towel and set aside for 2-3 hours, until the internal temperature of the dough is about 68°.
8. Turn the dough out onto a clean, lightly floured surface. Press the dough into a 1-inch-thick rectangle. Fold one long end in to the middle of the rectangle; repeat with the other long end. Then completely fold in half to create surface tension over the dough. Pinch the seam to seal underneath.
9. Place the dough seam side down on a floured cloth. Sift a light veil of flour over the loaf. Cover with a clean cloth and let sit for 1 hour.
10. Meanwhile, preheat the oven to 500° F (at least 45 minutes before the dough is ready to bake). Set a heavy pan filled with water on the floor of the oven. Set a baking stone or inverted baking sheet on the middle rack. Dust a peel or baking sheet with cornmeal.
11. Press the dough with a fingertip. If the dough springs back quickly, it requires more time. If it springs back slowly or holds the indentation, it is ready to bake.
12. Gently transfer the loaf onto the peel, seam side down. Slash the dough length-wise, making an incision 1/2-inch deep and stopping 1 inch from the ends.
13. Open the oven and slide the dough onto the baking stone or baking sheet. Heavily mist the floor, sides, and ceiling of the oven with water, or splash some with your hands. Shut the oven door. Mist 2 more times during the first 5 minutes, taking care not to mist the loaf itself.
14. Turn the oven temperature down to 450° F. Do not open the oven door for 20 minutes.
15. Open the oven and rotate loaf for even browning. Continue to bake for 15-20 more minutes. The bread is done when the internal temperature reaches 210°, or when a loaf sounds hollow when tapped on the bottom.
16. Cool the loaf on a wire rack for no less than 1 hour before slicing.