Happy birthday to For the Love of Food, who turns four years old on this day! I wanted to do something special for the blog for its big fourth, so I gave it a makeover: up top, you'll see a brand new banner, configured by my good friend Dave Manno (thanks, Dave!) I snapped the photo of those beautiful, sun-dappled radishes about a year ago at a market in Toulouse, France, and I think they do a swell job of communicating the type of food I'm into these days: simple, honest fare that relies more on the very best produce I can find, rather than on any kind of complicated techniques. I hope you like the new look!
I'm hoping to continue to improve upon the appearance of the blog; namely, by figuring out how to post bigger, more mouth-watering photos of my food, and by attending to a few small stylistic details. Stay tuned for those changes!
Showing posts with label France. Show all posts
Showing posts with label France. Show all posts
Saturday, March 17, 2012

Monday, April 11, 2011
A French dinner, by way of Mexico
Got a whole bunch of tomatoes lying around? Like, 2 pounds of tomatoes? Well grab 'em, because you're going to need them (seeded, chopped) for this recipe:

Oh, and that's right--I almost forgot to mention your huge bunch of fresh parsley. You'll be needing that, too.
The dish I'm talking about today is pescado a la Veracruzana, or fish, Verucruz style. The name Veracruz refers both to the state and the port city located on the eastern coast of Mexico. I was there, for two days, in early 2006, when my friend Malcolm and I stayed on after a community service trip to Oaxaca to explore the country a bit. We were pressed for time during our travels, but we still wanted to make it to the beach to swim and to beat the heat. Overwhelmingly, we were told that the western coast of the country was where to go for beautiful sand and pristine waters, but our research turned up the fact that the nearest western beach from where we were at the time could be reached only after a bus ride of eight to nine hours. We decided to see about going to the eastern coast instead. Bam! Veracruz, in a measly four hours. Bus tickets were purchased. We were excited.
During our stay, locals that we met often inquired about me and Malcolm's itinerary. Well, we told them, we're going to Mexico City--also known as the D.F., or Distrito Federal--for about 5 days. The locals nodded in appreciation. Also, we confessed, we'll be going to Veracruz for a day or two. The locals paused. Tactfully, they inquired, "Oh, I see. Why?" We explained ourselves: lack of time, desire to swim. "Why?" we asked. "Is it not so nice?" The locals, ever polite, assured us that it was fine, but often added, in a smaller, affectedly unconcerned voice, that there were lots of sharks in the water. "Be careful," they said. Malcolm and I encountered this same scenario at least 5 or 6 times, until it became a joke. We were going to Veracruz. We were determined not to be eaten by sharks.
When we got there, what we found was a small, slightly seedy, slightly dirty, but on the whole more or less charming port city. We walked around the central plaza, or zocalo. We ate the fruit ices that everyone in town was eating. We had an adventurous dinner of some kind of offal-ish pork cut. We made our plans for the beach the next day. Unfortunately, when we got up the next morning, we discovered that Malcolm had been struck down by the dreaded traveler's illness Montezuma's Revenge. After some negotiation with the hotel management to let Malcolm rest in the comfort of our room for the remainder of the day, instead of checking out as we had planned to, he settled in for the long haul, while I packed my bag to head out to the beach. After a long bus ride for which I didn't have exact change and therefore couldn't pay, earning me dirty looks from the driver for the entire ride, I arrived at a flat, not so pretty, beach. But it was a beach nonetheless. Setting my fears aside, I swam a little. I read my book. I tanned, or rather, burned to a crisp, since Malcolm wasn't there to sunscreen my back. After a while, as I tend to do, I got hungry.
It probably won't surprise you to discover that my main interest while traveling is the local cuisine, and therefore to know that when I decided to head to Veracruz, I tried to read up on what to eat there. As it turned out, the city is quite famous for the fish dish mentioned above. So, that day at beach, I was determined to find me some pescado a la Veracruzana, if only so that the trip there wasn't a total bust. I happened upon it at a casual seaside restaurant not fifty paces from the shore, and, despite my pretty much lifelong ambivalence about eating fish, when the dish arrived to my table I knew I was in for something good. It was a pristine white fillet of fish--most likely red snapper--bathed in a beautiful, and beautiful-smelling, fresh tomato sauce, its red flecked with the varying shades of green of parsley, olives and capers. I dug in. It was delicious, rich with flavor while still being light and not too filling. I was sold. When I got back to the U.S., I recreated the dish several times, and it remains my favorite way to prepare fish, period.
It doesn't hurt that it's so easy to make. Basically, you sauté chopped onions and garlic, sprinkling in a healthy dose of oregano (preferably of Mexican origin) towards the end of this process. Then you add a copious amount of chopped tomatoes, plus chopped green olives and some whole capers, as well as some water to create a broth. After letting these flavors simmer and meld for a few minutes, you slip in your fish fillets that you've briefly marinated in a mixture of lime juice and salt, and you let them poach just a few minutes until they're flaky and cooked through. Before serving over rice, you add a generous showering of chopped fresh parsley, and you cut up some limes to squeeze over at the table. Take it from me: this dish is a winner, and it tastes just as good in the U.S., or France, or wherever you might be, as it does in its hometown.

Pescado a la Veracruzana
Serves 4 - 6
Ingredients:
- 6 white fish fillets, such as snapper, cod, flounder, tilapia, etc.
- Juice of 4 or 5 limes, plus more limes for slicing
- 3 tbsp. olive oil
- 1 white or yellow onion, sliced into thin half-moons
- 3 cloves of garlic, minced
- 1 tsp. red pepper flakes, or to taste
- 2 tsp. dried oregano, preferably Mexican, or to taste
- 3 c. (about 2 lbs.) seeded and chopped tomatoes
- 1/2 c. green olives, pitted and chopped
- 3 tbsp. capers, rinsed
- 1 c. water
- Salt, to taste
- 1/2 c. chopped fresh parsley
- Limes, for slicing
Preparation:
1. Place fish fillets in a shallow dish and pour lime juice over. Sprinkle with a small amount of salt, and place in the refrigerator to marinate.
2. In a deep, wide, and heavy saucepan, heat the olive oil over a medium flame. Add the onions and garlic and a pinch of salt and sauté, stirring frequently, for about 6 minutes, or until onions are soft and translucent.
3. Add the red pepper flakes and oregano. Stir to coat and heat through.
4. Add the tomatoes, olives, capers and water and stir to combine. Add more salt, to taste (be careful here. The olives and capers add quite a bit of salt to the sauce). Bring sauce to a simmer and cook for about 15 minutes.
5. Gently slip the fish fillets into the sauce; cover the pan partially. Cook until fish is cooked through but still flaky, about 8 - 10 minutes.
6. Sprinkle the parsley over the dish and serve over rice, with lime wedges.

Oh, and that's right--I almost forgot to mention your huge bunch of fresh parsley. You'll be needing that, too.
The dish I'm talking about today is pescado a la Veracruzana, or fish, Verucruz style. The name Veracruz refers both to the state and the port city located on the eastern coast of Mexico. I was there, for two days, in early 2006, when my friend Malcolm and I stayed on after a community service trip to Oaxaca to explore the country a bit. We were pressed for time during our travels, but we still wanted to make it to the beach to swim and to beat the heat. Overwhelmingly, we were told that the western coast of the country was where to go for beautiful sand and pristine waters, but our research turned up the fact that the nearest western beach from where we were at the time could be reached only after a bus ride of eight to nine hours. We decided to see about going to the eastern coast instead. Bam! Veracruz, in a measly four hours. Bus tickets were purchased. We were excited.
During our stay, locals that we met often inquired about me and Malcolm's itinerary. Well, we told them, we're going to Mexico City--also known as the D.F., or Distrito Federal--for about 5 days. The locals nodded in appreciation. Also, we confessed, we'll be going to Veracruz for a day or two. The locals paused. Tactfully, they inquired, "Oh, I see. Why?" We explained ourselves: lack of time, desire to swim. "Why?" we asked. "Is it not so nice?" The locals, ever polite, assured us that it was fine, but often added, in a smaller, affectedly unconcerned voice, that there were lots of sharks in the water. "Be careful," they said. Malcolm and I encountered this same scenario at least 5 or 6 times, until it became a joke. We were going to Veracruz. We were determined not to be eaten by sharks.
When we got there, what we found was a small, slightly seedy, slightly dirty, but on the whole more or less charming port city. We walked around the central plaza, or zocalo. We ate the fruit ices that everyone in town was eating. We had an adventurous dinner of some kind of offal-ish pork cut. We made our plans for the beach the next day. Unfortunately, when we got up the next morning, we discovered that Malcolm had been struck down by the dreaded traveler's illness Montezuma's Revenge. After some negotiation with the hotel management to let Malcolm rest in the comfort of our room for the remainder of the day, instead of checking out as we had planned to, he settled in for the long haul, while I packed my bag to head out to the beach. After a long bus ride for which I didn't have exact change and therefore couldn't pay, earning me dirty looks from the driver for the entire ride, I arrived at a flat, not so pretty, beach. But it was a beach nonetheless. Setting my fears aside, I swam a little. I read my book. I tanned, or rather, burned to a crisp, since Malcolm wasn't there to sunscreen my back. After a while, as I tend to do, I got hungry.
It probably won't surprise you to discover that my main interest while traveling is the local cuisine, and therefore to know that when I decided to head to Veracruz, I tried to read up on what to eat there. As it turned out, the city is quite famous for the fish dish mentioned above. So, that day at beach, I was determined to find me some pescado a la Veracruzana, if only so that the trip there wasn't a total bust. I happened upon it at a casual seaside restaurant not fifty paces from the shore, and, despite my pretty much lifelong ambivalence about eating fish, when the dish arrived to my table I knew I was in for something good. It was a pristine white fillet of fish--most likely red snapper--bathed in a beautiful, and beautiful-smelling, fresh tomato sauce, its red flecked with the varying shades of green of parsley, olives and capers. I dug in. It was delicious, rich with flavor while still being light and not too filling. I was sold. When I got back to the U.S., I recreated the dish several times, and it remains my favorite way to prepare fish, period.
It doesn't hurt that it's so easy to make. Basically, you sauté chopped onions and garlic, sprinkling in a healthy dose of oregano (preferably of Mexican origin) towards the end of this process. Then you add a copious amount of chopped tomatoes, plus chopped green olives and some whole capers, as well as some water to create a broth. After letting these flavors simmer and meld for a few minutes, you slip in your fish fillets that you've briefly marinated in a mixture of lime juice and salt, and you let them poach just a few minutes until they're flaky and cooked through. Before serving over rice, you add a generous showering of chopped fresh parsley, and you cut up some limes to squeeze over at the table. Take it from me: this dish is a winner, and it tastes just as good in the U.S., or France, or wherever you might be, as it does in its hometown.

Pescado a la Veracruzana
Serves 4 - 6
Ingredients:
- 6 white fish fillets, such as snapper, cod, flounder, tilapia, etc.
- Juice of 4 or 5 limes, plus more limes for slicing
- 3 tbsp. olive oil
- 1 white or yellow onion, sliced into thin half-moons
- 3 cloves of garlic, minced
- 1 tsp. red pepper flakes, or to taste
- 2 tsp. dried oregano, preferably Mexican, or to taste
- 3 c. (about 2 lbs.) seeded and chopped tomatoes
- 1/2 c. green olives, pitted and chopped
- 3 tbsp. capers, rinsed
- 1 c. water
- Salt, to taste
- 1/2 c. chopped fresh parsley
- Limes, for slicing
Preparation:
1. Place fish fillets in a shallow dish and pour lime juice over. Sprinkle with a small amount of salt, and place in the refrigerator to marinate.
2. In a deep, wide, and heavy saucepan, heat the olive oil over a medium flame. Add the onions and garlic and a pinch of salt and sauté, stirring frequently, for about 6 minutes, or until onions are soft and translucent.
3. Add the red pepper flakes and oregano. Stir to coat and heat through.
4. Add the tomatoes, olives, capers and water and stir to combine. Add more salt, to taste (be careful here. The olives and capers add quite a bit of salt to the sauce). Bring sauce to a simmer and cook for about 15 minutes.
5. Gently slip the fish fillets into the sauce; cover the pan partially. Cook until fish is cooked through but still flaky, about 8 - 10 minutes.
6. Sprinkle the parsley over the dish and serve over rice, with lime wedges.
Friday, April 1, 2011
A Pesto for Printemps
That's spring, for you non-Francophones out there. As I discussed in my last post, spring, glorious spring has sprung in Toulouse--as I write this, my bedroom windows, which open on our huge, overgrown garden, are flung wide, allowing soft, cool breezes and lazy sunlight to gently filter in.

I really lucked out with this garden. You see, I set up my housing here in Toulouse before I left New York, taking a gamble on my room, housemates, etc. I'm happy to say that the place I live is truly better than anything I could have imagined: situated at the end of a quiet block, it's a big, two-story house with a large, well-stocked kitchen, and of course, the garden that I just mentioned. As I talked about in some of my container garden posts from 2009, I've been growing more and more interested in gardening and agriculture--as someone who's obsessed with food, it's natural to want to understand more about where it comes from, and especially gratifying to be able to grow it yourself. Serendipitously, my housemate Ben is an experienced jardinier, having lived on a farm for a while last year, and he's been maintaining our fruit and vegetable plants this year. When I first arrived, in September, I benefited from the last of the season's ripe, juicy tomatoes, and harvested some small cauliflowers and cabbages this winter. Right now, though, it's all about the early-spring crops of lettuces and tender green spinach:

The spinach we've got just grows and grows, so I've been trying to take advantage of it by mixing it into nearly everything I cook: tossing some into a bowl of warm pasta; sautéeing it with mushrooms; folding it into rice. Because there's so much of it, the thought occurred to me to try to make something that would call for a lot. And then it came to me: pesto! I love pesto, and I love that you can make it out of nearly anything green (arugula, as well as fresh herbs like parsley and cilantro come to mind)--not just the basil that most people associate it with--and that you can incorporate nearly any type of nut, and not just pine nuts. What I happened to have on hand were some flaked almonds, so I decided to use those. To tie it all together, I added just a little bit of something that goes wonderfully with both spinach and almonds--lemon. If you've ever eaten the classic Italian side dish of some quickly sautéed spinach finished with a refreshing spritz of lemon juice, you know what a natural pairing the two ingredients make. Same goes for almonds and lemon: many dessert recipes--like this one for pound cake, this one for madeleines, and this one for cookies--call for both. So for my pesto, I added a touch of freshly grated zest. The fresh spinach, the subtle almonds and the tart lemon combine to produce a pesto that's a lot lighter and brighter than the ones you might be used to. Spring in a bowl!

Spinach and Almond Pesto with Lemon
Makes about 1 1/2 cups
Ingredients:
- 1/2 c. flaked or slivered almonds, or use slightly less whole peeled almonds (if your nuts are fresh, there is no need to toast them. If they're not, toast in a pan or low oven until fragrant and allow them to cool.)
- 3 cloves garlic, peeled and roughly chopped
- 1 tsp. grated lemon zest
- 1 tsp. salt or more to taste
- About 6 oz. or 4 c. packed spinach leaves, washed and roughly torn
- 1/2 c. olive oil or more as needed
- 1/4 c. grated parmesan cheese
- Freshly ground black pepper, to taste
Preparation:
1. Place almonds, garlic, lemon zest and salt in the bowl of a food processor. Pulse until nuts are ground, but not too finely.
2. Add spinach, in batches if necessary, and pulse to combine. Once all spinach is added, leave the food processor running as you drizzle in the 1/2 c. olive oil. If mixture remains too thick, add more oil.
3. Scrape pesto into a bowl. Add parmesan and some grinds of black pepper and stir to combine. Taste for seasoning, adding more salt or pepper as needed. Store in the refrigerator for one week or in the freezer for one month.

I really lucked out with this garden. You see, I set up my housing here in Toulouse before I left New York, taking a gamble on my room, housemates, etc. I'm happy to say that the place I live is truly better than anything I could have imagined: situated at the end of a quiet block, it's a big, two-story house with a large, well-stocked kitchen, and of course, the garden that I just mentioned. As I talked about in some of my container garden posts from 2009, I've been growing more and more interested in gardening and agriculture--as someone who's obsessed with food, it's natural to want to understand more about where it comes from, and especially gratifying to be able to grow it yourself. Serendipitously, my housemate Ben is an experienced jardinier, having lived on a farm for a while last year, and he's been maintaining our fruit and vegetable plants this year. When I first arrived, in September, I benefited from the last of the season's ripe, juicy tomatoes, and harvested some small cauliflowers and cabbages this winter. Right now, though, it's all about the early-spring crops of lettuces and tender green spinach:

The spinach we've got just grows and grows, so I've been trying to take advantage of it by mixing it into nearly everything I cook: tossing some into a bowl of warm pasta; sautéeing it with mushrooms; folding it into rice. Because there's so much of it, the thought occurred to me to try to make something that would call for a lot. And then it came to me: pesto! I love pesto, and I love that you can make it out of nearly anything green (arugula, as well as fresh herbs like parsley and cilantro come to mind)--not just the basil that most people associate it with--and that you can incorporate nearly any type of nut, and not just pine nuts. What I happened to have on hand were some flaked almonds, so I decided to use those. To tie it all together, I added just a little bit of something that goes wonderfully with both spinach and almonds--lemon. If you've ever eaten the classic Italian side dish of some quickly sautéed spinach finished with a refreshing spritz of lemon juice, you know what a natural pairing the two ingredients make. Same goes for almonds and lemon: many dessert recipes--like this one for pound cake, this one for madeleines, and this one for cookies--call for both. So for my pesto, I added a touch of freshly grated zest. The fresh spinach, the subtle almonds and the tart lemon combine to produce a pesto that's a lot lighter and brighter than the ones you might be used to. Spring in a bowl!

Spinach and Almond Pesto with Lemon
Makes about 1 1/2 cups
Ingredients:
- 1/2 c. flaked or slivered almonds, or use slightly less whole peeled almonds (if your nuts are fresh, there is no need to toast them. If they're not, toast in a pan or low oven until fragrant and allow them to cool.)
- 3 cloves garlic, peeled and roughly chopped
- 1 tsp. grated lemon zest
- 1 tsp. salt or more to taste
- About 6 oz. or 4 c. packed spinach leaves, washed and roughly torn
- 1/2 c. olive oil or more as needed
- 1/4 c. grated parmesan cheese
- Freshly ground black pepper, to taste
Preparation:
1. Place almonds, garlic, lemon zest and salt in the bowl of a food processor. Pulse until nuts are ground, but not too finely.
2. Add spinach, in batches if necessary, and pulse to combine. Once all spinach is added, leave the food processor running as you drizzle in the 1/2 c. olive oil. If mixture remains too thick, add more oil.
3. Scrape pesto into a bowl. Add parmesan and some grinds of black pepper and stir to combine. Taste for seasoning, adding more salt or pepper as needed. Store in the refrigerator for one week or in the freezer for one month.
Sunday, March 27, 2011
It was supposed to be so simple
I had it all planned out: I would write a short, sweet little post about spring coming to Toulouse, the bounty of beautiful produce it's brought with it, and the delicate, yet unfussy, dish I would prepare with pristine white asparagus, a true harbinger of spring if ever there was one. Here, have a look at it, I invite you. Pretty stunning, no?

There I was at the Marché Cristal, a lively, sprawling open-air market near my house, on a recent sunny morning, agape with wonder at all the new arrivals on display, and rendered nearly paralyzed with indecision at what to buy first: the slender green artichokes, leaves still attached, displayed like so many bouquets of flowers? The huge, curling pods of fava beans, or fèves, overflowing and nearly tumbling down from their slatted cases? How about a small container of perfect, sweet yet tart strawberries, real strawberries, the likes of which you hardly ever find in the United States these days?

Somehow, I pulled myself together and made my purchases, starting, yes, with those lovely fraises, which I devoured in about three minutes upon reaching home, and finishing up with the bunch of asparagus pictured above. It was nearly lunchtime by the time I got home, and I was hungry, those berries not really having tided me over. I quickly trimmed up the asparagus, snapping the tough ends off, and threw them in a steamer to cook for, I wagered, about 12 minutes, until they were just tender. In the meantime, thought I, I'll put a little pot of water on the boil for a soft-cooked egg, which I envisioned as the perfect accompaniment to my asparagus, slumping gently over them, lubricating them with its rich yellow yolk. Sounds like a plan, no?
Well, sometimes even the most carefully thought out plans don't turn out the way we intend. You see, I had never actually cooked white asparagus before, and rather brashly assumed that its method of preparation was identical to that of its verdant cousin. And so when I tested a blond spear after about 10 minutes--lifting it from the steamer to see if it would bend ever-so-slightly--I could see that something was wrong. The tips of the asparagus seemed nice and tender, but the bottom part of the stem was still rather the same texture as it was when raw: woody and unyielding. "Well, OK," I thought to myself, "I'll just let them steam a little longer." Checked them again after ten minutes. No real discernible change. Abandoned my steaming mission and chucked the little devils right into the boiling water at the bottom. Ten more minutes, and it became clear that there was no salvaging this situation. I drained the little buggers, laid them out nicely on a plate as intended, draped them with lemony vinaigrette, and garnished them with some sliced tomatoes. I should add, at this point, that my frustration with the asparagus caused me to totally forgot about my lovingly cooked soft egg, and what I now had was a hard-cooked one. I saved it for later. I made another soft egg. And what I got, finally, was this:

It doesn't look bad, does it? And see, it didn't taste bad, either. But the only edible part of the asparagus was the top half. The bottom half I had to sort of pull through my teeth, much as one eats a steamed artichoke leaf, to scrape out the interior softness and leave behind the tough, fibrous exterior. A lot of work for a lot of waste. It was a shame. And so as soon as I finished eating, I looked up the correct method of preparing white asparagus. Turns out that even the slenderest stems possess a hard outer peel that must be removed--with a knife--before cooking. It would have been nice to know that before, but I know it now. And so I've provided the emended recipe below. Here's hoping your maiden white asparagus voyage encounters smooth seas.
Steamed White Asparagus with a Soft-Cooked Egg
Serves 1
Ingredients:
- 1 small bunch fresh white asparagus (10 - 12 spears)
- 1 egg
- Vinaigrette made with mustard, lemon juice, salt and olive oil
- Sliced fresh tomatoes, for serving (optional)
Preparation:
1. Trim and peel the asparagus: as mentioned above, this step is indispensable and it's important to do it correctly. First, trim the bottom 1 inch from the asparagus spears. Then, using a small, sharp paring knife, peel the outer layer off, stripping the stem from the bottom up. Continue peeling nearly to the top of the spear.
2. Steam the asparagus: in a large, wide pot or pan, heat about 2 inches of water over high heat. When it boils, salt it, drop in the asparagus, cover and drop to a lively simmer. Steam, covered, until spears are tender, about 15 to 20 minutes.
3. Meanwhile, soft-boil the egg: place egg in a small saucepan and fill with cold water to cover. Place over medium-high heat; cover. When water boils, drop to a simmer and cook egg for exactly 8 minutes. Drain and immediately run egg under cold water to stop the cooking. When egg is cool, peel.
4. Drain asparagus and arrange warm spears on a plate, drizzling with about 3 teaspoons vinaigrette. Season with salt and pepper. Slice egg into halves or quarters and arrange over the asparagus. Serve with sliced tomato, if desired.

There I was at the Marché Cristal, a lively, sprawling open-air market near my house, on a recent sunny morning, agape with wonder at all the new arrivals on display, and rendered nearly paralyzed with indecision at what to buy first: the slender green artichokes, leaves still attached, displayed like so many bouquets of flowers? The huge, curling pods of fava beans, or fèves, overflowing and nearly tumbling down from their slatted cases? How about a small container of perfect, sweet yet tart strawberries, real strawberries, the likes of which you hardly ever find in the United States these days?

Somehow, I pulled myself together and made my purchases, starting, yes, with those lovely fraises, which I devoured in about three minutes upon reaching home, and finishing up with the bunch of asparagus pictured above. It was nearly lunchtime by the time I got home, and I was hungry, those berries not really having tided me over. I quickly trimmed up the asparagus, snapping the tough ends off, and threw them in a steamer to cook for, I wagered, about 12 minutes, until they were just tender. In the meantime, thought I, I'll put a little pot of water on the boil for a soft-cooked egg, which I envisioned as the perfect accompaniment to my asparagus, slumping gently over them, lubricating them with its rich yellow yolk. Sounds like a plan, no?
Well, sometimes even the most carefully thought out plans don't turn out the way we intend. You see, I had never actually cooked white asparagus before, and rather brashly assumed that its method of preparation was identical to that of its verdant cousin. And so when I tested a blond spear after about 10 minutes--lifting it from the steamer to see if it would bend ever-so-slightly--I could see that something was wrong. The tips of the asparagus seemed nice and tender, but the bottom part of the stem was still rather the same texture as it was when raw: woody and unyielding. "Well, OK," I thought to myself, "I'll just let them steam a little longer." Checked them again after ten minutes. No real discernible change. Abandoned my steaming mission and chucked the little devils right into the boiling water at the bottom. Ten more minutes, and it became clear that there was no salvaging this situation. I drained the little buggers, laid them out nicely on a plate as intended, draped them with lemony vinaigrette, and garnished them with some sliced tomatoes. I should add, at this point, that my frustration with the asparagus caused me to totally forgot about my lovingly cooked soft egg, and what I now had was a hard-cooked one. I saved it for later. I made another soft egg. And what I got, finally, was this:

It doesn't look bad, does it? And see, it didn't taste bad, either. But the only edible part of the asparagus was the top half. The bottom half I had to sort of pull through my teeth, much as one eats a steamed artichoke leaf, to scrape out the interior softness and leave behind the tough, fibrous exterior. A lot of work for a lot of waste. It was a shame. And so as soon as I finished eating, I looked up the correct method of preparing white asparagus. Turns out that even the slenderest stems possess a hard outer peel that must be removed--with a knife--before cooking. It would have been nice to know that before, but I know it now. And so I've provided the emended recipe below. Here's hoping your maiden white asparagus voyage encounters smooth seas.
Steamed White Asparagus with a Soft-Cooked Egg
Serves 1
Ingredients:
- 1 small bunch fresh white asparagus (10 - 12 spears)
- 1 egg
- Vinaigrette made with mustard, lemon juice, salt and olive oil
- Sliced fresh tomatoes, for serving (optional)
Preparation:
1. Trim and peel the asparagus: as mentioned above, this step is indispensable and it's important to do it correctly. First, trim the bottom 1 inch from the asparagus spears. Then, using a small, sharp paring knife, peel the outer layer off, stripping the stem from the bottom up. Continue peeling nearly to the top of the spear.
2. Steam the asparagus: in a large, wide pot or pan, heat about 2 inches of water over high heat. When it boils, salt it, drop in the asparagus, cover and drop to a lively simmer. Steam, covered, until spears are tender, about 15 to 20 minutes.
3. Meanwhile, soft-boil the egg: place egg in a small saucepan and fill with cold water to cover. Place over medium-high heat; cover. When water boils, drop to a simmer and cook egg for exactly 8 minutes. Drain and immediately run egg under cold water to stop the cooking. When egg is cool, peel.
4. Drain asparagus and arrange warm spears on a plate, drizzling with about 3 teaspoons vinaigrette. Season with salt and pepper. Slice egg into halves or quarters and arrange over the asparagus. Serve with sliced tomato, if desired.
Tuesday, February 15, 2011
Not your ordinary fish cake
OK, you've got me--I don't even really know what an ordinary fish cake would be. Fact is, you don't see too many people routinely whipping up fish cakes at home. I don't think. But they happen to be a delicious, inexpensive and easy dish that are all too easily overlooked by the home cook. Growing up, my mom routinely prepared salmon cakes using canned fish--unappetizing sounding, perhaps, but in fact they were delicious, quick to throw together, and because they relied on pantry staples, they could be made at almost any time.
I was thinking about those salmon cakes about a week ago when, as I usually do during my half hour bus ride home from work, I was pondering what to make for dinner. It was getting late, I was hungry, and I wanted to make something fast and easy. On the other hand, I was in the mood for something a bit out of the ordinary. And finally, I was feeling like I should eat some fish. At this point in my life, I like most kinds of fish ok, but as a child I found them all to be disgusting, nauseating specimens and I couldn't believe that they passed as food. I remember that when I was young and my parents worked a lot, they designated certain nights of the week for certain foods, for example Pizza Friday, presumably to make the job of the babysitters feeding my brother and me a bit easier. Pizza Friday (always accompanied by a red Hawaiian Punch, in my case, except for that one week in 1992 when clear Pepsi was all the rage), in all its glory, shone even more brightly each week in comparison to the dreaded Fish Thursday. Much as the name implies, Thursday nights were reserved for fish, most often some bland tasteless fillet coated in breadcrumbs and fried in oil, but my delicate palate couldn't handle even that, and nearly every week I would feign illness or even lock myself in the bathroom pretending to throw up, attempting to weasel my way out of having to consume the fetid flesh. To no avail, I might add.
These days, I'll happily eat nearly anything put in front of me, and fish is no exception. And yet it's certainly never found itself on my list of favored foods. In fact, I often simply forget about fish and have to remind myself to eat it since it's light and healthy, and a good swap for meat when I'm not feeling like going totally vegetarian. It doesn't help that fish is often one of the worst purchases you can make these days, what with rampant overfishing and all, and that it can also be pretty pricey.
I was thinking about those salmon cakes about a week ago when, as I usually do during my half hour bus ride home from work, I was pondering what to make for dinner. It was getting late, I was hungry, and I wanted to make something fast and easy. On the other hand, I was in the mood for something a bit out of the ordinary. And finally, I was feeling like I should eat some fish. At this point in my life, I like most kinds of fish ok, but as a child I found them all to be disgusting, nauseating specimens and I couldn't believe that they passed as food. I remember that when I was young and my parents worked a lot, they designated certain nights of the week for certain foods, for example Pizza Friday, presumably to make the job of the babysitters feeding my brother and me a bit easier. Pizza Friday (always accompanied by a red Hawaiian Punch, in my case, except for that one week in 1992 when clear Pepsi was all the rage), in all its glory, shone even more brightly each week in comparison to the dreaded Fish Thursday. Much as the name implies, Thursday nights were reserved for fish, most often some bland tasteless fillet coated in breadcrumbs and fried in oil, but my delicate palate couldn't handle even that, and nearly every week I would feign illness or even lock myself in the bathroom pretending to throw up, attempting to weasel my way out of having to consume the fetid flesh. To no avail, I might add.
These days, I'll happily eat nearly anything put in front of me, and fish is no exception. And yet it's certainly never found itself on my list of favored foods. In fact, I often simply forget about fish and have to remind myself to eat it since it's light and healthy, and a good swap for meat when I'm not feeling like going totally vegetarian. It doesn't help that fish is often one of the worst purchases you can make these days, what with rampant overfishing and all, and that it can also be pretty pricey.
I'll readily admit that, like most people, price is what I think about before I consider the provenance of the fish and whether it's endangered or not. So that very night when I entered the grocery store and found cleaned, filleted lieu noir for something like 6 euro a kilo, making the one large piece I bought about $1.75, I scooped it up. Later, I did look up the fish--called Atlantic pollock in English (at least before a 2001 marketing campaign attempted to rebrand it colin)--and according to the Monteray Bay Aquarium's Seafood Watch List, wild, net-caught pollock is a sustainable choice. So let's hope my lieu noir was, in fact, fished in that manner.
After making sure my fish fillet was free of any lingering bones or skin, I cut it into large pieces and dropped it into the bowl of a food processor, then pulsed carefully to achieve a ground, but not puréed, texture. I transferred the fish to a mixing bowl and added salt, pepper, toasted sesame oil, fish sauce, minced shallots, a drop of rice vinegar and a small mountain of chopped fresh cilantro. I stirred this mixture with my hands until it just came together, then formed it into small cakes, rolled them in breadcrumbs, and let them firm up in the refrigerator before frying them in a hot pan. The result? Just as satisfying, and nearly as easy, as my mother's salmon cakes, and somewhat lighter and brighter. Call them fish cakes 2.0.

Asian-Style Fish Cakes
Makes about 6 medium cakes, or 2 servings
Ingredients:
- 1 lb. neutral white fish, such as pollock, cod, scrod or tilapia, cleaned and filleted
- 1 shallot, minced
- 1/2 c. fresh cilantro, chopped
- 2 tsp. sesame oil
- 1 tsp. rice wine vinegar
- Dash of fish sauce
- Salt and pepper, to taste
- About 1/2 c. plain dry breadcrumbs
- Vegetable oil
Preparation:
1. Check fish for any remaining bones or skin and remove. Cut the fish into several large pieces and place them in the bowl of a food processor. Pulse carefully to achieve a ground, but not puréed, texture. Transfer to a mixing bowl and add the shallot, cilantro, sesame oil, rice vinegar, fish sauce, salt, and pepper. Mix gently just until everything comes together. Shape into 6 medium cakes, roll in breadcrumbs, and let rest in refrigerator for 30 minutes to an hour.
2. Heat a large, heavy-bottomed skillet over medium heat and add about 1/4 inch of oil. When oil is hot, add fish cakes and fry, turning as necessary to avoid burning, until completely cooked through, about 12 - 15 minutes. Drain briefly on paper towels and serve.
Monday, February 7, 2011
Not your ordinary meatball
Because meatballs--whether made of beef, pork, veal, the classic combination of all three, or some other type of flesh--are among my favorite foods of all time, I was somewhat shocked to realize that I've never shared a recipe for them on the blog. In fact, they're not something I prepare all too often, which is a shame. I guess the reason for this is that meatball-making is a somewhat lengthy process, but since there's nothing complicated about it, it's really something I should tackle more often.

I recently invented a meatball recipe that, I have to say, has become my favorite way to prepare them. I've been lucky enough to have been hired to cater two events while here in France, both birthday parties, and it was for the occasion of the first one that I made this recipe up, subsequently preparing (and perfecting) it for the second one. I thought meatballs would make the perfect party food, since they're easy to spear with a toothpick, and I also wanted to make something unusual, that would stand out more than the average meatball. That's when I thought to take a cue from Greece, using a meat less commonly seen in meatballs--ground lamb--and to load it up with fresh herbs and chunks of feta. The resulting meatballs, served in a simple tomato sauce, are meaty but not heavy, their richness cut through with the brightness of the herbs and the sharpness of the feta. For the parties I served them on their own, but for a complete meal I think they'd be lovely over some rice, cracked wheat or bulgur.

Lamb Meatballs with Fresh Herbs and Feta
Serves 8 - 10
Ingredients:
- 2 lbs. ground lamb (or substitute ground beef)
- 3 eggs, lightly beaten
- 1/2 c. breadcrumbs
- 1/2 c. finely chopped parsley plus extra for garnish
- 1/2 c. finely chopped cilantro
- 1/2 c. finely chopped mint
- 6 oz. feta cheese, cut into a small dice
- Salt
- Pepper
- 4 tbsp. + 1 tbsp. olive oil, divided
- 1 large can peeled plum tomatoes in juice
Preparation:
1. In a large mixing bowl, combine the lamb, eggs, breadcrumbs, herbs, feta, and a generous amount of salt and pepper. Mix gently to combine. Roll mixture into small- to medium-sized balls. You should end up with about 30 meatballs.
2. Heat 4 tbsp. of olive oil in a large, wide, heavy-bottomed skillet set over a medium-high flame. When oil is hot, add meatballs in batches, turning and shaking them occasionally to ensure even browning. Remove meatballs with a slotted spoon.
3. Empty canned tomatoes into a deep bowl or pot, then use your hands to crush them, leaving some chunks for texture.
3. When all meatballs are browned, wipe out pan and heat remaining 1 tbsp. oil over a medium flame. Add the tomatoes and a generous sprinkling of salt. Cook, stirring, for about 3 minutes. Add meatballs, lower flame and cover partially, allowing meatballs to simmer until completely cooked through, about 30 minutes. Serve garnished with a sprinkling of fresh parsley.

I recently invented a meatball recipe that, I have to say, has become my favorite way to prepare them. I've been lucky enough to have been hired to cater two events while here in France, both birthday parties, and it was for the occasion of the first one that I made this recipe up, subsequently preparing (and perfecting) it for the second one. I thought meatballs would make the perfect party food, since they're easy to spear with a toothpick, and I also wanted to make something unusual, that would stand out more than the average meatball. That's when I thought to take a cue from Greece, using a meat less commonly seen in meatballs--ground lamb--and to load it up with fresh herbs and chunks of feta. The resulting meatballs, served in a simple tomato sauce, are meaty but not heavy, their richness cut through with the brightness of the herbs and the sharpness of the feta. For the parties I served them on their own, but for a complete meal I think they'd be lovely over some rice, cracked wheat or bulgur.

Lamb Meatballs with Fresh Herbs and Feta
Serves 8 - 10
Ingredients:
- 2 lbs. ground lamb (or substitute ground beef)
- 3 eggs, lightly beaten
- 1/2 c. breadcrumbs
- 1/2 c. finely chopped parsley plus extra for garnish
- 1/2 c. finely chopped cilantro
- 1/2 c. finely chopped mint
- 6 oz. feta cheese, cut into a small dice
- Salt
- Pepper
- 4 tbsp. + 1 tbsp. olive oil, divided
- 1 large can peeled plum tomatoes in juice
Preparation:
1. In a large mixing bowl, combine the lamb, eggs, breadcrumbs, herbs, feta, and a generous amount of salt and pepper. Mix gently to combine. Roll mixture into small- to medium-sized balls. You should end up with about 30 meatballs.
2. Heat 4 tbsp. of olive oil in a large, wide, heavy-bottomed skillet set over a medium-high flame. When oil is hot, add meatballs in batches, turning and shaking them occasionally to ensure even browning. Remove meatballs with a slotted spoon.
3. Empty canned tomatoes into a deep bowl or pot, then use your hands to crush them, leaving some chunks for texture.
3. When all meatballs are browned, wipe out pan and heat remaining 1 tbsp. oil over a medium flame. Add the tomatoes and a generous sprinkling of salt. Cook, stirring, for about 3 minutes. Add meatballs, lower flame and cover partially, allowing meatballs to simmer until completely cooked through, about 30 minutes. Serve garnished with a sprinkling of fresh parsley.
Friday, February 4, 2011
I'm back
Ahem. I apologize for the long delay between posts, but I was making some wonton soup and it took a long time.
I kid, of course. Well, not entirely. I did make wonton soup--that's what I'm here to tell you about on this sunny, mild Toulouse afternoon--and it did take a long time. But additionally, my less-than-a-year-old laptop decided to bite the dust several weeks ago, and after I sent it in to a repair center, I was left in the lurch, internet-less and unable to share my culinary creations. The cooking didn't stop--actually, I've been cooking more than ever lately--but I'll have to play some catch-up on the blog over the next few weeks.
So let's get right into that wonton soup, shall we? About 2 months ago, I posted about Paris Store, an Asian supermarket where I stocked up pantry essentials like fish sauce, sesame oil, sambal oelek and preserved vegetables. I also indulged in a few impulse purchases, such as Vietnamese nems, chewy sesame candies and a packet of wonton skins. When I got home that day, I threw the wontons into the freezer, not sure what I'd do with them, or when.
Inspiration struck about a week ago, when I was browsing the meat aisle at my local supermarket. As I've mentioned on the blog many a time,poverty frugality often guides me in my cooking. Though eating well is one of the most important pursuits in my life, I do not have a lot of money to spend on fancy ingredients, and so I seek out things that taste good but don't come at a high price. Rather than seeing this as some kind of hindrance, I actually enjoy the sport of bargain-hunting, and feel that it's a fun challenge. Spotting some random food item that has had its price slashed will often completely determine what I'll be making for dinner that night, as I scoop it into my shopping cart.
Such was the case when I decided to make these wontons. As I said, I was eying the meat offerings at the store when I noticed two items: first, a two-pound assortment of pork bones, labeled "Bones for animals," and priced at 55 cents; and second, a package of ground pork, on sale for 50% off, making its final price a whopping 2 euros. First a big pot of rich pork stock flashed into my mind (I love making stock, and do so often during the winter), followed by a vision of plump little pork dumplings floating in it. Later that afternoon, at the open-air market, I picked up the rest of the ingredients I would need--a knob of fresh ginger, a bunch of scallions and a small head of Napa cabbage--and I got to work.
First, I trimmed the pork bones of excess fat, then chucked them into a deep soup pot that I filled with cold water, brought to a boil, and dropped to a simmer. Then, I mixed up my wonton filling, seasoning the ground pork with salt, grated ginger, and sesame oil, and mixing in finely chopped scallions and cabbage. Then, I laid out my (defrosted) wonton skins on a clean, cornstarch-dusted work surface, 9 at a time, keeping the rest soft and supple under a damp paper towel. I filled each dumpling with one teaspoon of pork filling, no more, no less. You want a plump, juicy end result, but it's essential not to over-stuff your wontons, or you'll risk them bursting apart in your soup:

Next, I dipped my forefinger in a little bowl of water, ran it over two sides of the wonton squares, then pinched the dumplings into a triangle shape, making sure to press out any air and to verify that the edges were well bound together. I attempted to make a pretty pleated dumpling but failed, so I sort of folded the dumplings into little envelopes, sealing with a bit more water once they were folded. You can make any shape you like, as long as everything is well sealed:

With my dumplings done, it was time to finish my pork stock. I skimmed off any foam and fat that had risen to the top, then dropped in a knob of ginger, a halved onion, a chopped carrot and some peppercorns, and continued to simmer for another hour. I skimmed again, then strained the stock and returned it to the heat, adding dashes of soy sauce, fish sauce and rice vinegar. When it came to a gentle boil, I slipped the wontons in in batches, stirring gently and flipping them to ensure even cooking. When they were cooked through, about 8 minutes later, I scooped them out with a slotted spoon and tossed them with a little vegetable oil to prevent any sticking. I like to keep the wontons separate from the broth until I heat myself up a bowl of soup, so that they don't get soggy.
To serve, I heat the broth and dumplings up with a bit more shredded cabbage just until it's wilted, then stir in additional sesame oil and sambal oelek. Yes, it's a long process, but it results in a filling, delicious soup best tackled with a deep spoon and a pair of chopsticks:

Pork and Cabbage Wonton Soup
Serves 8 - 10
Ingredients:
- 8 - 10 cups Asian pork broth (see recipe below)
- 1 package wonton skins
- 1 1/2 lbs. ground pork
- 1 scallion, thinly sliced, white and green parts
- 1 small head Napa cabbage, finely shredded and chopped
- 1 tsp. grated ginger
- 1 tsp. toasted sesame oil
- 1/2 tsp. salt
- Water
- Vegetable oil
- Additional sesame oil, for serving
- Sambal oelek, for serving
Preparation:
1. Prepare the wonton filling: in a medium bowl, combine the pork, scallion, 1 cup shredded cabbage, ginger, sesame oil and salt. Knead to combine. Set aside.
2. Make the dumplings: dust a clean work surface (counter, table or kitchen towel) with cornstarch. Lay out the wonton skins 9 at a time, keeping the remainder under a damp paper towel. Place one teaspoon of pork filling in the center of each wonton. Dip your forefinger in a bowl of water and run water over 2 edges of dumpling wrapper. Pinch the dumplings together into a triangle shape. Press out any air pockets and ensure edges are well sealed, then pinch or fold into desired dumpling shape. Place finished dumplings on a dish and sprinkle cornstarch over to prevent sticking.
3. Bring the pork broth to a simmer and drop in the dumplings, working in batches to prevent crowding. Stir the soup gently and flip the dumplings around so they cook evenly. When cooked through, about 8 minutes, remove to a dish with a slotted spoon. Toss dumplings with a small amount of vegetable oil, to prevent sticking.
4. To serve soup, heat desired amount of broth with dumplings and a handful of shredded cabbage per person. Divide soup among bowls and serve with additional sesame oil and sambal oelek.
Asian Pork Broth
Makes 8 - 10 cups
Ingredients:
- 2 lbs. assorted pork bones, trimmed of excess fat
- 12 cups cold water
- 1 onion, peeled and cut in half
- 1 carrot, scrubbed and cut into pieces
- 1 small knob of ginger
- 1 tbsp. whole peppercorns
- 1 bay leaf
- Light soy sauce
- Fish sauce
- Rice wine vinegar
- Salt
Preparation:
1. Combine bones and water in a large, deep stock pot. Bring to a boil, then drop to a simmer. Cook, uncovered, for about 3 hours, skimming foam and fat as it rises to the top.
2. After 3 hours, add the onion, carrot, ginger, peppercorns and bay leaf. Continue to simmer for one hour.
3. Skim any remaining foam and fat and strain stock to remove bones and aromatics. Return broth to pot and season to taste with dashes of soy sauce, fish sauce, rice wine and salt.
I kid, of course. Well, not entirely. I did make wonton soup--that's what I'm here to tell you about on this sunny, mild Toulouse afternoon--and it did take a long time. But additionally, my less-than-a-year-old laptop decided to bite the dust several weeks ago, and after I sent it in to a repair center, I was left in the lurch, internet-less and unable to share my culinary creations. The cooking didn't stop--actually, I've been cooking more than ever lately--but I'll have to play some catch-up on the blog over the next few weeks.
So let's get right into that wonton soup, shall we? About 2 months ago, I posted about Paris Store, an Asian supermarket where I stocked up pantry essentials like fish sauce, sesame oil, sambal oelek and preserved vegetables. I also indulged in a few impulse purchases, such as Vietnamese nems, chewy sesame candies and a packet of wonton skins. When I got home that day, I threw the wontons into the freezer, not sure what I'd do with them, or when.
Inspiration struck about a week ago, when I was browsing the meat aisle at my local supermarket. As I've mentioned on the blog many a time,
Such was the case when I decided to make these wontons. As I said, I was eying the meat offerings at the store when I noticed two items: first, a two-pound assortment of pork bones, labeled "Bones for animals," and priced at 55 cents; and second, a package of ground pork, on sale for 50% off, making its final price a whopping 2 euros. First a big pot of rich pork stock flashed into my mind (I love making stock, and do so often during the winter), followed by a vision of plump little pork dumplings floating in it. Later that afternoon, at the open-air market, I picked up the rest of the ingredients I would need--a knob of fresh ginger, a bunch of scallions and a small head of Napa cabbage--and I got to work.
First, I trimmed the pork bones of excess fat, then chucked them into a deep soup pot that I filled with cold water, brought to a boil, and dropped to a simmer. Then, I mixed up my wonton filling, seasoning the ground pork with salt, grated ginger, and sesame oil, and mixing in finely chopped scallions and cabbage. Then, I laid out my (defrosted) wonton skins on a clean, cornstarch-dusted work surface, 9 at a time, keeping the rest soft and supple under a damp paper towel. I filled each dumpling with one teaspoon of pork filling, no more, no less. You want a plump, juicy end result, but it's essential not to over-stuff your wontons, or you'll risk them bursting apart in your soup:

Next, I dipped my forefinger in a little bowl of water, ran it over two sides of the wonton squares, then pinched the dumplings into a triangle shape, making sure to press out any air and to verify that the edges were well bound together. I attempted to make a pretty pleated dumpling but failed, so I sort of folded the dumplings into little envelopes, sealing with a bit more water once they were folded. You can make any shape you like, as long as everything is well sealed:

With my dumplings done, it was time to finish my pork stock. I skimmed off any foam and fat that had risen to the top, then dropped in a knob of ginger, a halved onion, a chopped carrot and some peppercorns, and continued to simmer for another hour. I skimmed again, then strained the stock and returned it to the heat, adding dashes of soy sauce, fish sauce and rice vinegar. When it came to a gentle boil, I slipped the wontons in in batches, stirring gently and flipping them to ensure even cooking. When they were cooked through, about 8 minutes later, I scooped them out with a slotted spoon and tossed them with a little vegetable oil to prevent any sticking. I like to keep the wontons separate from the broth until I heat myself up a bowl of soup, so that they don't get soggy.
To serve, I heat the broth and dumplings up with a bit more shredded cabbage just until it's wilted, then stir in additional sesame oil and sambal oelek. Yes, it's a long process, but it results in a filling, delicious soup best tackled with a deep spoon and a pair of chopsticks:

Pork and Cabbage Wonton Soup
Serves 8 - 10
Ingredients:
- 8 - 10 cups Asian pork broth (see recipe below)
- 1 package wonton skins
- 1 1/2 lbs. ground pork
- 1 scallion, thinly sliced, white and green parts
- 1 small head Napa cabbage, finely shredded and chopped
- 1 tsp. grated ginger
- 1 tsp. toasted sesame oil
- 1/2 tsp. salt
- Water
- Vegetable oil
- Additional sesame oil, for serving
- Sambal oelek, for serving
Preparation:
1. Prepare the wonton filling: in a medium bowl, combine the pork, scallion, 1 cup shredded cabbage, ginger, sesame oil and salt. Knead to combine. Set aside.
2. Make the dumplings: dust a clean work surface (counter, table or kitchen towel) with cornstarch. Lay out the wonton skins 9 at a time, keeping the remainder under a damp paper towel. Place one teaspoon of pork filling in the center of each wonton. Dip your forefinger in a bowl of water and run water over 2 edges of dumpling wrapper. Pinch the dumplings together into a triangle shape. Press out any air pockets and ensure edges are well sealed, then pinch or fold into desired dumpling shape. Place finished dumplings on a dish and sprinkle cornstarch over to prevent sticking.
3. Bring the pork broth to a simmer and drop in the dumplings, working in batches to prevent crowding. Stir the soup gently and flip the dumplings around so they cook evenly. When cooked through, about 8 minutes, remove to a dish with a slotted spoon. Toss dumplings with a small amount of vegetable oil, to prevent sticking.
4. To serve soup, heat desired amount of broth with dumplings and a handful of shredded cabbage per person. Divide soup among bowls and serve with additional sesame oil and sambal oelek.
Asian Pork Broth
Makes 8 - 10 cups
Ingredients:
- 2 lbs. assorted pork bones, trimmed of excess fat
- 12 cups cold water
- 1 onion, peeled and cut in half
- 1 carrot, scrubbed and cut into pieces
- 1 small knob of ginger
- 1 tbsp. whole peppercorns
- 1 bay leaf
- Light soy sauce
- Fish sauce
- Rice wine vinegar
- Salt
Preparation:
1. Combine bones and water in a large, deep stock pot. Bring to a boil, then drop to a simmer. Cook, uncovered, for about 3 hours, skimming foam and fat as it rises to the top.
2. After 3 hours, add the onion, carrot, ginger, peppercorns and bay leaf. Continue to simmer for one hour.
3. Skim any remaining foam and fat and strain stock to remove bones and aromatics. Return broth to pot and season to taste with dashes of soy sauce, fish sauce, rice wine and salt.
Sunday, January 16, 2011
The humble cabbage
One of the best things about travel, for me personally, is the culinary inspiration it brings. Over the past few months, I've been documenting my French-influenced cooking; and recently, on a trip through central Europe, I became quite enamored of the hearty, soulful, simple but tasty cuisine I encountered there. In my last post, I described how my wanderings left me with a hankerin' for lentils, but there was one other traditional ingredient I found myself craving consistently even after I returned to France, and that was cabbage.
I ate a lot of cabbage during my recent trip: stuffed, pickled, fermented, shredded raw into salad or baked inside a savory strudel, I couldn't get enough. You see, I really love cabbage. I know it has a reputation for being bland, mushy, and otherwise dull, but I've simply never found that to be the case. You might be wondering how I typically prepare cabbage. That's easy: in the summertime, I slip it into all manner of coleslaws. When cooking Asian soups and stirfrys, I often shred in some delicate, rippled Napa cabbage. And one of my favorite winter side dishes is a simple braise of red cabbage, apples and onions, seasoned with mustard, caraway or fennel seeds, and pretty darn irresistible alongside a mustardy sausage or tender pork chop. When I got back to Toulouse it felt like all I wanted to cook was cabbage, so you can imagine my delight at discovering this New York Times article, published shortly after my return. And the recipe that really caught my eye was this cabbage soup: full of hardy, widely-available green cabbage, tangy tomatoes and a sweet-and-sour flavor profile accented by lemon juice, brown sugar and golden raisins, it was almost as if the Times had me in mind when publishing the recipe. These were the exact flavors that I found in central Europe and that I so wanted to be able to recreate at home.
And the soup definitely didn't disappoint. I could tell just from its aroma while cooking that it was going to be good. In fact, the smells brought me right back to my childhood: my paternal grandmother, Laura, an excellent cook, made a rice-and-beef-stuffed cabbage, and my maternal grandmother, Georgia, still makes sweet-and-sour beef meatballs stewed in a zippy tomato sauce that are the highlight of every Thanksgiving. Standing over the stove and stirring this soup was like being in some magical, corners-of-my-memory kitchen that somehow channeled the formidable cooking prowess of both of these women into one steaming pot. And if that doesn't make you want to pick up a head of cabbage the next time you go to the store, I don't know what would.

Sweet-and-Sour Cabbage Soup
Adapted from the New York Times
Serves 8 - 10
Ingredients:
- 2 tbsp. olive oil
- 2 cloves garlic, minced
- 1 large onion, diced
- 2 carrots, peeled and sliced thinly
- 1 28-oz. can whole peeled plum tomatoes
- 1 c. tomato paste
- 1/2 c. ketchup
- 1/2 c. dark brown sugar
- 1 bay leaf
- 1/2 c. lemon juice
- 3 lbs. green cabbage, tough outer leaves, ribs and core removed, sliced into ribbons
- 1/2 c. golden or black raisins
- Salt
- Pepper
- Sour cream, for serving
- Chopped fresh dill or parsley, for serving
Preparation:
1. In a large, heavy-bottomed soup pot set over medium heat, sauté olive oil, garlic and onions along with a pinch of salt. When onions are soft and translucent, add 3 cups water, carrots, canned tomatoes, tomato paste, ketchup, brown sugar, bay leaf and another pinch of salt. Bring to a simmer and crush tomatoes lightly with a spoon. Simmer until carrots are tender, about 20 minutes. Discard bay leaf.
2. Using an immersion blender, or working in batches with a stand blender, purée soup lightly, leaving it a bit chunky. Add lemon juice, cabbage and 3 cups water. Simmer until cabbage is cooked to taste, about 1 hour for al dente cabbage or up to 2 hours for soft cabbage.
3. 10 minutes before serving, add 3 - 5 cups water to thin soup to desired consistency. Add raisins. Check soup for seasoning, adjusting if necessary. Serve with a dollop of sour cream and sprinkle with chopped herbs.
I ate a lot of cabbage during my recent trip: stuffed, pickled, fermented, shredded raw into salad or baked inside a savory strudel, I couldn't get enough. You see, I really love cabbage. I know it has a reputation for being bland, mushy, and otherwise dull, but I've simply never found that to be the case. You might be wondering how I typically prepare cabbage. That's easy: in the summertime, I slip it into all manner of coleslaws. When cooking Asian soups and stirfrys, I often shred in some delicate, rippled Napa cabbage. And one of my favorite winter side dishes is a simple braise of red cabbage, apples and onions, seasoned with mustard, caraway or fennel seeds, and pretty darn irresistible alongside a mustardy sausage or tender pork chop. When I got back to Toulouse it felt like all I wanted to cook was cabbage, so you can imagine my delight at discovering this New York Times article, published shortly after my return. And the recipe that really caught my eye was this cabbage soup: full of hardy, widely-available green cabbage, tangy tomatoes and a sweet-and-sour flavor profile accented by lemon juice, brown sugar and golden raisins, it was almost as if the Times had me in mind when publishing the recipe. These were the exact flavors that I found in central Europe and that I so wanted to be able to recreate at home.
And the soup definitely didn't disappoint. I could tell just from its aroma while cooking that it was going to be good. In fact, the smells brought me right back to my childhood: my paternal grandmother, Laura, an excellent cook, made a rice-and-beef-stuffed cabbage, and my maternal grandmother, Georgia, still makes sweet-and-sour beef meatballs stewed in a zippy tomato sauce that are the highlight of every Thanksgiving. Standing over the stove and stirring this soup was like being in some magical, corners-of-my-memory kitchen that somehow channeled the formidable cooking prowess of both of these women into one steaming pot. And if that doesn't make you want to pick up a head of cabbage the next time you go to the store, I don't know what would.

Sweet-and-Sour Cabbage Soup
Adapted from the New York Times
Serves 8 - 10
Ingredients:
- 2 tbsp. olive oil
- 2 cloves garlic, minced
- 1 large onion, diced
- 2 carrots, peeled and sliced thinly
- 1 28-oz. can whole peeled plum tomatoes
- 1 c. tomato paste
- 1/2 c. ketchup
- 1/2 c. dark brown sugar
- 1 bay leaf
- 1/2 c. lemon juice
- 3 lbs. green cabbage, tough outer leaves, ribs and core removed, sliced into ribbons
- 1/2 c. golden or black raisins
- Salt
- Pepper
- Sour cream, for serving
- Chopped fresh dill or parsley, for serving
Preparation:
1. In a large, heavy-bottomed soup pot set over medium heat, sauté olive oil, garlic and onions along with a pinch of salt. When onions are soft and translucent, add 3 cups water, carrots, canned tomatoes, tomato paste, ketchup, brown sugar, bay leaf and another pinch of salt. Bring to a simmer and crush tomatoes lightly with a spoon. Simmer until carrots are tender, about 20 minutes. Discard bay leaf.
2. Using an immersion blender, or working in batches with a stand blender, purée soup lightly, leaving it a bit chunky. Add lemon juice, cabbage and 3 cups water. Simmer until cabbage is cooked to taste, about 1 hour for al dente cabbage or up to 2 hours for soft cabbage.
3. 10 minutes before serving, add 3 - 5 cups water to thin soup to desired consistency. Add raisins. Check soup for seasoning, adjusting if necessary. Serve with a dollop of sour cream and sprinkle with chopped herbs.
Monday, January 10, 2011
Lentils for my new year
Over the Christmas holiday, I was lucky enough to be able to travel to Austria, Czech Republic and Hungary, pretty much eating my way through my wanderings. As an Ashkenazi Jew, and therefore someone with roots in this region of the world, I immediately felt a connection to the cuisine I found in these countries: warming, long-cooking dishes like goulash, stuffed cabbage and a wide variety of soups, as well as a mind-boggling array of delicious pastries, many stuffed with sweetened poppyseeds, a popular (and my favorite) filling for hamentaschen cookies, traditionally made during the Jewish holiday of Purim.
It being the end of the year, though, the one dish that you could find anywhere and that was advertised everywhere (especially on New Year's Day) was lentil soup. All over the world, it's traditional to eat legumes on the first of January: they symbolize money, and so are eaten in the hopes of assuring a financially propitious year. We Americans might be most familiar with Hoppin' John, a dish of blackeyed peas stewed with pork that's commonly consumed in the south, but all over Europe, including Italy, Germany, and the central European countries I visited, lentils are the number one New Year's Day meal.
I didn't actually eat any lentil soup in Budapest, the city where I rang in 2011, but the little green legume lodged itself in my mind, because I found myself craving it ever since I returned to Toulouse. I found the perfect occasion to prepare a lentil dish when my birthday, the 9th of January, rolled around. As anyone who follows this blog knows, on my birthday my preferred means of celebration is to fix a big, inexpensive meal and invite all my friends over. Usually the celebration is a porkfest (and, incidentally, pork is another auspicious food oft prepared for the New Year's meal). But although pork butt is cheap, my funds this year were even more limited than usual, having just returned from a vacation and all, and I set my sights on a meal that though still tasty, would cost me almost nothing. And what fits the bill for that? Why, legumes, of course. So I whipped up some hummus, an old standard of mine, and I improvised a lentil salad made with roasted red peppers and shallots. I felt it was appropriately French--they eat a lot of lentils over here, especially the little green ones which I suppose best symbolize money--and what's more, my buddies seemed to enjoy it, too:

Lentil Salad with Potatoes, Red Peppers and Shallots
Serves 8 - 10 as a side dish
Ingredients:
- 2 cups green lentils, rinsed
- 4 medium new potatoes, scrubbed and cut into a medium dice
- 1 red bell pepper
- 3 shallots, peeled and sliced into paper-thin half-moons
- 1 lemon
- Red wine vinegar
- Olive oil
- Salt
- Pepper
Preparation:
1. Preheat the oven to 400°. Rub the red pepper with a small amount of oil, place it in a small baking dish, and roast in the oven, turning occasionally, until the skin is blackened and the flesh is soft, about 20 minutes. Remove dish from oven and tent with foil.
2. Meanwhile, cook the lentils. Bring a large pot of salted water to the boil, then add the lentils. Drop to a simmer and cook lentils, stirring occasionally, until they are tender but still al dente, about 20 minutes. Drain and rinse with cold water.
3. Place the diced potatoes in a medium pot and cover with cold water. Add 1/2 tsp. salt. Bring to a boil, drop to a simmer, and cook until potatoes are cooked through but still firm, about 12 - 15 minutes. Drain.
4. When pepper is cool enough to handle, peel off the skin, open it up and discard the seeds and ribs. Slice into thin strips.
5. Combine the lentils, potatoes, red pepper and sliced shallots in a large salad bowl. Add the juice of 1 lemon. Add about 2 tbsp. red wine vinegar and about 4 tbsp. olive oil, and salt and pepper to taste. Taste the salad and adjust flavorings as necessary: it might need more vinegar, oil, salt or pepper. The salad is best if it sits for a few hours and absorbs the dressing. Before serving, taste again and adjust seasonings as necessary.

It being the end of the year, though, the one dish that you could find anywhere and that was advertised everywhere (especially on New Year's Day) was lentil soup. All over the world, it's traditional to eat legumes on the first of January: they symbolize money, and so are eaten in the hopes of assuring a financially propitious year. We Americans might be most familiar with Hoppin' John, a dish of blackeyed peas stewed with pork that's commonly consumed in the south, but all over Europe, including Italy, Germany, and the central European countries I visited, lentils are the number one New Year's Day meal.
I didn't actually eat any lentil soup in Budapest, the city where I rang in 2011, but the little green legume lodged itself in my mind, because I found myself craving it ever since I returned to Toulouse. I found the perfect occasion to prepare a lentil dish when my birthday, the 9th of January, rolled around. As anyone who follows this blog knows, on my birthday my preferred means of celebration is to fix a big, inexpensive meal and invite all my friends over. Usually the celebration is a porkfest (and, incidentally, pork is another auspicious food oft prepared for the New Year's meal). But although pork butt is cheap, my funds this year were even more limited than usual, having just returned from a vacation and all, and I set my sights on a meal that though still tasty, would cost me almost nothing. And what fits the bill for that? Why, legumes, of course. So I whipped up some hummus, an old standard of mine, and I improvised a lentil salad made with roasted red peppers and shallots. I felt it was appropriately French--they eat a lot of lentils over here, especially the little green ones which I suppose best symbolize money--and what's more, my buddies seemed to enjoy it, too:

Lentil Salad with Potatoes, Red Peppers and Shallots
Serves 8 - 10 as a side dish
Ingredients:
- 2 cups green lentils, rinsed
- 4 medium new potatoes, scrubbed and cut into a medium dice
- 1 red bell pepper
- 3 shallots, peeled and sliced into paper-thin half-moons
- 1 lemon
- Red wine vinegar
- Olive oil
- Salt
- Pepper
Preparation:
1. Preheat the oven to 400°. Rub the red pepper with a small amount of oil, place it in a small baking dish, and roast in the oven, turning occasionally, until the skin is blackened and the flesh is soft, about 20 minutes. Remove dish from oven and tent with foil.
2. Meanwhile, cook the lentils. Bring a large pot of salted water to the boil, then add the lentils. Drop to a simmer and cook lentils, stirring occasionally, until they are tender but still al dente, about 20 minutes. Drain and rinse with cold water.
3. Place the diced potatoes in a medium pot and cover with cold water. Add 1/2 tsp. salt. Bring to a boil, drop to a simmer, and cook until potatoes are cooked through but still firm, about 12 - 15 minutes. Drain.
4. When pepper is cool enough to handle, peel off the skin, open it up and discard the seeds and ribs. Slice into thin strips.
5. Combine the lentils, potatoes, red pepper and sliced shallots in a large salad bowl. Add the juice of 1 lemon. Add about 2 tbsp. red wine vinegar and about 4 tbsp. olive oil, and salt and pepper to taste. Taste the salad and adjust flavorings as necessary: it might need more vinegar, oil, salt or pepper. The salad is best if it sits for a few hours and absorbs the dressing. Before serving, taste again and adjust seasonings as necessary.

Monday, December 13, 2010
Paris Store
Upon arriving in Toulouse I was lucky enough to move into a house with an extremely well-stocked kitchen: pots, pans, dishes of all sizes, as well as a good selection of oils, herbs and spices. But there was one category that was sorely lacking, and that was the "International Foods" section. As I've chronicled on this blog, I've gotten very interested in cooking Asian food, particularly Chinese, over the past two years, and to suddenly find myself without my sesame oil, my sambal oelek, without even a bottle of soy sauce, was, to put it mildly, jarring. My number one fast, delicious go-to meal--fried rice--was suddenly out of reach. I was not pleased.
Happily, I found an ally in my roommate Ben, who's an accomplished cook and fellow admirer of spicy food (a true rarity in France). When I voiced my concerns to him he recommended we take a trip to Paris Store, a huge Asian food megamart in Mirail, the university district of Toulouse. And one cold Saturday about a week ago, that's exactly what we did.

Paris Store is similar to the many Asian supermarkets I'm familiar with from Brooklyn and Manhattan Chinatowns. It's got a great selection of meat, produce, sauces, spices, preserved and frozen items, as well as an interesting array of serving dishes and cookware. With one difference: whereas in New York these stores' prices are bargain-basement, making it a challenge for even your most indulgent shopping trips to cost you over $20, the prices at Paris Store are the same as you'd find at any normal supermarket. Not expensive, but enough to slightly reduce the omigodthisisSOcheap thrill of its U.S. counterparts.

Trust me when I tell you that I was thrilled nonetheless. This store really has everything. Need some MSG? They've got it. How about fresh durian? Or some jarred toddy palm paste, whatever that is? They've got that, too.


The expression "like a kid in a candy store" comes to mind here. As you can see, my roommates and I made out pretty well in the end:

We picked up tons of stuff, but most importantly the five condiments that I consider the most necessary to basic Asian cooking: light soy sauce, fish sauce, toasted sesame oil, rice wine, the aforementioned sambal oelek (or any other chili paste). Finally, I was reunited with my beloved ingredients, and a whole new world of flavor was opened up to me! By the time we got back from our shopping trip I was famished, and set to work on a simple stir-fry as soon as we walked in the door. I started with the basics: fresh ginger, garlic, scallions and chilis, which I always find so beautiful all lined up and waiting to be deployed to a hot pan:

These staples got fried up along with some gai lan, or Chinese broccoli, some cubed firm tofu, and the requisite lashings of several different kinds of sauces. Scooped over some freshly steamed white rice, it was the perfect bowlful. Absence makes the heart (and stomach) grow fonder, indeed.

Stir-Fried Chinese Broccoli with Tofu
Serves 2 as a main dish, 4 as a side
Ingredients:
- 1 tbsp. fresh ginger, minced
- 2 cloves garlic, minced
- 3 scallions, finely chopped (white and green parts)
- 1 fresh red chile, chopped finely (seeds and ribs removed if chile is very hot)
- 3 tbsp. vegetable oil
- 1 head of gai lan (Chinese broccoli), chopped and leaves separated from stalks
- 1/2 package of firm tofu, excess water squeezed out and chopped into cubes
- 3 tbsp. light soy sauce
- 2 tbsp. rice wine
- 2 tsp. sambal oelek or other Asian chile paste
- 2 tbsp. Chinese pickled vegetables (optional)
- 2 tsp. toasted sesame oil
Preparation:
1. Heat the vegetable oil in a wok or large deep pan set over medium-high heat.
2. Add the chopped broccoli stems, ginger, garlic, chilis and scallions and cook, stirring or tossing frequently, until broccoli stems are slightly softened, about 6 minutes.
3. Add the chile paste and pickled vegetables, if using. Fry for 2 minutes.
4. Add the chopped broccoli leaves, tofu, soy sauce, and rice wine. Cook, stirring gently, until liquid has evaporated slightly and broccoli is cooked through, about 4 more minutes. Drizzle sesame oil over. Check for seasoning. Serve over hot rice.
Happily, I found an ally in my roommate Ben, who's an accomplished cook and fellow admirer of spicy food (a true rarity in France). When I voiced my concerns to him he recommended we take a trip to Paris Store, a huge Asian food megamart in Mirail, the university district of Toulouse. And one cold Saturday about a week ago, that's exactly what we did.

Paris Store is similar to the many Asian supermarkets I'm familiar with from Brooklyn and Manhattan Chinatowns. It's got a great selection of meat, produce, sauces, spices, preserved and frozen items, as well as an interesting array of serving dishes and cookware. With one difference: whereas in New York these stores' prices are bargain-basement, making it a challenge for even your most indulgent shopping trips to cost you over $20, the prices at Paris Store are the same as you'd find at any normal supermarket. Not expensive, but enough to slightly reduce the omigodthisisSOcheap thrill of its U.S. counterparts.

Trust me when I tell you that I was thrilled nonetheless. This store really has everything. Need some MSG? They've got it. How about fresh durian? Or some jarred toddy palm paste, whatever that is? They've got that, too.


The expression "like a kid in a candy store" comes to mind here. As you can see, my roommates and I made out pretty well in the end:

We picked up tons of stuff, but most importantly the five condiments that I consider the most necessary to basic Asian cooking: light soy sauce, fish sauce, toasted sesame oil, rice wine, the aforementioned sambal oelek (or any other chili paste). Finally, I was reunited with my beloved ingredients, and a whole new world of flavor was opened up to me! By the time we got back from our shopping trip I was famished, and set to work on a simple stir-fry as soon as we walked in the door. I started with the basics: fresh ginger, garlic, scallions and chilis, which I always find so beautiful all lined up and waiting to be deployed to a hot pan:

These staples got fried up along with some gai lan, or Chinese broccoli, some cubed firm tofu, and the requisite lashings of several different kinds of sauces. Scooped over some freshly steamed white rice, it was the perfect bowlful. Absence makes the heart (and stomach) grow fonder, indeed.

Stir-Fried Chinese Broccoli with Tofu
Serves 2 as a main dish, 4 as a side
Ingredients:
- 1 tbsp. fresh ginger, minced
- 2 cloves garlic, minced
- 3 scallions, finely chopped (white and green parts)
- 1 fresh red chile, chopped finely (seeds and ribs removed if chile is very hot)
- 3 tbsp. vegetable oil
- 1 head of gai lan (Chinese broccoli), chopped and leaves separated from stalks
- 1/2 package of firm tofu, excess water squeezed out and chopped into cubes
- 3 tbsp. light soy sauce
- 2 tbsp. rice wine
- 2 tsp. sambal oelek or other Asian chile paste
- 2 tbsp. Chinese pickled vegetables (optional)
- 2 tsp. toasted sesame oil
Preparation:
1. Heat the vegetable oil in a wok or large deep pan set over medium-high heat.
2. Add the chopped broccoli stems, ginger, garlic, chilis and scallions and cook, stirring or tossing frequently, until broccoli stems are slightly softened, about 6 minutes.
3. Add the chile paste and pickled vegetables, if using. Fry for 2 minutes.
4. Add the chopped broccoli leaves, tofu, soy sauce, and rice wine. Cook, stirring gently, until liquid has evaporated slightly and broccoli is cooked through, about 4 more minutes. Drizzle sesame oil over. Check for seasoning. Serve over hot rice.
Monday, December 6, 2010
Latkes for ten
Well, folks, it's that time of year again: the holiday season is upon us. It's been chilly here in Toulouse, not one but two holiday markets have sprung up, and many of the streets in the center of town have been illuminated with strands of twinkling lights. Oh, yeah: and it snowed the other day. Only for about fifteen minutes, but still, snow is snow.
Hannukah came early this year--it started on the first of December--and as a cultural (read: food-obsessed) Jew, I felt it my duty this season not only to make latkes for myself, but to share them with my friends and roommates, many of whom had never attended a Hannukah celebration before. I'm sure anyone reading this blog knows what latkes are, so I won't take the time to explain them; I will, however, state unequivocally that they are one of my favorite foods. I find latkes incredibly festive: being a somewhat health-conscious cook and eater, it's not often I indulge myself by making fried foods, so when Hannukah rolls around and I fry up some potato pancakes, it really feels to me like a unique occasion, and a special time of year. Even setting aside for a moment the comfort that adhering to tradition brings, these things are just delicious: who doesn't like fried potatoes?

At home in New York, I usually celebrate Hannukah with my family, and that more or less means that on one of the nights my mom will fry up a large batch of latkes, usually several different varieties, in fact. Classic potato is always on the roster (and despite how good all types of latkes are, plain potato is by far my favorite), and she'll usually whip up some sweet potato latkes, too, as well as zucchini or mixed vegetables. Because I was inviting 10 people over for my Hannukah, as well as making a beef brisket, homemade applesauce and a side salad, I decided to only tackle 2 kinds of latkes this year: the classic potato, as well as a potato/beet mix, in order to pay homage to my current home country. The French love beets and you can find them everywhere (most supermarkets actually sell them precooked in vacuum-sealed packaging, which I don't really find appealing, since beets are so easy to cook anyway). And what's not to love? Beets are earthy and sweet, quite beautiful to look at, and, most importantly for me anyway, ridiculously cheap.

For me, latkes fit neatly into one of the categories of things I most like to cook, that being things that are fairly simple but also somewhat time consuming. I like cooking projects: give me a free Sunday afternoon and some good music to listen to, and there's few things I'd rather be doing. There's nothing complicated about latke-making, but it does require some elbow grease, both to grate the potatoes as well as to wring them out, in batches, in a kitchen towel (if you're lucky enough to possess a food processor with a grating attachment, as I am, the process is made infinitely easier). The number one most important thing about making latkes, no matter what type of potato you use or which recipe you follow, is that you really squeeze the living daylights out of those potatoes. The more water you get rid of (and the more starch, which will get wrung out along with the water), the crispier the latkes will fry up. And if there's anything you want your latkes to be, it's crispy.

I also tried a new technique this year that I think may have resulted in my crispiest latkes ever. Trying to get ahead a little on my prep workload yesterday, which was considerable, I grated all the potatoes early in the day and submerged them in ice cold water, then stored them in the fridge until I was ready to wring them out and add the rest of the ingredients. Soaking the potatoes gets rid of even more of the starch. It's a technique I use when making oven french fries, and it worked particularly well in this application, too.
And what did I serve the latkes with? Homemade applesauce, of course, as well as sour cream (or, in this instance, crème fraiche). As I mentioned, I also made a brisket, which I don't even want to get into here because I couldn't find the right cut of beef and the texture left something to be desired, and I also made a cooling salad of grated carrots and fennel. Alongside such a rich food like latkes, it's important to have something light to cut through the oiliness, and this salad did the trick nicely. There's three nights of Hannukah left; go ahead and try it!

Classic Potato Latkes
Serves 6
Ingredients:
- 6 medium russet (baking) potatoes, peeled
- 1 medium white or yellow onion
- 2 tbsp. all-purpose flour
- 1/2 tsp. baking powder
- 2 eggs, lightly beaten
- Salt
- Pepper
- Vegetable or canola oil, for frying
Preparation:
1. Using the medium holes of a box grater, or the grater attachment of a food processor, grate the potatoes. If making ahead, place grated potatoes in a large bowl or pot and cover with cold water; store in the fridge until ready to proceed.
2. Grate the onion on the smaller holes of a box grater, or on the grater attachment of a food processor. Using your hands, squeeze out some but not all of the excess onion juice.
3. Drain the potatoes and squeeze out some of the water using your hands. Then transfer half the potatoes to a clean kitchen towel, roll it up tightly, and squeeze out as much liquid as possible. Repeat with other half of potatoes. Transfer potatoes to a large mixing bowl and add the grated onion.
4. Add the eggs, the flour, the baking powder and a lot of salt and pepper. Mix well (hands work best for this).
5. Heat a large, heavy-bottomed skillet (ideally cast iron) over a medium flame. Add 1/2 inch of oil.
6. When oil is hot, drop about 2 tablespoons of mixture for each latke to the pan and fry, turning once. Keep oil hot but not hot enough to burn, and add more oil as needed with each subsequent batch.
7. When latkes are well-browned on both sides (about 6 minutes total), drain on layers of paper towel. If not eating immediately, transfer to a cookie sheet and keep in a warm oven. Serve latkes with sour cream and applesauce.
Potato-Beet Latkes
Serves 6
Ingredients:
- 4 medium russet (baking) potatoes, peeled
- 1 small beet, peeled
- 1 small white or yellow onion
- 2 tbsp. all-purpose flour
- 1/2 tsp. baking powder
- 2 eggs, lightly beaten
- Salt
- Pepper
- Vegetable or canola oil, for frying
Preparation:
1. Using the medium holes of a box grater, or the grater attachment of a food processor, grate the potatoes. If making ahead, place grated potatoes in a large bowl or pot and cover with cold water; store in the fridge until ready to proceed.
2. Using the medium holes of a box grater, or the grater attachment of a food processor, grate the beet. Transfer to a clean kitchen towel, roll up tightly and squeeze out as much liquid as possible. Set aside.
3. Grate the onion on the smaller holes of a box grater, or on the grater attachment of a food processor. Using your hands, squeeze out some but not all of the excess onion juice.
4. Drain the potatoes and squeeze out some of the water using your hands. Then transfer the potatoes to a clean kitchen towel, roll it up tightly, and squeeze out as much liquid as possible. Transfer potatoes to a large mixing bowl and add the grated beets and onion.
4. Add the eggs, the flour, the baking powder and a lot of salt and pepper. Mix well (hands work best for this).
5. Heat a large, heavy-bottomed skillet (ideally cast iron) over a medium flame. Add 1/2 inch of oil.
6. When oil is hot, drop about 2 tablespoons of mixture for each latke to the pan and fry, turning once. Keep oil hot but not hot enough to burn, and add more oil as needed with each subsequent batch.
7. When latkes are well-browned on both sides (about 6 minutes total), drain on layers of paper towel. If not eating immediately, transfer to a cookie sheet and keep in a warm oven. Serve latkes with sour cream and applesauce.
Carrot and Fennel Slaw with Cumin-Honey Dressing
Serves 6

Ingredients:
- 4 large carrots, peeled
- 1 large bulb of fennel, trimmed and core removed
- 3 tbsp. olive oil
- Juice of 1 lemon
- 2 tbsp. honey
- 1 tsp. ground cumin
- Salt
- Pepper
- 3 tbsp. chopped fresh parsley or chopped fresh cilantro
Preparation:
1. Using the medium holes of a box grater, or the grater attachment of a food processor, grate the carrots and the fennel. Transfer to a clean kitchen towel, roll it up tightly, and squeeze out as much liquid as possible. Transfer to a large serving bowl.
2. Place dressing ingredients in a jar, screw on the top and shake vigorously. Check for seasoning. Dress slaw, tossing lightly. If possible make 1 hour in advance and keep in fridge until ready to serve.
3. Garnish slaw with chopped parsley or cilantro and serve.
Homemade Applesauce
Makes about 2 cups
Ingredients:
- 6 medium apples of any variety, peeled and cut into a small dice
- 2 tbsp. sugar
- 1/2 tsp. ground cinnamon
- 1 small segment of fresh lemon peel
- Water
Preparation:
1. Place the apples, sugar, cinnamon, and lemon peel in a small heavy-bottomed saucepan. Add about 3 tbsp. of water and stir.
2. Cook slowly over medium-low heat, stirring occasionally and adding more water as needed. Cook until apples are soft and broken down, about 20 minutes. If you want a smoother texture, you can break up the apples with the back of a spoon or purée briefly in a food processor.
Hannukah came early this year--it started on the first of December--and as a cultural (read: food-obsessed) Jew, I felt it my duty this season not only to make latkes for myself, but to share them with my friends and roommates, many of whom had never attended a Hannukah celebration before. I'm sure anyone reading this blog knows what latkes are, so I won't take the time to explain them; I will, however, state unequivocally that they are one of my favorite foods. I find latkes incredibly festive: being a somewhat health-conscious cook and eater, it's not often I indulge myself by making fried foods, so when Hannukah rolls around and I fry up some potato pancakes, it really feels to me like a unique occasion, and a special time of year. Even setting aside for a moment the comfort that adhering to tradition brings, these things are just delicious: who doesn't like fried potatoes?

At home in New York, I usually celebrate Hannukah with my family, and that more or less means that on one of the nights my mom will fry up a large batch of latkes, usually several different varieties, in fact. Classic potato is always on the roster (and despite how good all types of latkes are, plain potato is by far my favorite), and she'll usually whip up some sweet potato latkes, too, as well as zucchini or mixed vegetables. Because I was inviting 10 people over for my Hannukah, as well as making a beef brisket, homemade applesauce and a side salad, I decided to only tackle 2 kinds of latkes this year: the classic potato, as well as a potato/beet mix, in order to pay homage to my current home country. The French love beets and you can find them everywhere (most supermarkets actually sell them precooked in vacuum-sealed packaging, which I don't really find appealing, since beets are so easy to cook anyway). And what's not to love? Beets are earthy and sweet, quite beautiful to look at, and, most importantly for me anyway, ridiculously cheap.

For me, latkes fit neatly into one of the categories of things I most like to cook, that being things that are fairly simple but also somewhat time consuming. I like cooking projects: give me a free Sunday afternoon and some good music to listen to, and there's few things I'd rather be doing. There's nothing complicated about latke-making, but it does require some elbow grease, both to grate the potatoes as well as to wring them out, in batches, in a kitchen towel (if you're lucky enough to possess a food processor with a grating attachment, as I am, the process is made infinitely easier). The number one most important thing about making latkes, no matter what type of potato you use or which recipe you follow, is that you really squeeze the living daylights out of those potatoes. The more water you get rid of (and the more starch, which will get wrung out along with the water), the crispier the latkes will fry up. And if there's anything you want your latkes to be, it's crispy.

I also tried a new technique this year that I think may have resulted in my crispiest latkes ever. Trying to get ahead a little on my prep workload yesterday, which was considerable, I grated all the potatoes early in the day and submerged them in ice cold water, then stored them in the fridge until I was ready to wring them out and add the rest of the ingredients. Soaking the potatoes gets rid of even more of the starch. It's a technique I use when making oven french fries, and it worked particularly well in this application, too.
And what did I serve the latkes with? Homemade applesauce, of course, as well as sour cream (or, in this instance, crème fraiche). As I mentioned, I also made a brisket, which I don't even want to get into here because I couldn't find the right cut of beef and the texture left something to be desired, and I also made a cooling salad of grated carrots and fennel. Alongside such a rich food like latkes, it's important to have something light to cut through the oiliness, and this salad did the trick nicely. There's three nights of Hannukah left; go ahead and try it!

Classic Potato Latkes
Serves 6
Ingredients:
- 6 medium russet (baking) potatoes, peeled
- 1 medium white or yellow onion
- 2 tbsp. all-purpose flour
- 1/2 tsp. baking powder
- 2 eggs, lightly beaten
- Salt
- Pepper
- Vegetable or canola oil, for frying
Preparation:
1. Using the medium holes of a box grater, or the grater attachment of a food processor, grate the potatoes. If making ahead, place grated potatoes in a large bowl or pot and cover with cold water; store in the fridge until ready to proceed.
2. Grate the onion on the smaller holes of a box grater, or on the grater attachment of a food processor. Using your hands, squeeze out some but not all of the excess onion juice.
3. Drain the potatoes and squeeze out some of the water using your hands. Then transfer half the potatoes to a clean kitchen towel, roll it up tightly, and squeeze out as much liquid as possible. Repeat with other half of potatoes. Transfer potatoes to a large mixing bowl and add the grated onion.
4. Add the eggs, the flour, the baking powder and a lot of salt and pepper. Mix well (hands work best for this).
5. Heat a large, heavy-bottomed skillet (ideally cast iron) over a medium flame. Add 1/2 inch of oil.
6. When oil is hot, drop about 2 tablespoons of mixture for each latke to the pan and fry, turning once. Keep oil hot but not hot enough to burn, and add more oil as needed with each subsequent batch.
7. When latkes are well-browned on both sides (about 6 minutes total), drain on layers of paper towel. If not eating immediately, transfer to a cookie sheet and keep in a warm oven. Serve latkes with sour cream and applesauce.
Potato-Beet Latkes
Serves 6
Ingredients:
- 4 medium russet (baking) potatoes, peeled
- 1 small beet, peeled
- 1 small white or yellow onion
- 2 tbsp. all-purpose flour
- 1/2 tsp. baking powder
- 2 eggs, lightly beaten
- Salt
- Pepper
- Vegetable or canola oil, for frying
Preparation:
1. Using the medium holes of a box grater, or the grater attachment of a food processor, grate the potatoes. If making ahead, place grated potatoes in a large bowl or pot and cover with cold water; store in the fridge until ready to proceed.
2. Using the medium holes of a box grater, or the grater attachment of a food processor, grate the beet. Transfer to a clean kitchen towel, roll up tightly and squeeze out as much liquid as possible. Set aside.
3. Grate the onion on the smaller holes of a box grater, or on the grater attachment of a food processor. Using your hands, squeeze out some but not all of the excess onion juice.
4. Drain the potatoes and squeeze out some of the water using your hands. Then transfer the potatoes to a clean kitchen towel, roll it up tightly, and squeeze out as much liquid as possible. Transfer potatoes to a large mixing bowl and add the grated beets and onion.
4. Add the eggs, the flour, the baking powder and a lot of salt and pepper. Mix well (hands work best for this).
5. Heat a large, heavy-bottomed skillet (ideally cast iron) over a medium flame. Add 1/2 inch of oil.
6. When oil is hot, drop about 2 tablespoons of mixture for each latke to the pan and fry, turning once. Keep oil hot but not hot enough to burn, and add more oil as needed with each subsequent batch.
7. When latkes are well-browned on both sides (about 6 minutes total), drain on layers of paper towel. If not eating immediately, transfer to a cookie sheet and keep in a warm oven. Serve latkes with sour cream and applesauce.
Carrot and Fennel Slaw with Cumin-Honey Dressing
Serves 6

Ingredients:
- 4 large carrots, peeled
- 1 large bulb of fennel, trimmed and core removed
- 3 tbsp. olive oil
- Juice of 1 lemon
- 2 tbsp. honey
- 1 tsp. ground cumin
- Salt
- Pepper
- 3 tbsp. chopped fresh parsley or chopped fresh cilantro
Preparation:
1. Using the medium holes of a box grater, or the grater attachment of a food processor, grate the carrots and the fennel. Transfer to a clean kitchen towel, roll it up tightly, and squeeze out as much liquid as possible. Transfer to a large serving bowl.
2. Place dressing ingredients in a jar, screw on the top and shake vigorously. Check for seasoning. Dress slaw, tossing lightly. If possible make 1 hour in advance and keep in fridge until ready to serve.
3. Garnish slaw with chopped parsley or cilantro and serve.
Homemade Applesauce
Makes about 2 cups
Ingredients:
- 6 medium apples of any variety, peeled and cut into a small dice
- 2 tbsp. sugar
- 1/2 tsp. ground cinnamon
- 1 small segment of fresh lemon peel
- Water
Preparation:
1. Place the apples, sugar, cinnamon, and lemon peel in a small heavy-bottomed saucepan. Add about 3 tbsp. of water and stir.
2. Cook slowly over medium-low heat, stirring occasionally and adding more water as needed. Cook until apples are soft and broken down, about 20 minutes. If you want a smoother texture, you can break up the apples with the back of a spoon or purée briefly in a food processor.
Sunday, November 28, 2010
(Expat) Thanksgiving leftovers
The most beloved of all American holidays has come and gone, and after so much planning, too. As I mentioned in my last post, I've got quite a few American friends here in Toulouse, and together we starting mapping out Thanksgiving almost as soon as we met, back at the beginning of October. Of all holidays, there's something particularly jarring about being out of the country over Thanksgiving. It's just so very American, obviously, centering on our (in)glorious beginnings as a nation; it almost doesn't translate, holding Thanksgiving in another country, and as bountiful and delicious as our expat Thanksgiving was, it just wasn't the same. And, of course, Thanksgiving is all about family; with all of us being so far away from ours, we instinctively banded together, eager to share our own family recipes so that we wouldn't have to go even one year without our grandma's stuffing, or our aunt's green beans.
I hosted Thanksgiving here at my house, and decided to tackle the bookends of the meal: the turkey, to start with, and pumpkin and sweet potato pies at the end (it was a potluck, and everyone who came contributed side dishes). Unfortunately, none of those recipes was a family one. But I decided to pay homage to my grandma Georgia, this year, with the Thanksgiving leftovers. My grandma hosts a feast of a Thanksgiving at her home in Pittsburgh every year: among an all-star lineup of dishes, my favorites have to be her sweet and sour meatballs, and her pumpkin pie. But another favorite of mine is one that slips under the radar: her day-after, turkey barley soup. She makes it with the stripped turkey carcass, of course, adding root vegetables and nutty barley to the mix, and it's the perfect after-Thanksgiving food: warm, hearty, and nourishing without being heavy, it's a welcome change from the rich, starch-heavy favorites of the Thanksgiving table. This was the first Thanksgiving of my whole life that I didn't spend with my grandma (and the rest of my family), but I figured I could bring her into my home here by making her soup.
Well, my own take on it, that is. I actually couldn't remember what all my grandma puts in her soup, but I knew that its two principal characters are turkey and barley. I had both of those things. I also happen to love mushroom barley soup, so I decided to add mushrooms to my recipe. Given that I succumbed to a nasty cold just yesterday, it was almost as if the soupmaking stars aligned.
I started by making the broth: when I woke up yesterday, I plopped the turkey carcass in a huge pot, added lots of cold water, and simmered that baby away for, say, 4 hours or so. Then I turned off the heat, skimmed the fat and foam off the top, strained out all the bones and bits, added some salt, and my broth was done.

Next, I set to work chopping up some tasty vegetables: leeks, carrots and mushrooms. I sautéed them in butter in a big heavy pot, adding some thyme for flavor and some flour for thickening. Then I slowly poured in the broth, and let the mixture simmer as I moved on to my next task.

I believe I've written about this on the site before, but I reiterate that soup is one of my favorite things to cook, period. It's a slow, relaxing process, building layers of flavor but never demanding very much effort or technique. And best of all, it feels so economical. That's what I was thinking about as I sifted through the soft, broken-down bones of the turkey carcass, pulling away the last remaining bits of meat and discarding the skin and fat. This turkey had already fed 15 or 16 people, with plenty of meat to spare, and there was still almost a cup's worth of flesh clinging to the bones. I felt like I was really doing justice to the bird, using every conceivable scrap it had to offer.
When the vegetables in the soup were tender, I stirred in the remaining turkey meat to heat it through, then ladled a steaming cupful into my barley-filled bowl (I cook and keep my barley on the side, stirring it in portion by portion, so that it doesn't get soggy in the soup). I don't know if my grandma would make this soup like I did--if anything, she would probably simplify it by dumping all the other ingredients right in there with the turkey carcass--but the flavors were almost exactly the same as the ones in her version, and they were powerful enough to transport me all the way to Pittsburgh, Pennsylvania.

Turkey Mushroom Barley Soup
Serves 12
Ingredients:
- 1 turkey carcass, or 2 turkey legs
- 2 leeks, white and light green parts only, sliced into half-moons and rinsed of any grit
- 2 carrots, peeled and cut into a medium dice
- 1 lb. white or brown button mushrooms, sliced
- 3 tbsp. butter
- 1 tsp. dried thyme
- 2 tsp. flour
- 1 cup barley, rinsed and cooked in boiling salted water until tender
- Salt and pepper to taste
- Chopped parsley, for serving
Preparation:
1. Place turkey carcass or turkey legs into a large stock pot and add 8 - 1o cups of cold water. Place over medium heat, bring to a boil, then drop to a simmer. Simmer, partially covered, for 3 to 4 hours.
2. Turn off heat and skim any foam, fat or impurities off the surface of the stock. Strain stock through a fine colander to remove all bones and grit. Set bones aside.
3. In another large, heavy-bottomed pot set over medium heat, sauté the vegetables in the butter until softened, about 8 - 10 minutes. Add the thyme and the flour and cook, stirring, for 5 more minutes.
4. Slowly pour in the stock, stirring to combine. Bring soup to a simmer and cook, uncovered, until vegetables are tender, about 20 minutes.
5. As soup cooks, remove all edible turkey meat from bones, discarding everything else. When vegetables are tender, add turkey meat to soup to heat through. Check soup for seasoning.
6. To serve, place a small amount of cooked barley in each bowl and ladle hot soup over it. Garnish with parsley.
I hosted Thanksgiving here at my house, and decided to tackle the bookends of the meal: the turkey, to start with, and pumpkin and sweet potato pies at the end (it was a potluck, and everyone who came contributed side dishes). Unfortunately, none of those recipes was a family one. But I decided to pay homage to my grandma Georgia, this year, with the Thanksgiving leftovers. My grandma hosts a feast of a Thanksgiving at her home in Pittsburgh every year: among an all-star lineup of dishes, my favorites have to be her sweet and sour meatballs, and her pumpkin pie. But another favorite of mine is one that slips under the radar: her day-after, turkey barley soup. She makes it with the stripped turkey carcass, of course, adding root vegetables and nutty barley to the mix, and it's the perfect after-Thanksgiving food: warm, hearty, and nourishing without being heavy, it's a welcome change from the rich, starch-heavy favorites of the Thanksgiving table. This was the first Thanksgiving of my whole life that I didn't spend with my grandma (and the rest of my family), but I figured I could bring her into my home here by making her soup.
Well, my own take on it, that is. I actually couldn't remember what all my grandma puts in her soup, but I knew that its two principal characters are turkey and barley. I had both of those things. I also happen to love mushroom barley soup, so I decided to add mushrooms to my recipe. Given that I succumbed to a nasty cold just yesterday, it was almost as if the soupmaking stars aligned.
I started by making the broth: when I woke up yesterday, I plopped the turkey carcass in a huge pot, added lots of cold water, and simmered that baby away for, say, 4 hours or so. Then I turned off the heat, skimmed the fat and foam off the top, strained out all the bones and bits, added some salt, and my broth was done.
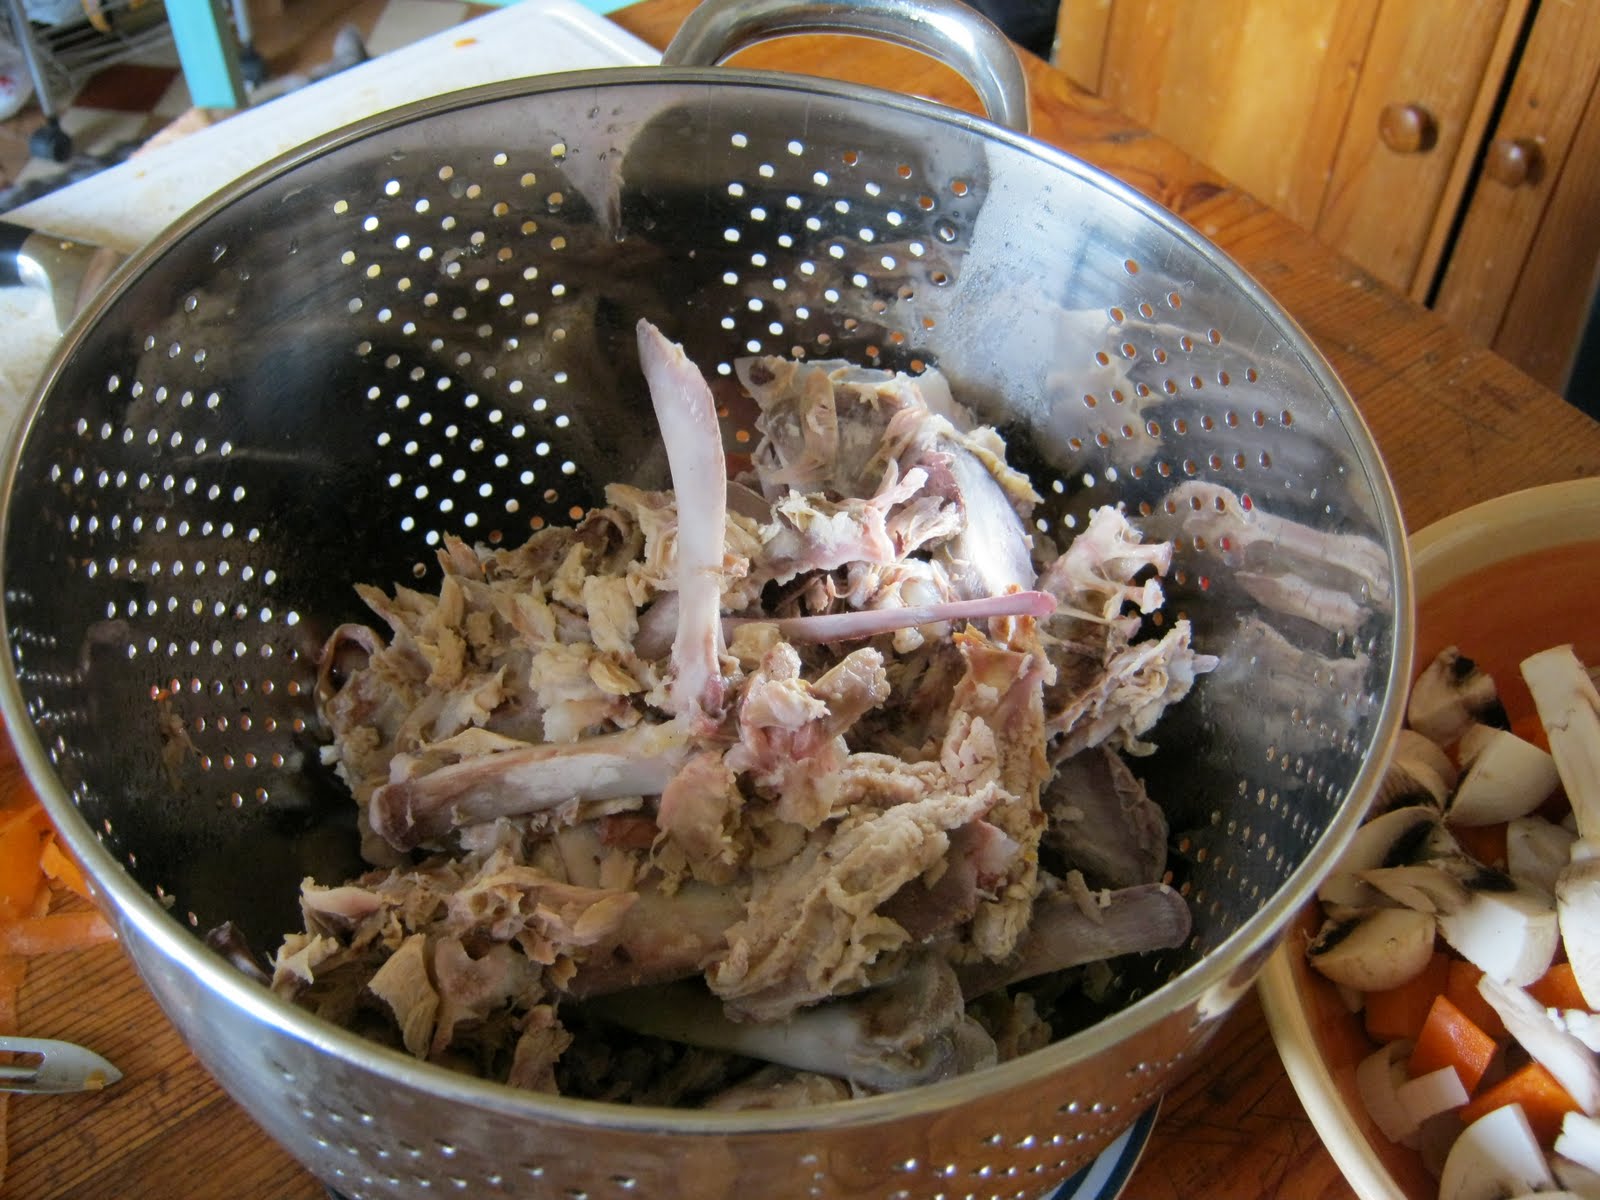
Next, I set to work chopping up some tasty vegetables: leeks, carrots and mushrooms. I sautéed them in butter in a big heavy pot, adding some thyme for flavor and some flour for thickening. Then I slowly poured in the broth, and let the mixture simmer as I moved on to my next task.

I believe I've written about this on the site before, but I reiterate that soup is one of my favorite things to cook, period. It's a slow, relaxing process, building layers of flavor but never demanding very much effort or technique. And best of all, it feels so economical. That's what I was thinking about as I sifted through the soft, broken-down bones of the turkey carcass, pulling away the last remaining bits of meat and discarding the skin and fat. This turkey had already fed 15 or 16 people, with plenty of meat to spare, and there was still almost a cup's worth of flesh clinging to the bones. I felt like I was really doing justice to the bird, using every conceivable scrap it had to offer.
When the vegetables in the soup were tender, I stirred in the remaining turkey meat to heat it through, then ladled a steaming cupful into my barley-filled bowl (I cook and keep my barley on the side, stirring it in portion by portion, so that it doesn't get soggy in the soup). I don't know if my grandma would make this soup like I did--if anything, she would probably simplify it by dumping all the other ingredients right in there with the turkey carcass--but the flavors were almost exactly the same as the ones in her version, and they were powerful enough to transport me all the way to Pittsburgh, Pennsylvania.

Turkey Mushroom Barley Soup
Serves 12
Ingredients:
- 1 turkey carcass, or 2 turkey legs
- 2 leeks, white and light green parts only, sliced into half-moons and rinsed of any grit
- 2 carrots, peeled and cut into a medium dice
- 1 lb. white or brown button mushrooms, sliced
- 3 tbsp. butter
- 1 tsp. dried thyme
- 2 tsp. flour
- 1 cup barley, rinsed and cooked in boiling salted water until tender
- Salt and pepper to taste
- Chopped parsley, for serving
Preparation:
1. Place turkey carcass or turkey legs into a large stock pot and add 8 - 1o cups of cold water. Place over medium heat, bring to a boil, then drop to a simmer. Simmer, partially covered, for 3 to 4 hours.
2. Turn off heat and skim any foam, fat or impurities off the surface of the stock. Strain stock through a fine colander to remove all bones and grit. Set bones aside.
3. In another large, heavy-bottomed pot set over medium heat, sauté the vegetables in the butter until softened, about 8 - 10 minutes. Add the thyme and the flour and cook, stirring, for 5 more minutes.
4. Slowly pour in the stock, stirring to combine. Bring soup to a simmer and cook, uncovered, until vegetables are tender, about 20 minutes.
5. As soup cooks, remove all edible turkey meat from bones, discarding everything else. When vegetables are tender, add turkey meat to soup to heat through. Check soup for seasoning.
6. To serve, place a small amount of cooked barley in each bowl and ladle hot soup over it. Garnish with parsley.
Saturday, November 20, 2010
Dinner club: Part I
One of the nice things about the program I'm doing in Toulouse is that there's a large community of American assistants in the city. Coming here, finding French roommates and practicing my French was my number one priority, and I'm thankful that I was able to achieve that, but even so, I appreciate having people to take an (English-speaking) break with. Even in a first world, western country like France, which on the surface might seem very similar to the United States, cultural differences--some subtle, others not so--abound. It's important to have friends from a similar background with whom you can discuss, critique, and--let's be honest here--sometimes playfully make fun of those differences.
Towards the beginning of my stay, when I was meeting other assistants at various "mixers," one thing I often found myself talking about was--big surprise--food. Like myself, many others cited an interest in good food as one of the primary motivators for their move abroad. After sharing some less formalized meals together, my friend Bonnie and I decided to organize a dinner club, so that our friends who like to cook could come together more often to share recipes and ideas. So far, we've been meeting twice a week: on Meaty Mondays, that week's host makes a dish with meat, and the attendees bring wine or dessert. On Thursdays, the cook makes something vegetarian. The next week, two different people cook on Monday and Thursday, and the next week two other people, and so on and so forth. It's a nice break in the daily routine, where we can come together, speak English and talk about our jobs over some good food.
Last Monday marked the initial meeting of the club, and I hosted. As I mentioned, I would be making a meat-based dish, and because I would be cooking for 7 people, I wanted to select something budget-friendly. Sadly, that usually means chicken, and since I'm often bored by chicken, I wanted to see if I could find something a little more exciting. Luckily, my local Casino supermarket features a weekly meat sale in a refrigerated case near the front of the store. Each week, they load it up with meat that's about to (but hasn't yet) passed its expiration date, at bargain prices. It's a fun way to be inspired: pick up some meat that's dirt cheap, and let that main ingredient dictate what else you'll buy and cook.
For Monday's dinner, I was lucky enough to find some rich, meaty duck legs on sale. I picked up four large ones, and the total came to less than 8 euro! Duck legs need long, slow cooking, both to render the enormous amounts of fat that they come enrobed in, and also to tenderize the somewhat tough meat. I decided to make a slow-simmered ragù, with shredded duck meat and a simple base of carrots, onions and tomatoes.
I started off by slowly searing the duck legs over a low flame, without any seasoning, in order to render most of their fat. And don't throw that duck fat away! For cooking, it's liquid gold: use it to sauté vegetables, use it to make warm salad dressings, and definitely, definitely use it to roast potatoes: their flavor and richness is, well, indescribably good. (To keep rendered duck fat, strain it into a clean container, cover, and refrigerate indefinitely.)

Once I had rendered the majority of the fat off the duck legs, I removed them to a plate to cool, then I used a small sharp knife to cut off some of the pockets of fat that remained. I sautéed garlic, onions, and carrots, along with a bit of dried thyme, in a heavy pan, then added crushed canned tomatoes and red wine once they had softened. I slipped the duck legs back into the pan, covered it, and simmered away for about 3 hours. Then I took the duck legs back out, chilled them down rapidly in the fridge, pulled away and discarded all the remaining skin and fat, and shredded the meat into bite-sized pieces that I deposited back into the sauce. A little before my guests were due to arrive, I turned the heat under the pan back on, and further reduced and heated the sauce for about a half hour. Finally, I ladled the sauce over some al dente egg noodles, garnished it with shards of parmesan and chopped parsley, and ate. A 30-minute meal this was not, but it was well worth it in the end.

Slow-Cooked Duck Ragù
Serves 8 - 10
Ingredients:
- 4 whole duck legs (both thigh and drumstick)
- 1 tbsp. olive oil
- 2 large onions, cut into a small dice
- 2 large carrots, peeled and cut into a large dice
- 4 cloves garlic, finely chopped
- 1 tsp. dried thyme
- 1 28-oz. can whole peeled tomatoes, crushed by hand
- 1/2 bottle dry red wine
- Salt and pepper to taste
- Grated or shaved parmesan cheese, for serving
- Chopped parsley, for serving
- 1 1/2 lbs. egg noodles, cooked, for serving
Preparation:
1. Arrange the duck legs in a large, deep, heavy-bottomed pan and place over low-medium heat. Cook for 20 - 30 minutes, turning the duck pieces occasionally, until they have rendered the majority of their fat. Strain the fat into a jar for later use. Set duck aside to cool. When cool, use a small sharp knife to cut away any large pockets of fat.
2. Drain off all but 1 tbsp. of duck fat from the pan and add 1 tbsp. olive oil. Sauté the onions, carrots and garlic over medium heat until softened. Add the red wine and bring to a boil, using a wooden spoon to scrape any bits from the bottom of the pan. Add the canned tomatoes and some salt and lower sauce to a simmer. Put the duck back in the pan, cover, and simmer for 3 hours.
3. Remove the duck legs from the sauce and cool them on a plate in the refrigerator. When cool, remove all remaining skin and fat from the duck and discard. Using your hands, remove the duck meat from the bone and shred into bite-size pieces. Stir the duck back into the sauce.
4. Place the whole pot in the fridge and cool for at least 2 hours or as long as overnight. The excess fat will rise to the surface; skim it off and discard.
5. 30 minutes before eating, turn the heat back on and simmer sauce. Check for seasoning. Serve over egg noodles, garnished with parmesan and parsley.
Towards the beginning of my stay, when I was meeting other assistants at various "mixers," one thing I often found myself talking about was--big surprise--food. Like myself, many others cited an interest in good food as one of the primary motivators for their move abroad. After sharing some less formalized meals together, my friend Bonnie and I decided to organize a dinner club, so that our friends who like to cook could come together more often to share recipes and ideas. So far, we've been meeting twice a week: on Meaty Mondays, that week's host makes a dish with meat, and the attendees bring wine or dessert. On Thursdays, the cook makes something vegetarian. The next week, two different people cook on Monday and Thursday, and the next week two other people, and so on and so forth. It's a nice break in the daily routine, where we can come together, speak English and talk about our jobs over some good food.
Last Monday marked the initial meeting of the club, and I hosted. As I mentioned, I would be making a meat-based dish, and because I would be cooking for 7 people, I wanted to select something budget-friendly. Sadly, that usually means chicken, and since I'm often bored by chicken, I wanted to see if I could find something a little more exciting. Luckily, my local Casino supermarket features a weekly meat sale in a refrigerated case near the front of the store. Each week, they load it up with meat that's about to (but hasn't yet) passed its expiration date, at bargain prices. It's a fun way to be inspired: pick up some meat that's dirt cheap, and let that main ingredient dictate what else you'll buy and cook.
For Monday's dinner, I was lucky enough to find some rich, meaty duck legs on sale. I picked up four large ones, and the total came to less than 8 euro! Duck legs need long, slow cooking, both to render the enormous amounts of fat that they come enrobed in, and also to tenderize the somewhat tough meat. I decided to make a slow-simmered ragù, with shredded duck meat and a simple base of carrots, onions and tomatoes.
I started off by slowly searing the duck legs over a low flame, without any seasoning, in order to render most of their fat. And don't throw that duck fat away! For cooking, it's liquid gold: use it to sauté vegetables, use it to make warm salad dressings, and definitely, definitely use it to roast potatoes: their flavor and richness is, well, indescribably good. (To keep rendered duck fat, strain it into a clean container, cover, and refrigerate indefinitely.)

Once I had rendered the majority of the fat off the duck legs, I removed them to a plate to cool, then I used a small sharp knife to cut off some of the pockets of fat that remained. I sautéed garlic, onions, and carrots, along with a bit of dried thyme, in a heavy pan, then added crushed canned tomatoes and red wine once they had softened. I slipped the duck legs back into the pan, covered it, and simmered away for about 3 hours. Then I took the duck legs back out, chilled them down rapidly in the fridge, pulled away and discarded all the remaining skin and fat, and shredded the meat into bite-sized pieces that I deposited back into the sauce. A little before my guests were due to arrive, I turned the heat under the pan back on, and further reduced and heated the sauce for about a half hour. Finally, I ladled the sauce over some al dente egg noodles, garnished it with shards of parmesan and chopped parsley, and ate. A 30-minute meal this was not, but it was well worth it in the end.
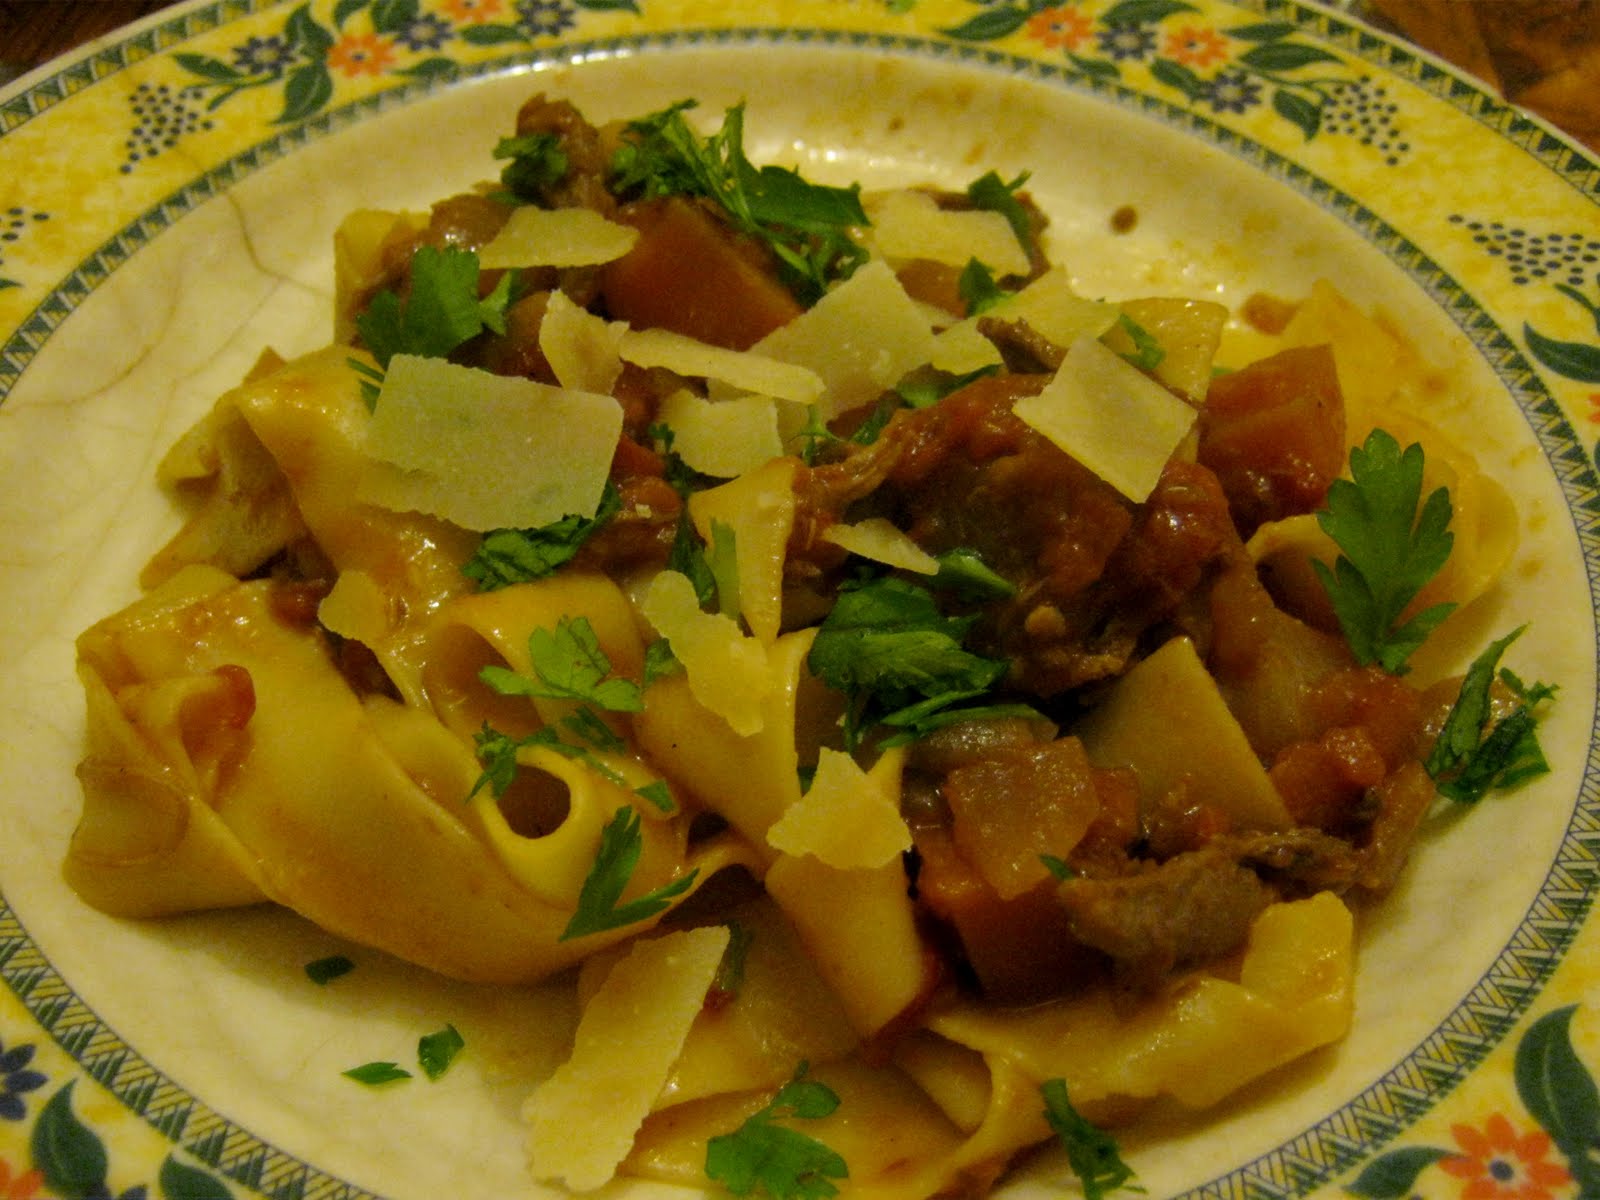
Slow-Cooked Duck Ragù
Serves 8 - 10
Ingredients:
- 4 whole duck legs (both thigh and drumstick)
- 1 tbsp. olive oil
- 2 large onions, cut into a small dice
- 2 large carrots, peeled and cut into a large dice
- 4 cloves garlic, finely chopped
- 1 tsp. dried thyme
- 1 28-oz. can whole peeled tomatoes, crushed by hand
- 1/2 bottle dry red wine
- Salt and pepper to taste
- Grated or shaved parmesan cheese, for serving
- Chopped parsley, for serving
- 1 1/2 lbs. egg noodles, cooked, for serving
Preparation:
1. Arrange the duck legs in a large, deep, heavy-bottomed pan and place over low-medium heat. Cook for 20 - 30 minutes, turning the duck pieces occasionally, until they have rendered the majority of their fat. Strain the fat into a jar for later use. Set duck aside to cool. When cool, use a small sharp knife to cut away any large pockets of fat.
2. Drain off all but 1 tbsp. of duck fat from the pan and add 1 tbsp. olive oil. Sauté the onions, carrots and garlic over medium heat until softened. Add the red wine and bring to a boil, using a wooden spoon to scrape any bits from the bottom of the pan. Add the canned tomatoes and some salt and lower sauce to a simmer. Put the duck back in the pan, cover, and simmer for 3 hours.
3. Remove the duck legs from the sauce and cool them on a plate in the refrigerator. When cool, remove all remaining skin and fat from the duck and discard. Using your hands, remove the duck meat from the bone and shred into bite-size pieces. Stir the duck back into the sauce.
4. Place the whole pot in the fridge and cool for at least 2 hours or as long as overnight. The excess fat will rise to the surface; skim it off and discard.
5. 30 minutes before eating, turn the heat back on and simmer sauce. Check for seasoning. Serve over egg noodles, garnished with parmesan and parsley.
Subscribe to:
Posts (Atom)