Showing posts with label dinner. Show all posts

Sunday, April 22, 2012

A mutt of a dish

Last week my friends Willy and Clemmy came over for an impromptu weeknight dinner. In deciding what to make, I established two things: one, that I hadn't cooked anything Mexican in a while, so that'd be the direction I'd take, and two, that I wanted to spend as little money as possible. A look in the fridge revealed a dire lack of produce, but in the freezer I found a stack of corn tortillas, as well as a small container of chipotles en adobo. Those items would help things along. As I've mentioned many a time on the blog, my eating habits have changed a bit over the past few years, as I've become more interested in local, organic food: notably, I've been eating a lot less meat, and when it comes to cooking at home, I almost always prepare vegetarian dishes. When you have access to beautiful, fresh produce, it's easy to make a meal that's so flavorful that it simply doesn't need meat. Cooking almost exclusively with vegetables also keeps those grocery bills down, something that—as a perpetual unpaid intern living in New York City—is always at the forefront of my mind. So once I settled on Mexican with tortillas and chipotles, I started to think of what kind of meatless dish I could make, and that's when it came to me: chilaquiles. I hadn't eaten them in a long, long time, so they sounded good, and though they wouldn't be super quick to prepare, it would be a relatively easy process.

I'm no expert on what comprises traditional chilaquiles, but the versions I've eaten in New York tend to be made with crisp-fried corn tortillas or tortilla chips, blanketed with green or red salsa, layered with shredded meat, and finished off with a generous amount of melted cheese. Sometimes the chips remain crisp; sometimes they're soggy. I like both ways. What I came up with was a riff on these dishes, by no means the same in preparation but pretty similar in terms of flavor. In the interest of cutting down on prep time as well as keeping the end result a lot healthier, I decided not to fry my tortillas, but rather to crisp them up in a warm oven, then crumble them into manageable pieces before layering them in a baking dish with some homemade red salsa, shredded Jack cheese, and a mix of vegetables: a sort of Mexican lasagna, if you will.


First things first: the salsa roja. I made a simple one by roasting together some tomatoes, jalapeños, and onions, then blending them up in the food processor, along with the liquid they lot off in cooking as well as some chipotles en adobo and red wine vinegar.


I settled on a combination of sweet potatoes, black beans and green onions as my filling. I roasted up the sweet potatoes in the oven as I cooked the tomato mixture; the beans were just rinsed canned beans (soaked and cooked dried beans would be even better, if you have those on hand). To build the "lasagna," I started with a layer of salsa in the bottom of a glass baking dish, then a layer of the broken-up tortillas, then a scattering of vegetables:


That got covered in some more salsa, then a generous amount of shredded cheese. Then I started over again: tortillas, salsa, veggies, and cheese, until I ran out of ingredients: I got 3 layers in there, with the top one being just tortillas and cheese. That all got baked in the oven, wrapped in a protective layer of foil, until things were nice and hot and bubbly, when I removed the foil to brown the cheese to a burnished finish:


After a brief rest to allow everything to settle, I cut that bad boy up into generous pieces. My friends and I ate them topped with sour cream, sliced avocados, chopped cilantro, and a squeeze of fresh lime:


Mexican Chilaquiles with Sweet Potatoes and Black Beans
Serves 6 - 8

2 large or 3 medium tomatoes, cut into large pieces
1 large onion, cut into quarters
2 jalapeños, stem removed, cut in half lengthwise
About 2 tbsp. vegetable oil, divided
Salt
Pepper
1 tbsp. chipotles en adobo (both peppers and sauce)
1 tbsp. red wine vinegar
1 package corn tortillas
1 large or two medium sweet potatoes, rinsed and cut into a small dice
2 15.5 oz cans black beans, rinsed and drained
3 - 4 green onions, white and green parts, thinly sliced
8 oz. Monterey Jack cheese, shredded (about 2 cups)
1 avocado, pitted and sliced
1 lime, cut into wedges
Sour cream, for serving
Chopped cilantro, for serving

Preparation:

1. Preheat the oven to 400°.

2. Combine tomato, onion, and jalapeño in a large bowl. Drizzle with 1 tbsp. vegetable oil and sprinkle with salt and pepper. Toss to coat, then turn into an oven-safe dish. Roast for about 30 minutes, or until tomatoes are soft and juicy and onions and peppers begin to brown.

3. Use the same large bowl to toss the sweet potatoes with 1 tbsp. oil and salt and pepper. Turn potatoes onto a baking sheet and roast for about 20 minutes, or until soft and well-browned. Remove all vegetables from oven and lower heat to 250°.

4. In the bowl of a blender or food processor, blend roasted vegetables and their liquid until smooth. Add chipotle, vinegar and salt and blend again. Check for seasoning, adding more vinegar or salt as needed. Set salsa aside.

5. Spread tortillas out in a single layer over several large baking sheets (you'll need about 15 small tortillas total). Bake in oven until crisp and slightly browned, about 20 minutes. Remove from oven and let cool. Increase oven temperature to 350°.

6. Assemble the chilaquiles: in the bottom of a large glass lasagna pan, spread a thin layer of salsa. Break 5 tortillas into large pieces and distribute over salsa. Sprinkle half the sweet potatoes, half the black beans and half the green onions over tortillas. Pour half of remaining salsa over vegetables, then sprinkle with one third of the Jack cheese. Repeat with 5 more tortillas, rest of vegetables, rest of salsa, and one more third of cheese. Finish with a top layer of 5 more tortillas and the rest of the shredded cheese.

7. Spray a large rectangular piece of aluminum foil with nonstick cooking spread and cover baking dish tightly. Place dish in oven and bake until chilaquiles are hot and the cheese has melted, about 25 minutes. Remove foil and bake until top layer of cheese is nicely browned, about 15 more minutes. Remove from oven and let rest about 15 minutes before cutting into 6 - 8 pieces. Serve with sour cream, avocado, cilantro and lime.

Wednesday, February 29, 2012

Chinatown, my love

Starting a couple of years ago after I read Fuchsia Dunlop's excellent food memoir Shark's Fin and Sichuan Pepper, then devoured her two beautiful cookbooks Land of Plenty and the Revolutionary Chinese Cookbook, I quickly became obsessed with Chinese cooking, and it's a trend that's continued--and grown--since then. I think Chinese food gets a bad rap--people say it's greasy, or bland, or makes them sick--and that's because they're thinking of the carelessly thrown together, cornstarch- and MSG-laden takeout on their nearest corner. It's simply not an opinion I understand, because true, artfully prepared Chinese food is so incredibly flavorful, bursting with spicy, salty accents and full of contrasting textures that, to my palate, at least, it's simply one of the best cuisines out there. (I should point out here that there isn't really one "Chinese cuisine"--as you may have heard, China is a big country, and there are many regional styles of food. I happen to be partial to the fiery cuisine of the Sichuan or Szechuan province, but then again I like any kind of well-made Chinese food.)

Although you might imagine them to be exotic or difficult, the Chinese recipes I've tried are actually quite easy. What they rely on is a well-stocked pantry: you need some basics such as different kinds of soy sauce, chile pastes, fermented vegetables, toasted sesame oil, etc., but once you have those items the actual preparations are quite simple. For the past few months I'd sort of fallen out of the habit of cooking Asian, and that was because during my last move, I misplaced my precious stash of special ingredients. When I started my internship at Serious Eats, whose offices are located in Manhattan's Chinatown, it was the perfect occasion to restock my cabinets.


Some staples I picked up recently included (from left): fermented broad bean chile paste; Chianking, or black, vinegar; Shaoxing cooking wine; and potato starch (whose silky texture and un-gloppiness I prefer to cornstarch). Don't you love the packaging? So colorful.


Speaking of great packaging, check out these preserved Szechuan vegetables. Drool and an enthusiastic thumb's-up? Now that's great advertising!

Once I had all my go-to ingredients, I put them to good use making a recipe by one of the Serious Eats editors, Kenji Lopez-Alt. Kenji's no slouch when it comes to perfecting recipes: in addition to years of restaurant experience, he's got a stint as editor at Cook's Illustrated under his belt. Having tasted some of the delicious dishes he's whipped up in our office kitchen, such as bok choy and black bean chow fun and tonkotsu ramen, I knew I could trust his recipe for braised eggplant and tofu in garlic sauce. The best tip I learned from this recipe was to steam the eggplant first: sometimes, eggplant takes a long time to break down and become soft and creamy, and getting it to do so often requires a lot of hot oil. The pre-steam allows the eggplant to soften before it gets incorporated into the stir-fry:


Next, I fried up some aromatics: garlic, ginger, scallions, and the preserved vegetables. This right here is why I love Chinese cooking: look at all the flavor packed in there! It doesn't really matter what you add next--that oil has so much going on, anything cooked in it is going to be good:


The steamed eggplant and some diced firm tofu get fried up in here, then cooked down with a richly flavored sauce made up of soy, vinegar, cooking wine, brown sugar and chile paste. Behold, the finished dish:


Braised Eggplant with Tofu in Garlic Sauce
Adapted slightly from seriouseats.com
Serves 4

*Note: visit your local Asian grocery before making this recipe: many of the ingredients are not available at the supermarket.

Ingredients:

- 4 small or 2 large Japanese/Asian eggplants, rinsed and cut into large chunks
- 3 tsp. Chianking vinegar
- 1/2 c. Shaoxing cooking wine
- 1 tbsp. potato starch
- 4 tbsp. soy sauce
- 2 tbsp. brown sugar
- 1 tbsp. fermented broad bean chile paste
- 1 tbsp. sesame oil
- 2 tbsp. vegetable oil
- 2 cloves of garlic, smashed and peeled, plus 4 more cloves, minced or thinly sliced
- A 1-inch nub ginger, peeled and minced or grated
- 3 scallions, thinly sliced, whites and greens separated
- 2 tbsp. Chinese preserved vegetables, minced
- 1 package firm tofu, excess water squeezed out, cut into medium chunks
- 3 tbsp. chopped cilantro

Preparation:

1. Place eggplant in a large bamboo steamer set over a wok filled with 2 inches of water. Bring to a boil over high heat, reduce to a simmer, cover steamer, and cook until eggplant is completely tender, about 15 minutes. Set aside. (If you don't have a bamboo steamer, you can use a steamer insert in a large pot of water.)
2. Make the sauce: in a bowl, combine vinegar, wine, potato starch, soy, brown sugar, chile paste and sesame. Whisk until completely smooth.
3. Wipe out wok. Add oil and whole garlic cloves and cook over medium heat, turning garlic occasionally, until it is browned and fragrant. Remove garlic and discard.
4. Turn heat to high and add minced garlic and ginger, scallion whites, and preserved vegetables. Cook, stirring, about one minute, then stir sauce to recombine, and add to wok. Add eggplant and tofu and stir gently to combine. Bring to a boil, reduce to a simmer, and cook, stirring occasionally until thick and glossy, about 10 minutes longer. Garnish with scallion greens and cilantro and serve immediately with white rice.

Monday, January 30, 2012

A good soak

I may have become the shopper I've always wanted to be by making my purchases at the Co-op, but that doesn't necessarily make the me the cook I want to be. Let me explain: my increased access to ingredients like whole grains, healthy oils, organic produce and unprocessed foods--and the low prices for all of this bounty--has certainly led to my cupboards being filled to the bursting, but sometimes those things just find their way in there and stay, never getting the chance to show their stuff in my pots, or in my stomach.

Case in point: dried legumes. Having spent a fair amount of time working on organic farms, where the proprietors grow what they eat and store-bought foods don't often come into the picture, I've eaten some lovely dishes made with dried and soaked beans. And I've noticed that their flavor and texture is exponentially better than the canned stuff. And so when I joined the Co-op, I determined to never again pick up a can of Goya. From now on, I brazenly declared to myself, I will cook exclusively with dried beans! And I lined my shelves with chickpeas, kidney beans, and black eyed peas.

I'm sure you know where this is going. Those bags of beans sat in my cupboards, taunting me, ever since June. Turns out, canned beans are pretty darn convenient: no thinking ahead required. Right? A working farm, though an intensely active place, also has, in its own way, a slower pace than city life, and there's time built into the day to do things like soak some dried beans in water.

The thing is, I don't really even believe the above--that my life is just way too busy to think about my dinner more than an hour before I sit down to eat it. In fact, I do little but think about food and cooking all day long, so I believe I should be able to commit to preparing some beans a day ahead of time.

I had already been stewing over those chickpeas sitting in my kitchen cabinet when I spied a tasty-looking recipe for coconut-braised chickpeas over at the site of my new employer, Serious Eats. The dish sounded like it had some nice flavors going on--lemon, ginger and coconut--and I was keen to try it. The recipe actually called for canned chickpeas, but I would use dried--finally. I knew I would have all the time in the world to cook on Sunday, so on Saturday night, I filled a pot with those clattering little peas, and covered them in twice the amount of water. They'd be (nearly) ready for me when I needed them.

The next day, about an hour before I was ready to cook, I put the pot of chickpeas on the stove, added some salt, and simmered them, covered. Then, as I set to work on the recipe, I simply allowed the garbanzos to steam to toothy perfection before they got to cook for a second time in the dish's flavorful broth.


I used the recipe only as a starting point: though it sounded like a good base, I could tell it would need some punching up. The only spice it called for was ginger and an optional shaking of red pepper flakes, and for me, coconut milk cries out for a complex, heady mixture of aromatics. I also wanted to add some chopped carrot for added sweetness, and some cubed potatoes for some starch to help thicken the broth. The end result was sweet and fragrant, with the tender, creamy chickpeas providing a welcome contrast to the softness of the spinach and the potatoes. Eating it reaffirmed my conviction that cooking with dried legumes is just better. I won't be able to do it all the time--some nights, those ready-to-go Goya beans will still be attractive--but I definitely plan to try this more often. I may not normally possess the virtue of patience, but when it comes to good food, I'm happy to make an exception.


Coconut-Braised Chickpeas with Spinach and Lemon

Adapted (heavily) from seriouseats.com
Serves 4 - 6

Ingredients:

- About 8 ounces dried chickpeas, soaked overnight in 16 oz. water, or one 15-oz. can, drained
- 2 tbsp. vegetable oil
- 2 small (or 1 large) onions, peeled and finely chopped
- 1 carrot, peeled and thinly sliced
- 3 cloves garlic, minced
- 1 tbsp. grated ginger
- 1 large lemon, zested and juiced
- 1/2 tsp. red pepper flakes
- 1/2 tsp. curry powder
- 1/2 tsp. turmeric
- 1/2 tsp. ground coriander
- 3 medium waxy potatoes, scrubbed and cut into a medium dice
- One 14-oz. can coconut milk (I used light--I don't notice the difference)
- About 1 c. water
- 5 oz. baby spinach, rinsed
- Fish sauce (nam pla), to taste
- Salt
- About 1/2 c. unsweetened coconut flakes, toasted, for serving
- Chopped cilantro, for serving
- Cooked white rice, for serving

Preparation:

1. If using dried, soaked chickpeas: about one hour before starting to cook, transfer the chickpeas in soaking liquid to the stove. Add a pinch of salt, cover, and simmer for one hour. As you proceed, leave chickpeas covered.
2. Heat the oil in a large, heavy-bottomed pot (Dutch oven) over medium heat. Add the onions and carrot, stir, and when they begin to soften, add the garlic and ginger. Add the lemon zest and all the spices and cook, stirring, until onions are translucent and spices are toasted and fragrant.
3. Drain the chickpeas and add to the pot along with the potatoes. Add the coconut milk and water, cover, and bring to a simmer. Cook for 15 - 20 minutes, until potatoes are tender.
4. Uncover pot and taste broth. Add a few dashes of fish sauce, to taste, and salt. Add the spinach, cover again, and let wilt. Cook for about 5 more minutes.
5. Turn off heat and stir in lemon juice. Check again for seasoning. Serve over hot white rice, garnished with cilantro and coconut.

Sunday, January 22, 2012

26 years + 1 complicated recipe

Earlier this month I turned 26 years old and over the weekend I celebrated with friends by throwing a somewhat belated birthday party. Over the past few years I've developed a tradition for my birthday: I invite over a ton of people and then stress myself out by committing to cooking them a huge dinner feast. It's an interesting way to fête my own birthday, I admit, but I'm mostly kidding about the stressful part: in fact, I enjoy making large, complicated meals. Years of producing food on a huge scale as a freelance caterer have made the feat of preparing a meal for 20 people seem like a piece of cake.

In the years that I've been writing on this blog, I've made pork, pork, and legumes for my birthday parties. This year, I wanted to try something different, something a little out of my comfort zone. I'm not as impoverished this year as I was last, so I could afford to buy and serve flesh, and I decided on something that most meat eaters deem commonplace, even mundane: chicken. You see, I've been eating mostly vegetarian for the past few months, and I found that the first thing to disappear from my diet with me hardly even noticing was chicken. It's always been my least favorite meat: I prefer proteins that pack a wallop of flavor, like pork, lamb, and game such as rabbit and venison. I simply find chicken dull, and before my party I honestly can't remember the last time I cooked or ate it. So, of course, that meant that I was sort of craving chicken, after all this time. But since it takes a lot to make chicken exciting, I wanted to impart as much flavor as possible to the meat. Here are some of the ingredients I used in the dish; can you guess what I made?


Not sure yet? Maybe this will clue you in:


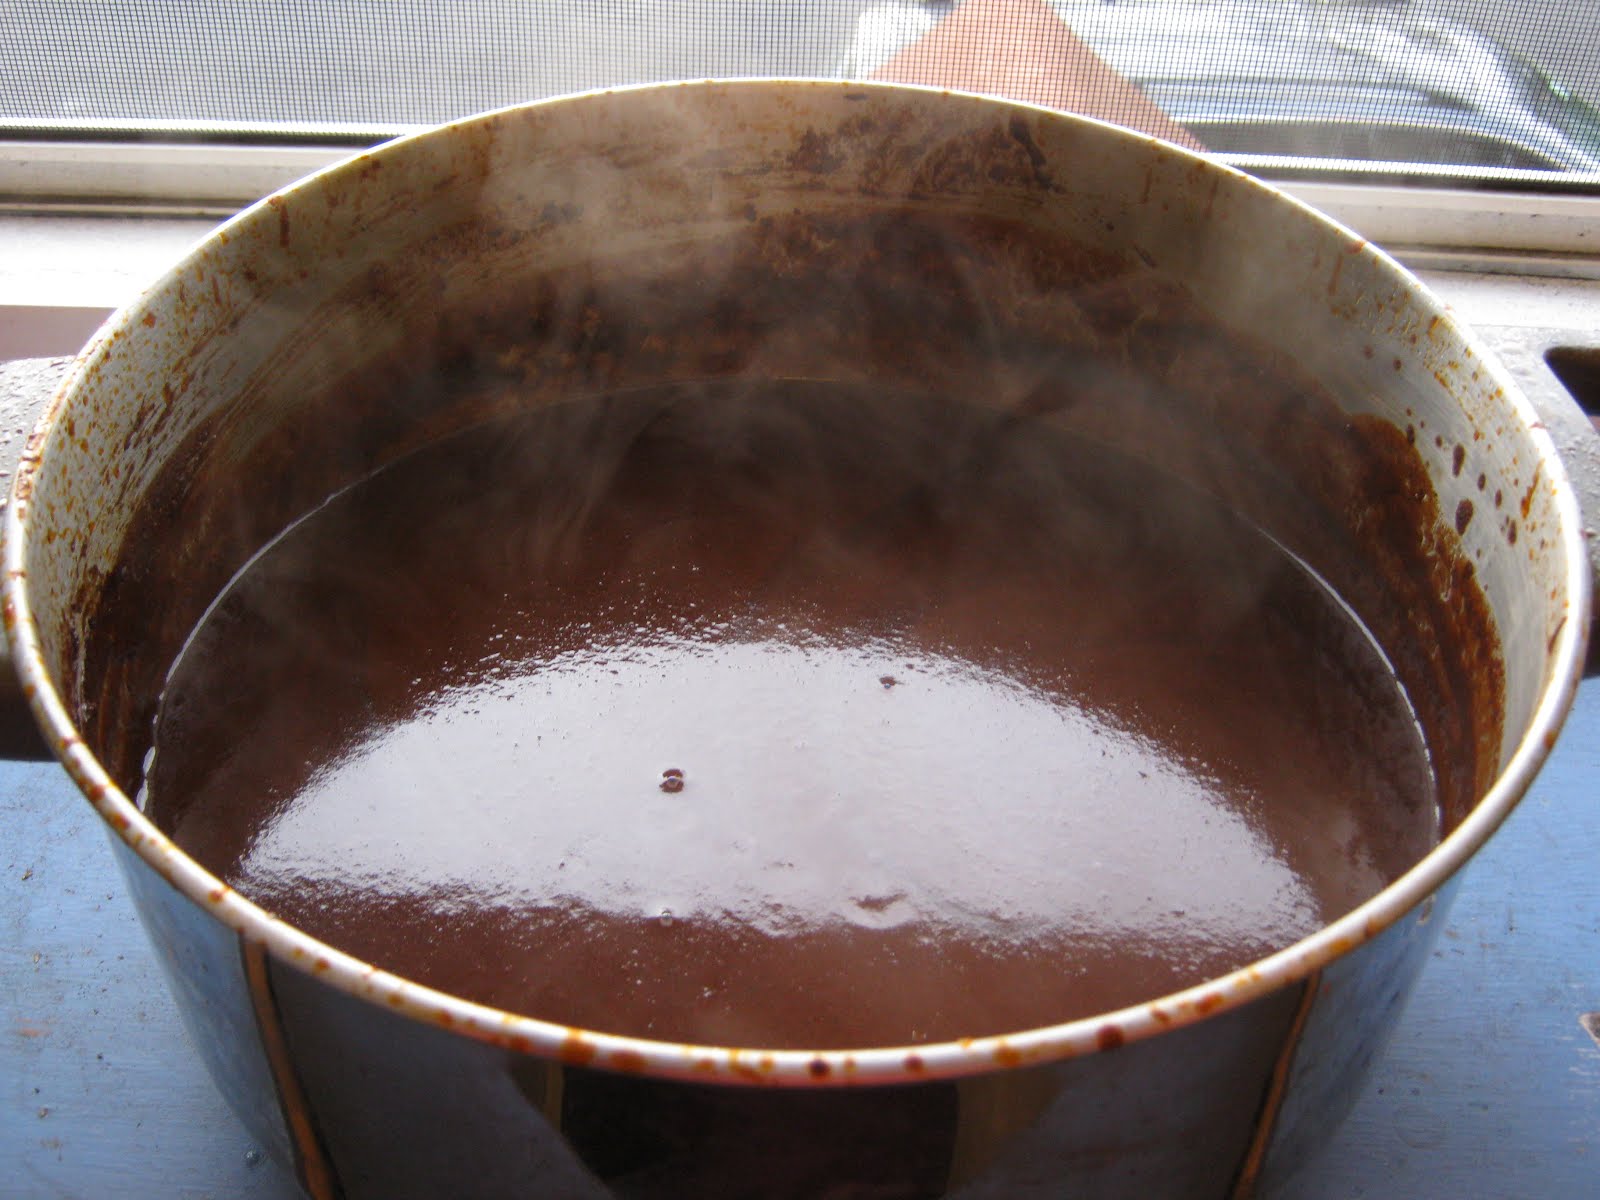
Chocolate...? In a savory dish...? Why, it must be mole! Yes, for my birthday I prepared chicken mole poblano, meaning that the recipe comes from Puebla, in Mexico. You see, most people are familiar with mole poblano because of its inclusion of sweet chocolate, which most people wouldn't ordinarily associate with a spicy, savory dish. But in actuality the chocolate forms only a very small proportion of the ingredients, which also include (from top) three types of dried chiles; a spice blend made of whole toasted spices (sesame seeds, chile seeds, cloves, anise seeds, peppercorns, cloves, thyme, oregano, bay leaves, and cinnamon) which are then ground; fried almonds, peanuts, pumpkin seeds, and raisins; and fried bread and corn tortillas. Only at the very end of the hours-long cooking process is a small amount of chocolate and sugar stirred into the nearly-completed sauce.


Another misconception about mole is that poblano--the best-known type--is the only type. In fact, there are many many types of moles--really just a base sauce that meat is then cooked in--prepared all over Mexico, depending on the region and which ingredients are available there. Some other types include negro (black, includes similar ingredients to the poblano but adding dried prunes and ripe plantain); rojo (red, heavier on the tomatillos and also including not a small amount of rendered pork lard); amarillo (yellow, with ground cumin and corn flour); colorado ("colored," with fresh herbs); and verde (green, with fresh green chiles, cilantro, and green pumpkin seeds), among many other varieties. So...now you know. Tell your friends about mole.


I did, however, want to stick with the classic and widely recognized poblano version of this dish. Always served over chicken or turkey, this sauce is incredibly complex-tasting, thanks to its many ingredients. It's not an easy thing to make--it's very time consuming and demands a measure of organization and thoughtful planning--but neither is it as complicated as it might first appear when you read through the recipe. Very basically, you first create a spicy chile sauce made from the fried, then rehydrated and puréed dried chiles, and then you make a sweet sauce from the nuts, dried fruit, and floral spices. Only at the very end do you combine these two sauces and then reduce the result into a silky mixture that is both hot and sweet at the same time.

I talk a lot of game on this site about how I don't follow recipes, preferring instead to follow my muse wherever she might lead me and charting my own way as I go. It's a talent I'm proud of, because it's pretty much my only creative outlet: I don't play music, make art or write anything that's nonfiction. As important as that skill is to me, though, it's also immensely satisfying, once in a while, to cook from a recipe, particularly one that's foreign to me and that I probably wouldn't be able to riff on my own. The mole was a perfect example of such a dish. In the initial stages of the cooking process, I was kind of groping along blindly; I had an idea of where I needed to go, but I wasn't altogether sure how to get there. As I progressed, though, I began to see how everything would come together in the end. A recipe like this is really like a puzzle: you can taste the separate components (basically, the two "mother" sauces) as you go along, but even so, it will be incredibly difficult to imagine how they'll taste when they're finally wedded together. But when they are, they fit perfectly. A recipe that keeps even an experienced cook guessing until the very end? That's certainly my idea of birthday fun.


Chicken Mole Poblano

Adapted from Rick Bayless via Saveur
Serves 15 - 20

A few notes about this recipe. You'll need to visit a Mexican grocery store to get a number of the ingredients (the dried chiles, the Mexican chocolate, and possibly the tortillas). You'll need access to a few appliances: a spice/coffee grinder and, if you want to cut your labor load (as I did), a food processor. I condensed a few of the steps in Bayless's recipe to make things go a little faster. The amount of oil called for seems like a lot, but you'll need it all, because many of the ingredients get fried. You can pour off whatever seems like excess later on.

Ingredients:

- 12 dried ancho chiles
- 12 dried guajillo chiles
- 6 dried pasilla chiles
- 6 tbsp. sesame seeds
- 1 tsp. whole aniseed
- 1 tsp. black peppercorns
- 1⁄2 tsp. whole cloves
- 1 tsp. dried thyme
- 1⁄2 tsp. dried marjoram or oregano
- 3 dried bay leaves, crumbled
- 1 1⁄2" stick cinnamon, broken into pieces
- 2 cups canola oil
- 7 1⁄4 cups chicken or turkey stock
- 1⁄2 cup skin-on almonds
- 1⁄2 cup raw shelled peanuts
- 1⁄3 cup hulled pumpkin seeds
- 1⁄3 cup raisins
- 2 slices white bread
- 2 stale corn tortillas
- 10 cloves garlic, peeled and smashed
- 2 medium onions, peeled and chopped
- 5 tomatillos, husked, rinsed, and halved
- 2 large tomato, quartered
- 12 whole chicken legs, skin removed and separated into thighs and drumsticks
- Kosher salt, to taste
- 1 cup finely chopped Mexican chocolate
- 4 tbsp. sugar, plus more to taste
- Tortillas, plain white rice and cilantro sprigs, for serving

Preparation:

1. Stem chiles and shake seeds into a bowl. Set chiles aside. Measure 4 tbsp. chile seeds (discard the rest) and 4 tbsp. sesame seeds into a small skillet set over medium heat. Toast seeds, swirling pan, for 2 minutes. Transfer to a spice grinder. Toast aniseed, peppercorns, and cloves; transfer to grinder along with thyme, marjoram, bay leaves, and cinnamon. Grind into a powder and transfer to a large bowl; set spice mixture aside.

2. Heat oil in an 8-quart Dutch oven set over medium heat. Working in small batches, add chiles and cook, turning, until toasted, about 20 seconds. Using a slotted spoon and reserving oil in skillet, transfer chiles to paper towels to drain. Transfer fried chiles to a large bowl; add boiling water to cover (about 4 cups). Let chiles steep for 30 minutes. Strain chiles, reserving soaking liquid.

3. Place the chiles, 3⁄4 cup soaking liquid, and 3⁄4 cup stock into the bowl of a food processor; blend until smooth. Set a sieve over a bowl and strain chile mixture, pushing it through sieve with a rubber spatula; discard solids. Rinse food processor; set chile purée aside.

4. Return pan with oil to medium heat. In quick succession, fry the almonds, then peanuts, then pumpkin seeds, then raisins until toasted, about 1 minute from the time you add the almonds. Transfer all ingredients to paper towels to drain. Return pan to medium heat and fry the bread, turning once, until golden brown, about 3 minutes; transfer to paper towels. Repeat with tortillas. Break bread and tortillas into small pieces and transfer to bowl, along with the almonds, peanuts, pumpkin seeds, raisins, and ground spice mixture; set aside.

5. Set a fine strainer over a large bowl. Strain oil and return it to Dutch oven. Remove 2 tbsp. of the oil and heat it in an 8” skillet set to medium-high. Place onions, garlic, tomatillos and tomatoes into the bowl of the food processor; pulse until finely chopped. Rinse food processor. Add mixture to skillet and cook, stirring, until mixture has softened and the liquid has evaporated, about 12 minutes. Transfer to bowl with spice mixture along with 2 1⁄2 cups stock. Blend onion/nut/spice mixture in food processor until smooth. Press through the strainer into a bowl; set purée aside.

6. Heat reserved Dutch oven over medium-high heat. Season chicken pieces with salt. Working in batches, brown each piece, turning once. Transfer chicken to a plate. Pour off all but 3 tbsp. of oil in Dutch oven and return to medium-high heat. Add chile purée; cook, stirring, until thick, 10–12 minutes. Add spice purée, reduce heat, and cook, stirring, for 30 minutes. Stir in 4 cups stock and chocolate; simmer, partially covered and stirring often, for 1 hour. Season mole sauce with salt and sugar to taste; remove from heat.

7.
Heat oven to 350°. Nestle chicken in mole sauce, dividing among oven-safe dishes if necessary. Bake, covered, for 2 hours. Remove from oven and sprinkle with remaining sesame seeds; serve with tortillas, white rice, and cilantro sprigs.

Thursday, January 12, 2012

The kitchen sink of stuffed veggie recipes

Recently, while shopping at the Co-op, I noticed some beautiful-looking Delicata squashes, and decided to grab a couple. Though I had never cooked with them, I knew they were among my mom's favorite vegetables, and that she'd be able to recommend a good recipe. And I was right: when I queried her via email, she responded that she bakes them, stuffed with a mixture of cottage cheese, apples, and raisins, then tops them with Swiss cheese, which creates a browned, gooey crust. I liked her idea, but it sounded a little too sweet for me, so using that recipe as a base, I riffed my own version of a stuffing.

First, I sautéed chopped onions and apples in some olive oil, adding some minced garlic and dried thyme once the first ingredients began to break down. Once everything was well cooked, I took some nice clean kale, shredded it up and added it to the pan, covering it to allow the kale to steam. Once that mixture had cooled slightly, I added the rest of the stuffing ingredients: cottage cheese, eggs, breadcrumbs, and grated Parmesan cheese. I portioned this generously between my two halved, par-baked squashes, then topped with more Parmesan cheese, as, well, I didn't have any Swiss. If you wanted to get more decadent, you could add more breadcrumbs to the top along with the cheese, and dot everything with butter before sending it off to the oven. Even if you go that route, you'll still have a pretty virtuous, complete, vegetarian meal:


Baked Stuffed Delicata Squash
Serves 4

Ingredients:
 

2 medium to large Delicata squashes, halved and seeds removed
Olive oil
2 medium onions, peeled and finely chopped
2 medium apples, peeled and finely chopped
2 cloves garlic, minced
1 tsp. dried thyme
1/2 c. raisins
1 bunch of kale, rinsed, thick stems removed, and shredded
About 1 c. cottage cheese, any style
2 eggs
About 1/2 c. breadcrumbs
About 1/4 c. grated Parmesan cheese
Salt
Pepper

Preparation:

1. Preheat the oven to 350
°. Lightly season the squash with salt and pepper, then bake for about 25 minutes or until flesh is slightly tender. (Make sure the squash halves sit flat on the baking pan. If they don't, use a vegetable peeler to trim a strip or two away from the bottom.)

2. Prepare the stuffing: in a large, heavy-bottomed pan, heat about 3 tbsp. olive oil over medium heat. Add the apples and onions; a few minutes later, stir in the garlic, raisins and thyme. Cook, stirring occasionally, for about 5 minutes.

3. Add the shredded kale and cook, stirring occasionally, until kale is mostly wilted, about 5 - 7 minutes. Turn off the heat, cover the pan, and allow mixture to cool slightly.

4. Add cottage cheese, eggs, breadcrumbs, Parmesan, and salt and pepper to taste. Mix well. Remove squash from oven and divide filling evenly among 4 halves. (If you have any leftover stuffing, bake it in a greased dish alongside.) Top squash with more Parmesan, or, if you prefer, Parmesan + breadcrumbs and some dots of butter.

5. Return to oven and bake until squash is tender and stuffing is nicely browned, about 25 more minutes. I served the squash with a brown rice pilaf and a beet salad.

Saturday, November 20, 2010

Dinner club: Part I

One of the nice things about the program I'm doing in Toulouse is that there's a large community of American assistants in the city. Coming here, finding French roommates and practicing my French was my number one priority, and I'm thankful that I was able to achieve that, but even so, I appreciate having people to take an (English-speaking) break with. Even in a first world, western country like France, which on the surface might seem very similar to the United States, cultural differences--some subtle, others not so--abound. It's important to have friends from a similar background with whom you can discuss, critique, and--let's be honest here--sometimes playfully make fun of those differences.

Towards the beginning of my stay, when I was meeting other assistants at various "mixers," one thing I often found myself talking about was--big surprise--food. Like myself, many others cited an interest in good food as one of the primary motivators for their move abroad. After sharing some less formalized meals together, my friend Bonnie and I decided to organize a dinner club, so that our friends who like to cook could come together more often to share recipes and ideas. So far, we've been meeting twice a week: on Meaty Mondays, that week's host makes a dish with meat, and the attendees bring wine or dessert. On Thursdays, the cook makes something vegetarian. The next week, two different people cook on Monday and Thursday, and the next week two other people, and so on and so forth. It's a nice break in the daily routine, where we can come together, speak English and talk about our jobs over some good food.

Last Monday marked the initial meeting of the club, and I hosted. As I mentioned, I would be making a meat-based dish, and because I would be cooking for 7 people, I wanted to select something budget-friendly. Sadly, that usually means chicken, and since I'm often bored by chicken, I wanted to see if I could find something a little more exciting. Luckily, my local Casino supermarket features a weekly meat sale in a refrigerated case near the front of the store. Each week, they load it up with meat that's about to (but hasn't yet) passed its expiration date, at bargain prices. It's a fun way to be inspired: pick up some meat that's dirt cheap, and let that main ingredient dictate what else you'll buy and cook.

For Monday's dinner, I was lucky enough to find some rich, meaty duck legs on sale. I picked up four large ones, and the total came to less than 8 euro! Duck legs need long, slow cooking, both to render the enormous amounts of fat that they come enrobed in, and also to tenderize the somewhat tough meat. I decided to make a slow-simmered ragù, with shredded duck meat and a simple base of carrots, onions and tomatoes.

I started off by slowly searing the duck legs over a low flame, without any seasoning, in order to render most of their fat. And don't throw that duck fat away! For cooking, it's liquid gold: use it to sauté vegetables, use it to make warm salad dressings, and definitely, definitely use it to roast potatoes: their flavor and richness is, well, indescribably good. (To keep rendered duck fat, strain it into a clean container, cover, and refrigerate indefinitely.)


Once I had rendered the majority of the fat off the duck legs, I removed them to a plate to cool, then I used a small sharp knife to cut off some of the pockets of fat that remained. I saut
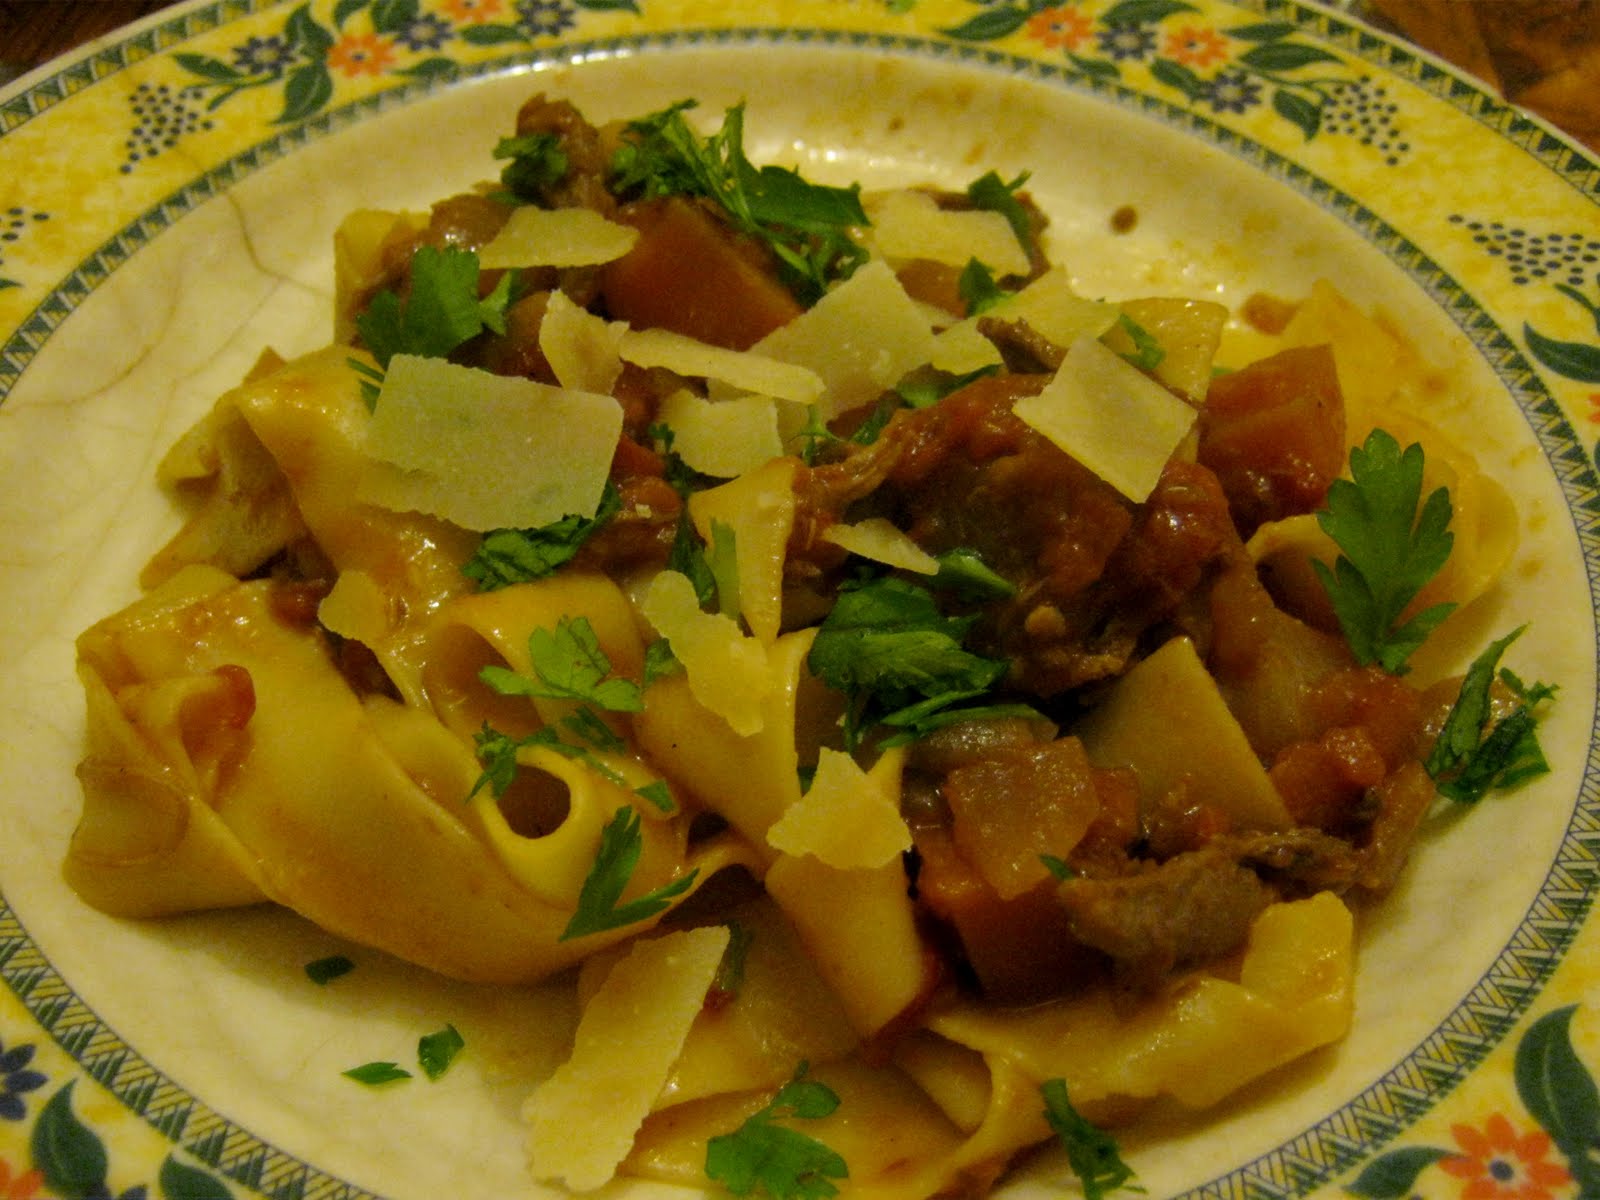
éed garlic, onions, and carrots, along with a bit of dried thyme, in a heavy pan, then added crushed canned tomatoes and red wine once they had softened. I slipped the duck legs back into the pan, covered it, and simmered away for about 3 hours. Then I took the duck legs back out, chilled them down rapidly in the fridge, pulled away and discarded all the remaining skin and fat, and shredded the meat into bite-sized pieces that I deposited back into the sauce. A little before my guests were due to arrive, I turned the heat under the pan back on, and further reduced and heated the sauce for about a half hour. Finally, I ladled the sauce over some al dente egg noodles, garnished it with shards of parmesan and chopped parsley, and ate. A 30-minute meal this was not, but it was well worth it in the end.


Slow-Cooked Duck Rag
ù
Serves 8 - 10

Ingredients:

- 4 whole duck legs (both thigh and drumstick)
- 1 tbsp. olive oil
- 2 large onions, cut into a small dice
- 2 large carrots, peeled and cut into a large dice
- 4 cloves garlic, finely chopped
- 1 tsp. dried thyme
- 1 28-oz. can whole peeled tomatoes, crushed by hand
- 1/2 bottle dry red wine
- Salt and pepper to taste
- Grated or shaved parmesan cheese, for serving
- Chopped parsley, for serving
- 1 1/2 lbs. egg noodles, cooked, for serving

Preparation:

1. Arrange the duck legs in a large, deep, heavy-bottomed pan and place over low-medium heat. Cook for 20 - 30 minutes, turning the duck pieces occasionally, until they have rendered the majority of their fat. Strain the fat into a jar for later use. Set duck aside to cool. When cool, use a small sharp knife to cut away any large pockets of fat.
2. Drain off all but 1 tbsp. of duck fat from the pan and add 1 tbsp. olive oil. Sauté the onions, carrots and garlic over medium heat until softened. Add the red wine and bring to a boil, using a wooden spoon to scrape any bits from the bottom of the pan. Add the canned tomatoes and some salt and lower sauce to a simmer. Put the duck back in the pan, cover, and simmer for 3 hours.
3. Remove the duck legs from the sauce and cool them on a plate in the refrigerator. When cool, remove all remaining skin and fat from the duck and discard. Using your hands, remove the duck meat from the bone and shred into bite-size pieces. Stir the duck back into the sauce.
4. Place the whole pot in the fridge and cool for at least 2 hours or as long as overnight. The excess fat will rise to the surface; skim it off and discard.
5. 30 minutes before eating, turn the heat back on and simmer sauce. Check for seasoning. Serve over egg noodles, garnished with parmesan and parsley.

Monday, November 15, 2010

Too much of a good thing

I've been in France for a little more than a month now, and for the most part I've been embracing French ingredients and cooking methods: you can't get much better than a cuisine based on delicious essentials like good butter, good bread, good cheese, and aromatics like garlic, shallots, onions, and a variety of herbs. That being said, it's getting to the point where I'm starting to miss the heavily Asian accents my cooking has been taking on over the past few years, and especially right before I made the big move overseas.

I find it odd that for a country that happily colonized several Asian countries during its Third Republic, the French are remarkably resistant to spicy food, and, in general, Asian ingredients and condiments are quarantined to a limited number of specialty épiceries , or grocery stores. You should see the "international" section in my local supermarket; I almost literally laughed, when I did. There were a few dusty jars of curry sauce, some teriyaki and soy sauce, a little bag of dried peppers. Not much to work with, that. (To be fair, I've heard good things about the épiceries asiatiques here in Toulouse, and I'm planning on checking them out this week or next. I'll report back.)

Sometime last week, I was jonesing for a quick, spicy dinner, and my heart sank a bit when I realized that my usual staple, fried rice, just wasn't going to be possible: I was lacking, well, almost everything but the rice. I did notice, however, a small carton of coconut milk among the pantry items, and when I also spied some bright red lentils nearby, I had it: curried lentils. I'd never made it before, but it seemed easy enough, and fast, too: red lentils cook through in about 15 minutes.

I set to work chopping up some garlic, ginger, shallots, and a (homegrown!) red chili. Then I took a picture, because I thought the colors looked pretty together:


Then I rinsed some of the aforementioned lentils, drained them, and took another picture because, they, too, looked beautiful:


I sautéed the garlic, ginger, shallots and chili in some oil, adding a few good shakes of curry powder when they softened. Then I added the lentils, the container of coconut milk, and enough water to cover. I simmered this mixture over medium-low heat, adding more water as necessary, for about 15 minutes, then ate the curry over rice, with a squeeze of lemon and some harissa (the easiest hot sauce to find in these parts, France being so near to North Africa and all) on top. It wasn't fried rice, but it went down just fine.


Curried Red Lentils

Serves 6

Ingredients:

2 tbsp. vegetable or canola oil
3 cloves of garlic, minced
3 tbsp. minced fresh ginger
3 shallots, finely chopped
1 hot red chili, seeds removed, minced
1 tbsp. curry powder
3 cups red lentils, rinsed and drained (you cannot substitute green or brown lentils, they don't cook in the same way)
1 can (14 oz.) coconut milk, or use light coconut milk
Water
Salt
Lemon or lime wedges, for serving
Sriracha or other chili sauce, for serving

Preparation:

1. Heat the oil in a medium-sized, heavy-bottomed saucepan set over a medium flame. Add the garlic, ginger, shallot and chili and saut
é until softened, about 5 minutes. Add the curry powder and cook until heated through, about 1 minute.
2. Add the lentils, the coconut milk, and enough water to cover the lentils by about 1 inch. Salt. Bring the mixture up to a boil, then drop to a simmer.
3. Cook, stirring occasionally, for about 15 minutes, adding more water if the lentils absorb it all too quickly. Check for seasoning and serve over rice, with lemon or lime wedges and sriracha.

Tuesday, May 18, 2010

Talking turkey

If there's a "less is more" school of turkey burgers, then you could not count me among its adherents. I happen to really like turkey burgers, and make them often. Every time I do, my formula is a little different, but each is marked by one particular characteristic: a reckless hand with seasoning, herbs and spices, and add-ins. One might deem this the Kitchen Sink school of turkey burgers.

Ground turkey, I think, needs a little extra help. The packaged kind you buy in supermarkets, and particularly the all breast meat type (which I always steer widely clear of), can be a little dry. It can be a little flavorless. This is because the meat comes from factory raised birds fed a diet of mostly uninteresting things like corn and soy by-products, and if the turkey doesn't eat interesting things, then why would it itself taste good? In order to combat this Tasteless Turkey syndrome, I'm accustomed to throwing lots of flavor at the problem: finely chopped onion or scallions, as well as garlic, are a must; lots of salt and freshly ground pepper are advisable; generous amounts of dried spices like paprika, cumin, and red pepper flakes are common; and chopped fresh herbs like parsley or cilantro often show up, too. One last thing to consider is a little lubrication: I'll often toss in a bit of whole-milk plain yogurt, or a dash of olive oil, to ensure that the burger comes out juicy.

And tonight, my friends, I did all those things--and more--to my turkey meat. But as it turns out, I might not have had to. You see, after a recent viewing of the excellent, eye-opening, generally disturbing but also fascinating (much like a car wreck) documentary, Food, Inc., I've decided to avoid supermarket meat for a while. I don't want to make any hard and fast declarations, especially since my wallet might not be equipped to handle such claims, but for the time being, at least, I've decided to buy the vast majority of my meat at the farmer's market (and avoid the label "Perdue" like the bloody plague). I started my new resolution this past weekend, when a trip to the Grand Army Plaza farmer's market proved quite fruitful (or meat-ful?). I stocked my freezer full of ground pork, ground turkey, and different cuts of free-range beef, so now all I have to do is reach into the icebox for a guilt-free meat meal.

I used up the first of my provisions, the ground turkey (from DiPaola Turkey Farm in Hamilton, New Jersey) in the aforementioned burgers that I made for dinner earlier this evening. I added all the usual suspects--plus a blanket of sharp, rich Cato Corner Farm cheese--and, to be blunt, ended up with a juicy fistful of The Best Turkey Burger I Have Ever Eaten in My Life. Yup--it was that good. Supremely moist and packing a wallop of flavor, I suspect that there was more at work in this burger than the seasonings that I added to it: namely, the freshness and quality of the turkey. Maybe, with meat this good, you don't really need to add much to it. So you should treat yourself to some good meat, too. But for those times when you can't or don't, try the Kitchen Sink technique.


Kitchen Sink Turkey Burgers
Serves 3 - 4

Ingredients:

1 lb. ground turkey, dark meat preferable
Finely chopped onion or scallion
Minced garlic
Salt
Pepper
Dried spices such as but not limited to: paprika; cumin; coriander; chili powder; red pepper flakes
Chopped fresh herbs such as parsley, cilantro or thyme
Worcestershire sauce (optional)
Whole milk plain yogurt, for moisture (optional)
Olive oil, for moisture (optional)
Cheese, for topping (optional)

Preparation:

1. In a large bowl, combine turkey with ingredients and amounts of your choice. The flavorings listed above are a good guideline but can be varied or omitted according to preference. Just remember to add a lot of seasoning. Mix lightly and form turkey into 3 or 4 burgers. If time allows, let burgers rest in the fridge for about 20 minutes. The flavors will meld, and the burgers will hold together better during cooking.
2. Heat a cast iron skillet, grill pan, or grill. Alternatively, preheat your broiler. When pan is hot, add burgers and cook over high until cooked through but still moist, about 8 minutes per side. When burgers are nearly done, shut the heat off, top burgers with cheese if using, and loosely tent the pan with tin foil. This will help burgers to finish cooking evenly, and will melt the cheese. Serve as desired.

Tuesday, April 20, 2010

Bruschetta (without the bread)

It's spring here in New York City, and I couldn't be happier about that fact. As soon as temperatures rose above 50 degrees, I retired my winter jacket--perhaps a bit prematurely--and immediately starting craving spring/summer crops like strawberries and tomatoes. Also somewhat prematurely. While the strawberry plants on my deck will probably bear fruit within a few weeks, my tomatoes won't even show their first flowers until June. For the moment, it seems, I'll have to make due with the produce available in my local grocery store. That explains how I, ever powerless to resist or even wait out a craving, found myself with a bag of sub-par supermarket tomatoes last week. I wanted tomatoes, and I got tomatoes.

So how to best utilize an ingredient, like the tomato, that when purchased at the store is almost always woefully lacking in the flavor department? The key is to try your darnedest to deepen and enhance what flavor is already there. In the post I just linked to I suggested slow-roasting tomatoes in order to do just that; and today I'm going to share a fresher, faster alternative to that method. What I did with my most recent batch of wan tomatoes was to make a no-cook tomato sauce that sits at room temperature, marinating undisturbed for as long as your hunger can hold out, increasing in lusty flavor all the while. What you do is dice tomatoes and plop them in a bowl along with minced garlic, shredded basil, a generous amount of salt and a good glug of olive oil (use your best; you'll really taste it here).


This recipe, as you might notice, is pretty much exactly what you'd pile atop toasted bread and call bruschetta (it's just as good with pasta). What happens is that the salt draws out a lot of liquid from the tomatoes, and as the liquid goes, you taste the fruit's flavor more. Same theory behind roasting any fruit or vegetable. In this instance, that liquid mixes and mingles with the olive oil in the bowl, making a sort of dressing that nicely coats the pasta that you will cook and add in. And the warmth of that pasta will heat up the garlic just a little bit, taking away some of its raw edge but leaving a nice spicy bite behind. So until you can get your hands on some nice, fresh, locally grown and seasonal tomatoes, try this move on your everyday tomato and tell me that it doesn't make the waiting that much easier.


No-Cook Tomato Sauce
Serves 2

Ingredients:

4 plum tomatoes or 2 larger tomatoes, cut into a small dice
3 cloves garlic, minced
A generous handful of basil, cut or torn into thin strips
Salt
Olive oil
2 servings of dried pasta

Preparation:

1. Combine tomatoes, garlic, basil, salt and olive oil to taste in a bowl. Let sit at room temperature for a minimum of 20 minutes and ideally for at least an hour.
2. When you're ready to eat, set a pot of water to boil. Cook the pasta to al dente, drain, and add it to the bowl of sauce. Toss to combine, check for seasoning, and serve.

Monday, April 5, 2010

Just saying no to takeout

I'll admit it: I love takeout. I live in New York, and there is no shortage of reasonably priced local restaurants whose varied cuisines I would be more than happy to see arrive, like magic, at my doorstep. For me, ordering takeout is akin to what I imagine getting room service to be like: a luxurious, I'm-just-going-to-sit-here-watching-movies-while-someone-else-prepares-my-dinner type of indulgence.

That being said, I can probably count on two hands the number of occasions that I have actually gotten takeout in the past 2 years. Not only am I ridiculously cheap frugal, but I also, obviously, love to cook, and therefore rarely do my stove the dishonor of letting it stand idly by while I eat the fruits of some stranger's labor.

One of the best things about becoming confident in your cooking is that, eventually, you'll probably be able to recreate or at least approximate some of your favorite dishes in your own home, without having to waste money on (nor unwittingly ingest the various chemical additives of) takeout. Anyone reading this blog of late will have noticed that I have become extremely enamored of cooking Asian, particularly Chinese, cuisines. And my increased facility with once-mysterious ingredients such as fermented black beans and preserved vegetables is perhaps my best armor against the siren song of restaurant food. That is because for me, and, I would wager, for a lot of people, my number one takeout craving happens to be Chinese food. Nowadays, in moments of tired-after-a-long-day-at-work weakness, I can look into my pantry and avoid the (you know you have one) takeout menu/miscellanea drawer.

Earlier tonight I was sorely tempted by thoughts of the excellent Thai restaurant down the street from me. But before I picked up the phone I checked out what was in the fridge: a lone lean pork chop and the last remaining member of a bunch of Japanese eggplants. Suddenly I was all caught up in a craving for Chinese eggplant with garlic sauce, with tender slivers of pork throughout. I was now committed to the cause, and duly chopped my ginger and garlic and set my wok to heat up. Working very, very loosely from a recipe I found online, I was soon rewarded with a plate full of creamy, tender eggplant and soft bits of pork suspended in a pungent, slightly spicy sauce. Delayed gratification, in this instance, was just as satisfying--if not more so--than the instant kind.


Eggplant and Pork in Chile-Garlic Sauce
Serves 3 - 4
Adapted from The Pittsburgh Post-Gazette

Ingredients:

3 medium Japanese eggplants, about 1 pound
2 thin, lean, pork chops, trimmed of fat and sliced into small strips
1 tbsp. plus 2 tbsp. light soy sauce, divided
1 tsp. sesame oil
1 tbsp. plus 2 tbsp. rice wine vinegar, divided
1 tbsp. plus 2 tbsp. rice cooking wine, divided
Red pepper flakes
2 tbsp. chile garlic sauce
1 tbsp. sugar
2 tbsp. finely minced ginger
2 tbsp. finely minced garlic
2 scallions, thinly sliced
Vegetable oil for frying

Preparation:

1. Marinate the pork: In a small bowl combine the pork with 1 tbsp. soy sauce, 1 tbsp. rice wine vinegar, 1 tbsp. rice cooking wine, 1 tsp. sesame oil and a dash of red pepper flakes. Stir to combine and set aside.
2. Slice the eggplant into thick (about 1/2") medallions. Discard stem.
3. Make the sauce: in a small bowl, combine remaining soy sauce, vinegar, cooking wine, and sugar.
4. Heat a generous amount of oil (about 3 - 4 tbsp.) in a wok set over a high flame. Just before it begins to smoke, add the eggplant. Cook, stirring or shaking constantly, until eggplant starts to soften, about 8 - 10 minutes. Remove eggplant to a plate.
5. Add one more tbsp. of oil to the wok and heat over a medium flame. Add the garlic and ginger and cook briefly; then add the pork and cook, stirring, until it is no longer pink, about 3 minutes.
6. Add the eggplant back to the wok and stir in the sauce. Reduce heat to low, cover, and cook for about 8 - 10 minutes or until pork is cooked through and eggplant is very tender. Garnish with scallions and serve with rice.

Monday, March 29, 2010

A meal fit for the Joads

I've been thinking, lately, about bacon. Thinking about it a lot. Or, I should say, somewhat more than is usual, since it's not exactly rare that I have bacon on the brain. Why the pork dreams, you ask? Well, I've been re-reading John Steinbeck's masterpiece The Grapes of Wrath, a book that sits high atop the American literary canon, peering down and perhaps sneering just a little bit at all the books stacked up below--and deservedly so. I think I first read the book in seventh grade, and it certainly made an impression on me at the time. I don't think, however, that as a child I could truly understand and empathize with the crushing plight of its central family, the Joads, nor could I really appreciate the flawlessness and innovation of Steinbeck's prose. In short, I'm glad I made the decision to pick up the book again (and you should, too!)

But I'm getting off track--let's get back to the bacon. You see, in The Grapes of Wrath, the rise and fall of the Joads' fortunes can be reliably tracked by one thing: whether or not they have "side meat" sputtering away on the stove. In one of the early scenes of the book, when prodigal son Tom returns home from prison, he finds Ma in the kitchen in a classic scene of domestic tranquility, removing "high brown biscuits" from the oven and "curling slices of pork" from the pan. The book, here, carefully constructs for us a whole, complete picture of family life that is about to be torn down, shattered, trampled and spat upon by the powers that be, or Big Business. The bacon is just one of the things that assure the Joads they are safe, at home, together. But it's a persistent image. All throughout the rest of the book, Ma, Pa, Tom and Al all bring up side meat--repeatedly. As soon as they've got some coins in their pockets or even some credit at the rapacious company stores--they're spending it on side meat. When they're all out, things are bad. But when there's some bacon frying in the pan, it's a small victory; the sound and smell of the crackling pork, and the nourishment it brings, reminding them that they are still human, that they're still a family unit.

Now, bacon doesn't hold the same resonance for me, but it sure is darn delicious. And the Joads' constant yearning for it definitely got me hungry. That's when I put down my book, put on my coat, and strolled down the street to Jubilat Provisions, a Polish-owned meat shop that bursts at the seams with a seemingly endless variety of house-made kielbasa and other sausages, as well as various types of patés, smoked and cured meats, fresh Polish baked goods and jars and cans of imported delicacies of every stripe (it's one of my favorite food stores ever. Do yourself a favor and check it out the next time you're having a BBQ). And one of the best items in the house is the thick-cut, double-smoked bacon. I picked up a little less than a pound, using it first in an Austrian potato strudel that my friend Patricia and I brought to a potluck over the weekend, then, of course, crisped up in a pan for breakfast, and when I still had some left over, I thought of the Joads. Although they're not southerners, they eat (when they can manage to) what I think of as soul food: biscuits. Pie. Warming stews. Lots of things fried up in grease in a cast-iron pan. As it happened, my mom had made Southern-Style Barbecued Pulled Pork, and had given me some of the leftovers. So I had that component down. There's not much that goes better with pulled pork than good old fashioned collards do, and that's when I figured out how to use up my bacon. Finally, I wanted something sweet and starchy, but less heavy than cornbread, something that would fry up nice in my iron pan: I found a recipe for a type of corn griddle cake and worked from there. The resulting meal that I sat down to was warm and comforting, with sweet, soft meat; melting, smokey greens; and crisp, nutty, savory corn cakes. This plate's for you, Joads.


Traditional Southern Collard Greens
Serves 4

Ingredients:

2 large bunches collard greens, washed, with tough stems removed
4 slices of bacon, cut into a small dice
Half an onion, sliced very thinly
2 tbsp. apple cider vinegar
Salt
Pepper

Preparation:

1. In a deep, heavy-bottomed, medium-sized pot, heat the bacon over a medium flame until it starts to sizzle and render its fat, about 3 - 4 minutes. Add the onion and cook, stirring occasionally, until it is tender and translucent.
2. Take several leaves of greens, roll them into a tight bundle, and slice them into long ribbons of medium thickness, adding them to the pot and stirring as you go. Repeat, in batches, with remaining greens. Season greens with salt and pepper, add about 1/2 cup water, and cover the pot. Drop the heat to low and cook, stirring occasionally and adding more water if necessary, until greens are very soft but not mushy, about 35 - 40 minutes.
3. When greens are done, shut off the heat and add the apple cider vinegar. Taste for seasoning and serve.


Corn Griddle Cakes
Adapted from epicurious.com
Makes 12 - 15 cakes

Ingredients:

1 cup yellow cornmeal
3/4 cup all-purpose flour
1 tsp. salt
1/2 tsp. baking soda
1/2 tsp. baking powder
1/2 tsp. pepper
2 tsp. sugar
2 tbsp. unsalted butter, melted and cooled, plus more for brushing the griddle
1 large egg
1 cup buttermilk (or sour 1 cup milk with 1 tsp. white vinegar or lemon juice)
1 cup thawed frozen corn kernels

Preparation:

1. In a medium-sized bowl whisk together the dry ingredients (cornmeal, flour, salt, baking soda, baking powder, pepper, and sugar).
2. In a small bowl whisk together the buttermilk, egg, and melted butter.
3. Add the wet ingredients to the dry, stirring to combine (don't worry about a few lumps). Stir in the corn kernels.
4. Drop the batter into a buttered cast-iron skillet set over medium heat, dropping about 1/4 cup batter at a time. Cakes will be about 3 - 4 inches across. Cook until browned and crisp, about 3 minutes per side. Repeat with remaining batter.

*Note: these cakes can be eaten savory or sweet. They were delicious with my Southern dinner and equally so the next morning reheated with additional butter and drizzled with maple syrup.

Monday, March 22, 2010

Simple but good

When people are first getting to know me, they discover pretty quickly that I'm obsessed with really into food, and they invariably ask me this question: "So what's your favorite thing to cook?" I never know quite how to respond to this, because I really, truly, don't play favorites with my food. What I enjoy about cooking is the creativity and invention at work in it; the sense of freedom that I feel in choosing ingredients that I think might go well together and then attempting to unify them, sometimes successfully and sometimes not, with the flavors and cooking techniques that I surmise will do the most justice to those ingredients. What I'm trying to say is that 99% of the time when I'm cooking, I'm just winging it: not following recipes and rarely making the same dish on a regular basis, because what I love most about the process of cooking is how it's new every time.

Since that's a pretty long answer, what I usually say goes something like this: "Well, I like to cook lots of different things, but what I like best is simple food." And it's true. Though there are exceptions to the rule, you'll notice that most of the recipes I share on this blog are very intuitive, with few steps: the kind of food that even people with little cooking experience could make easily. For me, it's a kind of bang-for-your-buck thing: with the type of food I make, a relatively small amount of planning and labor can often yield an extremely satisfying result. I try not to get too touchy-feely about the process of cooking when writing on this blog, but the truth is that sometimes it seems almost magical, like some sort of alchemy: putting in but salt and heat and time, and then sitting down to something that is truly complex, with layers of flavor and shades of richness.

The following recipe definitely fits that description. The ingredients are as follows: chicken, soy sauce, brown sugar, star anise and lime. Count 'em: 5. I just made it up one night when I had some chicken thighs to use up (as I often do), and a craving for Asian flavors (as I often do). It won't deplete your pantry, and it'll take about 15 minutes from start to finish: it's simple, but it's good.


Soy-Braised Chicken Thighs with Star Anise and Brown Sugar
Serves 1

Ingredients:

2 chicken thighs
Salt
Pepper
Vegetable oil
Dark soy sauce
2 tbsp. brown sugar
2 star anise pods
Water
Half a lime

Preparation:

1. Generously salt and pepper both sides of the chicken thighs and sear them in a wide, heavy pan set over high heat until well browned on both sides, about 6 minutes. Remove chicken from pan and set aside.
2. Drop the heat under the pan to medium. Add about 1/2 a cup of water to the pan and stir to deglaze. Add about 2 tbsp. soy sauce, the brown sugar and the star anise; stir to dissolve the brown sugar, then drop the heat so that the mixture bubbles slowly. Add the chicken, cover, and cook until chicken is tender, about 12 minutes.
3. Remove the lid and allow sauce to evaporate until it is quite thick and coats the chicken in a sort of glaze. Taste for seasoning. Eat the chicken over noodles or rice, squeezing the juice of the lime over it before you do.

Wednesday, March 17, 2010

Tofu for carnivores

I love tofu: firm or silken, smoked or not, freshly made or prepackaged, I'll happily take them all. I also love meat. I happen to really, really like tofu and meat together, as in, in the same dish.

If this pairing seems incongruous to you, then you've probably missed out on many of the best dishes that Asian, particularly Chinese, cuisines have to offer. You see, in America tofu has acquired a pretty poor reputation for being the wan, tasteless, colorless and textureless ingredient that people sub in for meat, resulting in such unfortunate products as Tofurky, Boca Burgers, and the like. You can't taste the tofu in these things at all; it's covered up, hidden away behind a thick veil of salt, herbs and spices.

Asian cooking takes a different stance on tofu. It's a revered ingredient, one whose smooth texture and clean flavor is as at home nestled in among a medley of vegetables as it is sitting shoulder to shoulder with, say, some pork...shoulder. Rather than attempting to substitute tofu for meat, Asian recipes oftentimes place the two together--a sort of yin and yang, if you will forgive the terrible, terrible pun, a harmonious, balanced relationship that allows both ingredients to shine. Some of Asia's most famous dishes--such as Chinese mapo dofu, Korean kimchi jjigae, Filipino tokwa't baboy, and Thai pad thai--all call for both meat and tofu. All are delicious.

It was from Asia that I took my cue last night when I decided I wanted to have a light, flavorful and balanced soup for dinner. I had made some Chinese-style chicken earlier in the week, and as a result I had a whole potful of chicken broth flavored with ginger, scallion and Szechuan peppercorns leftover. To give my soup a sort of Thai inflection--bearing tom yum soup in mind--I heated up the broth with some crushed lemongrass, poaching some additional chicken thighs at the same time. When the chicken was cooked through, I shredded it and added it back to the broth, along with some sliced shiitake mushrooms, some diced drained tofu, and some soba noodles. When the noodles were just cooked, I added dashes of dark soy sauce, sesame oil and rice wine vinegar to taste and topped off my bowl with some thinly sliced scallion. Utilizing Chinese broth, Thai herbs and Japanese mushrooms and noodles, this soup was definitely all over the map. But the one thing about it that I think all those various nations could appreciate is its perfect union of meat and soy.


Asian Soba Noodle Soup with Chicken and Tofu
Serves 4

Ingredients:

4 cups chicken broth, preferably homemade, if possible flavored with aromatics such as ginger, scallion and garlic
1 stalk fresh lemongrass
1/2 a block extra-firm tofu, or use smoked tofu
2 chicken thighs, bone-in, skin removed
8 - 10 shiitake mushrooms, cleaned and sliced
1 generous handful Japanese soba noodles
2 scallions, thinly sliced
Dark soy sauce
Sesame oil
Rice wine vinegar
Salt

Preparation:

1. Drain the tofu: cut the half block of tofu in half again, this time lengthwise. Place the two pieces on a deep plate lined with paper towels, then put a heavy plate on top. Weight it down; I used a large can of tomatoes. Place in fridge and allow to drain for at least a half an hour.
2. Heat the chicken broth. Add a length of lemongrass that you have crushed with the back of a knife. Add the chicken thighs. Bring the broth to a gentle simmer and cook until the chicken is cooked through, about 8 - 10 minutes. Remove the chicken with a slotted spoon and let cool in fridge.
3. When chicken is cool, shred it with your fingers and place the meat back in the pot. Remove the tofu from the fridge and cut it into small, evenly sized cubes. Add them to the pot. Add the sliced mushrooms and bring the soup back to a simmer.
4. When soup is simmering, add the soba noodles. Cook until they are al dente, about 6 - 7 minutes. Discard lemongrass. Add dashes of soy sauce, sesame oil and rice wine vinegar to taste. Salt to taste and garnish soup with sliced scallions.